

Collage letters are a creative and unique way to turn text into a beautiful piece of art. By using hand-lettering techniques, you can create custom letters that have meaning and stand out from the pile of ordinary letters. Whether you want to make a special gift for a family member or create a sign for your home, making collage letters is a fun and personal way to express yourself.
To make collage letters, you will need a few basic supplies. First, gather your favorite papers, such as old book pages or colorful scrapbooking papers. You will also need scissors, glue, and some pictures that hold special meaning to you. You can choose pictures of loved ones, places you have been, or anything else that is meaningful to you.
To start, cut out the letters you want to use from your chosen papers. You can print out templates or draw them freehand. Then, arrange the pictures and letters together on a flat surface until you find a composition that you like. This is where you can get creative and experiment with different shapes and placements.
After you have decided on the composition, begin to glue the pieces down onto a background paper or canvas. You can choose a solid color or use more patterned papers to add further interest. Make sure to leave space around the edges of the letters and pictures to create a clean, masked look.
Once everything is glued down and dry, you can add some further touches to your collage letters. Use your hand-lettering skills to add meaningful words or phrases that relate to the pictures and letters. You can also use an inkpad to give the edges of the letters and pictures a distressed look.
When your collage letters are complete, take a step back and admire your work. You have transformed ordinary letters and pictures into a beautiful piece of art that holds personal meaning. Whether you hang it on your wall or give it as a gift, your collaged letters will be a unique and special reminder of the memories and moments that are most important to you.
- Create Collage Letters with this Hand-Lettering Technique
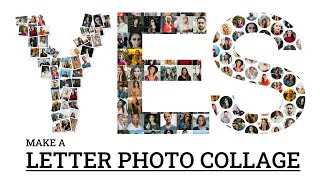
- Letter Photo Pile Collage
- Letter photo pile collage
- Letter photo pile collage with pictures masked using the letter shape
- Letter photo pile collage with pictures placed at the letter edges only
- Letter photo pile collage with pictures placed outside the letter
- Letter photo pile collage with pictures placed outside the letter as well as masked using the letter
- Family Letter Photo Collage Meaningful and Beautiful Gift
- Turn Any Shape Text or Number into a Photo Collage
- How to create a Letter Photo Collage
- Sources
Create Collage Letters with this Hand-Lettering Technique
If you want to add a personal touch to your home decor or create a unique gift for someone special, try making collage letters using this hand-lettering technique. This creative project combines the art of hand-lettering with the sentimental value of collaged photos, making it a meaningful and beautiful way to display memories.
To begin, take some time to gather your materials. You will need paper, scissors, glue, a black inkpad, and a selection of photos or papers that hold special meaning to you. Choose photos of family and friends, favorite places, or significant moments in your life.
Start by selecting the letters you want to create. You can choose a word or a number that holds special significance, such as a name or a birthday. Once you have chosen your letters, print or trace templates onto the paper you will be using for your collages.
Next, cut out the letters from the template paper. Take the photos or papers you have selected and cut them into smaller pieces that will fit on the letters. This step allows you to incorporate more memories into your collage.
Now, it’s time to start collaging! Apply glue to one letter at a time and place the smaller pieces of photos or papers onto the letter, overlapping them slightly. You can arrange the pieces in a specific pattern, or you can simply place them randomly for a more abstract look.
To give your collage letters a more finished look, consider adding a border or frame to each letter. You can use a black inkpad to lightly ink the edges of the letters, creating a subtle border that helps each letter stand out. This technique adds depth and dimension to your collaged letters.
Once your collage letters are complete, take a step back and admire your work. The combination of hand-lettering and collaged memories creates a unique piece of art that stands out and tells a story. These collaged letters can be displayed on a wall, used as a sign, or even turned into a meaningful gift for someone.
If you want to further customize your collage letters, you can try using different papers, textures, or even masking techniques. The possibilities are endless, and each letter can be a representation of your creativity and personal style.
Now that you know how to create collage letters with this hand-lettering technique, you can start making your own. Gather your materials, choose your favorite photos or papers, and let your creativity take over. Your collaged letters will be a unique and special addition to your home decor or a thoughtful gift for someone else.
For more inspiration and tips on hand-lettering and collage techniques, subscribe to Mandy’s Creative Book and join the creative community. You can also visit Mandy’s website for additional resources and projects.
Thank you for reading and happy lettering!
Please note that all photos and papers used in this tutorial have been chosen and placed with care. If you would like to use the same materials, please respect the source and withdraw them for your own personal use only.
Letter Photo Pile Collage
If you are looking for a unique and creative way to turn your favorite photos and letters into a meaningful gift, then the letter photo pile collage technique is for you. This technique involves using shapes and letters to create a collage that not only looks great but also has personal significance.
To start, gather a number of photos that you want to use in your collage. You can choose pictures of family, friends, or any special moments that hold meaning to you. Print these pictures out on photo papers or have them professionally printed.
Next, choose a letter or word that is significant to you. This could be your initial, a favorite word, or someone’s name. You can either hand-letter the letter or word using inkpad and paper, or use software to create custom templates. Cut out the letter or word, making sure to leave some empty space around the edges.
Now it’s time to start collaging. Take your photos and cut them into different shapes and sizes. Arrange the photos around the letter or word, layering them to create depth and visual interest. You can also tear the edges of the photos for a more unique and artistic touch.
Once you have placed all the photos, sign the collage by masking the letter or word with a piece of paper and spraying adhesive over the top. This will secure the photos in place and give your collage a finished look.
And there you have it – a letter photo pile collage that is not only unique but also holds special meaning. This collage can be a great gift for someone you care about or a special addition to your own home decor.
If you want to create more collaged letters, MandysBook has a special offer for its subscribers. By subscribing to their email list, you will get access to their creative templates and techniques for making collaged letters. Sign up today to get started on your own letter photo pile collages!
Thank you for reading and happy collaging!
Letter photo pile collage
Creating a letter photo pile collage is a unique and creative way to combine meaningful memories with beautiful visuals. This technique involves using photos, letters, or pieces of paper to form collages in the shape of letters, adding a personal touch and giving them a deeper meaning.
To make a letter photo pile collage, you will need a number of photos or pieces of paper with your desired images. You can choose to use photos from your personal collection, or you can take new ones specifically for this project. If you want to use photos from the internet, make sure to check their copyright policy and ensure they are valid sources.
Start by selecting a letter as the base of your collage. You can choose either the first letter of your name or a letter with a special meaning to you. Once you have chosen your letter, print it out on a sheet of paper or use a template from software programs that offer lettering options.
Now it’s time to gather the photos or pieces of paper you want to use in your collage. Take a look at your collection and select the ones that have a personal connection to you, such as family photos, pictures from a memorable trip, or images that represent your favorite hobbies or interests.
Next, cut out the selected photos or pieces of paper into various shapes and sizes. The more unique the shapes, the more interesting your collage will look. You can also tear the edges for a more artistic and collaged effect.
Once you have your pile of photos or papers, start arranging them on the letter base. You can overlap them, place them at different angles, or stack them on top of each other to create depth and a dynamic composition.
If you want to add a personal touch, consider hand-lettering or using an inkpad to write meaningful words, quotes, or dates on the photos or papers. This will not only enhance the visual appeal but also give the collage a deeper significance.
When all the photos or papers have been placed on the letter base, step back and take a look at the final result. You may need to rearrange some of the pieces to achieve the look you desire. Once you are satisfied with the overall composition, you can glue the photos or papers down to secure them in place.
The letter photo pile collage is now complete, and it stands as a unique piece of artwork that represents your personal memories and creativity. It can be displayed on a wall, placed in a frame, or gifted to someone special.
So, whether you want to create a letter photo pile collage for yourself or as a custom gift, this technique allows you to combine the beauty of photos with the meaning of letters, resulting in a personalized and visually captivating piece.
Get started on making your own letter photo pile collage and let your creativity soar!
Letter photo pile collage with pictures masked using the letter shape
Creating a letter photo pile collage is a fun and creative way to turn your favorite memories into a personalized work of art. This technique, popularized by Mandy’s Book of Hand-Lettering, allows you to feature meaningful photos and give them a special touch by using the shape of a letter.
To make a letter photo pile collage, you will need some photos, papers, and basic software to edit and print your pictures. You can choose any letter you like, such as the initial of your name, a meaningful word, or even an important symbol. The first step is to find a letter shape that will serve as the base for your collage.
Once you have chosen your letter, you can start collecting photos and memories that hold significance to you. You can gather pictures of your family, friends, or any other subject that you find special. This is a perfect opportunity to dive into your old photo albums and relive some precious moments.
Next, you can start making the photo pile collage. Cut out your chosen letter shape from a piece of paper and place it on a larger sheet that will serve as the background. Then, begin layering your photos on top of each other, making sure that each picture is visible. You can arrange them in different angles and sizes to create a visually interesting collage.
One technique to make the collage more aesthetically pleasing is to mask the photos using the letter shape. Use scissors or a craft knife to carefully cut out the shapes of the letter from each photo. This will create a unique effect where the photos blend in with the letter, giving a seamless, creative look to the collage.
As you complete the collage, make sure to leave some photos with their original edges visible. This will add a touch of authenticity and remind viewers that these are real pictures and memories, not just digital creations.
When you are satisfied with the arrangement of the photos, use glue or adhesive to secure them to the background paper. Make sure to press firmly to ensure that the photos stick well. You can also add some additional decorative elements, such as stickers or small pieces of paper, to enhance the overall look of the collage.
Finally, once your letter photo pile collage is complete, you can consider framing it or giving it as a gift to someone special. This unique and personal creation is sure to be cherished and admired by anyone who sees it.
In summary, creating a letter photo pile collage allows you to transform your favorite memories into a beautiful and meaningful work of art. By using the letter shape as a mask for your pictures, you can create a unique and creative collage that stands out. Whether you decide to keep it for yourself or give it as a gift, this collage is a testament to the special moments captured in each photo.
Letter photo pile collage with pictures placed at the letter edges only

If you’re looking for a unique way to create a collaged letter filled with memories and meaningful pictures, this technique is for you. With these simple steps, you’ll be able to turn your favorite photos into a beautiful collage that stands out.
To start, gather the photos you want to use and choose a letter shape as your base. You can either create a custom letter template or use pre-made ones that are available online. There are many sources where you can find letter templates in different shapes and sizes.
Once you have your letter shape ready, print it out on a piece of paper and cut it out. This will serve as your guide for placing the photos. You can also choose to draw the letter shape onto a blank piece of paper if you prefer.
Next, take the photos you have gathered and cut them into small pieces or shapes that fit within the letter shape. You can get creative with the shapes and sizes of the pieces, giving your collage a more unique look. Make sure to leave some space around the edges of the letter shape.
Now, it’s time to start collaging. Apply a thin layer of glue or adhesive to the back of each photo piece and carefully place them onto the letter shape, starting from the edges. Take your time to arrange the photos in a way that looks appealing to you. You can overlap the pieces or leave small gaps in between, depending on the look you want to achieve.
As you place the photos at the edges of the letter shape, make sure they touch the edges and slightly overlap with each other. This technique gives the collaged letter a more layered and textured appearance.
Once you have placed all the photos, take a step back and review your collage. If there are any areas that you want to change or adjust, now is the time to do so. You can carefully lift the photo pieces and make the necessary modifications.
When you’re satisfied with the final arrangement, let the collage dry completely. This may take some time depending on the type of glue or adhesive you are using, so be patient.
Once the collage is dry, it’s ready to be displayed or gifted. You can frame it, place it in a scrapbook, or even use it as a book cover. The collage will be a unique and meaningful way to showcase your favorite photos and memories.
With this technique, you can create a collage that not only looks beautiful, but also has a deeper meaning. Each photo represents a special moment or person in your life, and by collaging them together, you are creating a visual representation of your memories.
So, if you’re looking for a creative way to showcase your photos and add a personal touch, give this letter photo pile collage technique a try. It’s a fun and meaningful project that will result in a beautiful and unique piece of art.
Letter photo pile collage with pictures placed outside the letter
If you’re looking for a unique and creative way to display your favorite photos, look no further than the letter photo pile collage technique. This technique allows you to create a beautiful and meaningful collage that stands out from the traditional collaged photos.
To make this letter photo collage, you’ll need a few supplies. First, choose a letter that has special meaning to you. It could be the initial of your name, a letter that represents a special occasion, or simply a letter that you love the look of. Next, gather together a number of photos that you want to include in the collage. You can print out these photos on paper or use a software program to create digital collages.
Once you have your letter and photos, it’s time to start making the collage. Begin by masking off the edges of the letter with tape or masking paper. This will ensure that only the letter itself is collaged and the photos are placed outside of the letter.
Next, start placing the photos outside of the letter. You can arrange them in a pile or create a more structured design. Feel free to be creative with the placement of the photos – you can overlap them, stack them, or even turn them at different angles. The goal is to create a visually appealing collage that showcases your photos.
As you’re placing the photos, keep in mind that you want the letter to remain visible. Don’t cover it completely with photos, but rather use the photos to enhance the lettering and make it stand out even more.
Once you’ve placed all of the photos, take a step back and admire your work. You’ve created a one-of-a-kind collage that combines the beauty of hand-lettering with the memories captured in your photos. This collage can make a perfect gift for someone special or a beautiful addition to your own home decor.
Thank you for subscribing to our email list and for giving us a chance to provide you with creative ideas like this one. If you want to learn more about collage techniques, be sure to check out our book “Collage Techniques: From Basics to Advanced”.
Letter photo pile collage with pictures placed outside the letter as well as masked using the letter
If you’re looking for a unique way to showcase your memories, the letter photo pile collage is a technique you’ll want to try. This creative method not only allows you to turn your favorite pictures into a collage, but it also lets you incorporate hand-lettering and shapes to make it even more special.
To create this collage, you’ll need a letter template of your choice. You can either make one by hand or find printable templates online. Once you have your letter template, gather some photos that you’d like to include in your collage. These photos can be of your family, friends, or any memories you hold dear.
Start by cutting out the shape of the letter using your chosen template. Next, take some papers and cut them into smaller pieces. These will serve as the base for your collage. You can choose papers in different colors and patterns to add more visual interest to your collage.
Now it’s time to start collaging. Take one piece of paper and glue it to a larger sheet of paper or cardstock. Then, using an inkpad or pens, add some hand-lettering or words that are important to you. You can also add some hand-drawn shapes or patterns to further personalize your collage.
Once the ink has dried, start placing your photos on the larger sheet of paper or cardstock. You can arrange them in a random pile, overlapping them and allowing them to go outside the edges of the letter shape. The goal is to create a visually interesting composition with the photos.
If you want to take this technique to the next level, you can also mask some of the photos using the letter shape. To do this, cut out the letter shape from a separate piece of paper and use it as a mask. Place the mask on top of the photo you want to mask and carefully glue it down. This will create a unique effect where the letter shape stands out among the other pictures.
Repeat this process for each photo you want to include in your collage, layering them on top of each other and masking some if desired. When your collage is complete, take a step back and admire your work. You’ve created a beautiful letter photo pile collage that’s full of memories and personal touches.
Thank you for giving these techniques a try. If you have any further questions or want some more inspiration, feel free to reach out to us via email or visit our website, where you can find tutorials and resources on making collages and hand-lettering. We wish you all the best in your creative endeavors!
Family Letter Photo Collage Meaningful and Beautiful Gift
Creating a family letter photo collage is a special and personalized way to give a meaningful gift. By combining photos and hand-lettering techniques, you can transform memories into a unique work of art that speaks volumes about your love and appreciation for your loved ones.
To begin, gather the photos you want to use for your collage. You can ask family members to email you their favorite pictures, or you can use photo software to select and print the images yourself. Choose photos that hold special meaning and bring back cherished memories.
Once you have your photos ready, you can start the process of creating the collage. One technique is to cut out the photos into different shapes and arrange them together on a piece of paper or cardboard. You can also use a masking technique, where you cut out the photos and use them as stencils to create a beautiful collage on the outside of a book or any other object you choose.
Using hand-lettering techniques, you can integrate meaningful quotes or the names of family members into the collage. Hand-lettering adds a personal touch and brings the pieces together in a visually appealing way. You can also add a touch of color and creativity by using colored ink or an inkpad.
As you complete your family letter photo collage, you will have a truly unique and special gift that your loved ones will cherish. The collage will serve as a reminder of the love and memories you share as a family. It’s a gift that stands out from the rest and shows the time and effort you put into creating something meaningful.
Thank you again for choosing to make a family letter photo collage. We hope this technique offers you a way to create something beautiful and meaningful that will be treasured for years to come. Remember, the most important thing is to have fun and enjoy the process of making a collage that is truly one-of-a-kind!
Sources:
- “Collage Techniques” by Gerald Brommer
- “The Collage Workbook: How to Get Started and Stay Inspired” by Randel Plowman
- “Collage: Contemporary Artists Hunt and Gather, Cut and Paste, Mash Up and Transform” by Danielle Krysa
Turn Any Shape Text or Number into a Photo Collage
If you’re looking to make a unique and creative gift that stands out from the piles of books and letters, why not try making a photo collage with your favorite words or numbers? This technique combines the art of hand-lettering with the beauty of photos to create a personalized and meaningful piece.
Here’s how you can make your own photo collage in the shape of any text or number:
| 1. Choose your favorite shape or text: First, decide on the shape or text that you want to use for your collage. It could be a special word or a meaningful number, like a birth date or anniversary. Write or print out the text or number in a font and size that you like. |
| 2. Gather your materials: Next, gather the materials you’ll need for this project. You’ll need photos, scissors, glue or adhesive, colored or patterned papers, an inkpad, and any additional decorations you want to use. |
| 3. Cut out your photos and papers: Start by cutting out your photos and papers into various shapes and sizes. You can use templates or freehand cut them for a more organic look. Be sure to vary the shapes and sizes to add visual interest to your collage. |
| 4. Arrange the photos and papers: Once all your photos and papers have been cut, start arranging them onto the shape or text you chose. You can overlap them, place them only on the edges, or create a completely random pattern – it’s up to you! Play around with the placement until you’re happy with how it looks. |
| 5. Masked lettering technique: To add further interest, you can use the masked lettering technique. Cut out the shape of your chosen text or number from a piece of paper and place it on top of your photo collage. Then, using an inkpad, lightly stamp ink over the top to create a unique effect. Peel off the paper mask to reveal your custom shape. |
| 6. Glue everything together: Once you’re satisfied with the placement of your photos and papers, begin gluing them down one by one. Apply adhesive to the back of each piece and carefully press it onto your chosen shape or text. Make sure everything is securely glued in place. |
| 7. Complete your photo collage: Once all the pieces are glued down, take a step back and look at your completed photo collage. Add any additional decorations or touches you want, such as ribbons or stickers. Then, let it dry completely before moving or framing it. |
Now you have a beautiful photo collage that incorporates your favorite words or numbers. This unique and creative piece can be given as a gift or displayed in your own home. It’s a great way to capture memories and make something special that people will cherish.
Thank you for using this creative technique! If you have any questions or want to share your own photo collages, feel free to get in touch via email or social media. Happy collaging!
How to create a Letter Photo Collage
Creating a letter photo collage is a fun and creative way to showcase your favorite memories or to create a personalized gift for someone special. There are various techniques you can use to make a meaningful collage using letters and photos.
First, you’ll need to gather your materials. Choose the letter or letters you want to use for your collage. These can be wooden or cardboard letters that are readily available at craft stores, or you can cut them out from paper or cardboard. You’ll also need a pile of photos that you want to include in your collage, as well as scissors, glue or tape, and any other decorative elements you may want to add.
Once you have your materials ready, you can start the collage-making process. Begin by laying out your letter or letters on a flat surface. You can rearrange them to find the best placement that you like. Take your chosen photos and start cutting them into pieces or shapes that can fit inside the letters. You can cut them into squares, circles, or any other creative shape that you like.
Next, start placing the cut photo pieces inside the letters. You can overlap them or collage them in a way that looks visually appealing to you. You can also leave some of the edges of the photos sticking out for a more unique and textured look.
If you want to add more touches of creativity to your collage, you can also use other decorative elements. For example, you can use scrapbook paper, patterned paper, or washi tape to add visual interest. You can also use inkpad or masked templates to create fun patterns or textures on your photos or letters.
Once you have all your photos and decorative elements in place, you can glue or tape them down to secure them. Give them some time to dry before moving on to the next step. This will ensure that your collage stays intact.
Finally, you can complete your letter photo collage by adding any additional text or lettering. You can use alphabet stickers, stencils, or even your own handwriting to add names, quotes, or any other text that holds meaning to your collage.
By following these steps, you can create a unique and personalized letter photo collage that will be a special gift or a cherished piece of art for yourself. Thank you for giving your time to learn how to make a collage like this. By subscribing to our newsletter, you can stay up to date with the latest techniques and launches of new templates that can help you in your creative journey.
Sources

When it comes to making collage letters, there are several sources you can turn to for inspiration and materials. Here are some options:
1. Online templates: There are many websites that offer free or paid templates for creating collage letters. By subscribing to these websites, you can access a wide variety of lettering styles and shapes to choose from.
2. DIY techniques: If you want to create custom letters, you can try making your own templates using techniques such as hand-lettering or masking. This gives you the freedom to design letters that have a special meaning or personal touch.
3. Books: There are books available that provide step-by-step instructions on how to make collage letters. These resources can not only teach you the techniques but also give you valuable tips and tricks to make your letters look unique and beautiful.
4. Family photos: Another great source of materials for collage letters is your own family photo collection. By choosing meaningful pictures, you can turn your memories into a visually appealing collage that stands for something special.
5. Online photo services: If you don’t have physical photos, you can still create collaged letters using online photo services. These platforms allow you to upload and arrange your pictures digitally, so you can easily create a collage without the need for physical printed photos.
6. Scrapbooking supplies: If you are a scrapbooking enthusiast, you may have a pile of beautiful papers and embellishments that can be used to create collaged letters. Looked through your stash and choose the ones that match your desired lettering style.
Remember: No matter which sources you choose, make sure to respect copyright policies and only use valid images. If you want to share your collaged letters online, don’t forget to give credit to the original sources for any image or template you used.
By using these sources, you can create collage letters that are not only visually appealing but also have a personal and meaningful touch.


