

In today’s digital world, businesses can leverage electronic signatures (eSign) to streamline their document signing process. Whether you’re a small business owner or part of a larger organization, setting up eSign provides a convenient and efficient way to send, sign, and manage documents electronically.
One of the world’s leading eSign services, DocuSign®, offers a user-friendly platform that makes it easy to create and apply electronic signatures. In just a few simple steps, you can configure your eSignatures and start sending documents for signing.
To start the setup process, you will need to open a free account on DocuSign®. Once you’ve signed up, you can access the service by accessing it from your computer or by downloading the mobile app for on-the-go access.
When you’re ready to start using eSign, follow these 5 steps:
- Step 1: Upload and Prepare Your Document
- Step 2: Add Signers and Configure Signature Placement
- Step 3: Send the Document for Signing
- Step 4: Review and Verify Signatures
- Step 5: Download and Save Your Signed Document
- Setting up CCH ® eSign Accounts and Users
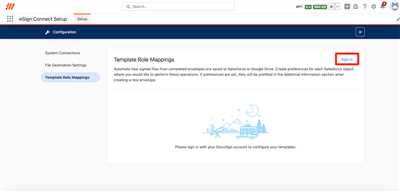
- Accessing eSign Configuration
- Step by step instructions
- 1 Upload a document
- 2 Apply your edits
- 3 Create an eSignature
- 4 Fill out the document
- 5 Download your document for free
- How to Make an Electronic Signature Leverage Your Business
- Sending PDFs for electronic signature is simple and quick
- The world’s #1 way to electronically sign
- Video:
- How To Install IPA Files With Esign | Esign Complete Setup | iPhone Esign Certificate Setup
Step 1: Upload and Prepare Your Document
Start by uploading the document that needs to be signed. DocuSign® supports various file types, including PDFs and Word documents. Once uploaded, you can make any necessary edits and fill in any required information.
Step 2: Add Signers and Configure Signature Placement
Add the signers to the document by entering their email addresses. You can also define the order in which they need to sign the document. Once the signers are added, you can configure the placement of the electronic signature fields.
Step 3: Send the Document for Signing
After configuring the signatures and making sure everything is in order, you can send the document to the signers. DocuSign® assuresign® will then notify the signers by email, prompting them to access the document and sign electronically.
Step 4: Review and Verify Signatures
Once the signers have signed the document, you can review and verify the signatures. DocuSign® offers a qualified audit trail that ensures the authenticity and integrity of the signed document.
Step 5: Download and Save Your Signed Document
Finally, you can download and save the signed document for your records. The document will be stored securely in your DocuSign® account, making it easily accessible whenever you need it.
By following this simple step-by-step process, you can quickly set up eSign and start enjoying the benefits of electronic signatures. With DocuSign® and other similar services, you can save time, reduce paperwork, and streamline your business operations.
Setting up CCH ® eSign Accounts and Users
Setting up CCH ® eSign accounts and users is a simple process that allows you to leverage the world’s leading electronic signature service. By configuring your CCH ® eSign account, you can start sending and receiving electronically signed documents in a quick and efficient way.
Here are step-by-step instructions to set up CCH ® eSign accounts and users:
- Create a CCH ® eSign account: Start by signing up for a CCH ® eSign account. You can do this by accessing the CCH ® eSign website or downloading the free CCH ® eSign app from Google Play or the App Store.
- Configure your account: Once you have created your CCH ® eSign account, you can configure your account settings. This includes setting up your signature, selecting the types of documents you will be sending, and making any other necessary configurations.
- Add users: Next, you can add users to your CCH ® eSign account. Users can be anyone in your business who needs to sign or send documents. You can add qualified signers who have the authority to sign legal documents, as well as other users who may need access to view or make edits to documents.
- Upload your documents: After adding users to your account, you can start uploading the documents that need to be signed. CCH ® eSign supports a wide range of document types, including PDFs and Word documents.
- Send and sign: Once your documents are uploaded, you can send them out for electronic signatures. CCH ® eSign provides a simple and secure way to send documents to your signers. They can easily sign the documents electronically and send them back to you.
CCH ® eSign offers a quick and efficient way to fill out and sign documents. Everything works in a secure and encrypted environment, assuring that your electronic signatures are legally binding. By setting up CCH ® eSign accounts and users, you can streamline your business processes and save time by sending and receiving signed documents electronically.
Setting up CCH ® eSign accounts and users is a straightforward process that can be done in just a few simple steps. By following these instructions, you can start using the power of electronic signatures in your business.
Accessing eSign Configuration
Setting up eSign for your business is a quick and simple process. With eSign, you can electronically sign and send documents to your clients, partners, or anyone else who needs to sign. Here’s how to access the eSign configuration in just a few easy steps:
- Open your eSign account. If you don’t have one, you can create a free account on the eSign website.
- Once you’re in, click on the “Configuration” tab at the top of the page.
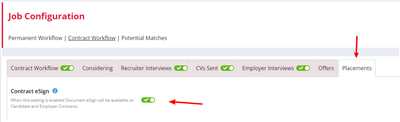
- From there, you can configure different settings to apply to your eSign process. For example, you can set up signature types, upload your company logo, and configure email notifications.
- For qualified eSign users, you can leverage various integration options to send and sign documents from the applications you already use. eSign offers integrations with popular platforms such as Microsoft Word, Google Docs, and CCH.
- After configuring everything to your liking, you’re ready to start using eSign. Simply upload the PDFs or Word documents you need to be signed, fill in the necessary information, and select the signers. eSign will then send the document to each signer for their electronic signature.
With eSign, you can save time and send documents for signing electronically, eliminating the need for printing, scanning, and mailing. This not only makes the process faster but also ensures the security and legality of your signatures.
Remember, accessing and configuring eSign is just the first step. Make sure to follow up with signers who haven’t completed the process and view the signed documents. eSign offers a quick and easy way to view and download these signed documents, providing you with a hassle-free electronic signature solution.
Step by step instructions
- Start by accessing the Docusign website or download the Docusign app from the App Store or Google Play Store. Docusign is the world’s leading electronic signature service that allows you to easily sign and send documents electronically.
- Create a Docusign account or sign in if you already have one. Signing up is quick and simple.
- When you’re signed in, you’ll be taken to the main dashboard where you can configure your esignature settings. Docusign offers different types of signatures to choose from, so you can select the one that works best for your business.
- Upload the document that you want to send for electronic signature. Docusign supports various file types, including Word documents and PDFs. Simply click on the “Upload” button and select the file from your device.
- After uploading the document, you can make any necessary edits or fill in any blanks. Docusign provides tools for adding text, checkboxes, and other elements to the document.
- Next, you’ll need to specify the signers for the document. You can either manually enter their email addresses or import them from your address book or CRM system. Docusign allows you to send the document to multiple signers.
- Once you’ve added the signers, you can configure the signing order if necessary. Docusign lets you determine the order in which the signers should sign the document.
- Before sending the document, you can add a message or instructions for the signers. This can help clarify any specific actions or information that the signers need to know.
- When everything is set up, simply click on the “Send” button to send the document for signature. Docusign will automatically send an email to the signers with a link to view and sign the document.
- The signers can easily sign the document by clicking on the provided link. Docusign offers a simple and quick signing process that guides the signers through each step.
- Once the signers have completed signing the document, you will receive a notification. You can then access the signed document in your Docusign account and download it for your records.
- Docusign also offers additional features, such as the ability to leverage templates for frequently used documents and the option to integrate with other business systems, such as CCH Axcess. These features can help streamline your esignature process and save you time.
Setting up esign with Docusign is a free and easy way to apply electronic signatures to your documents. It simplifies the signing process, ensures the security of your documents, and saves you time and effort. Sign up today and start enjoying the benefits of esignatures for your business.
1 Upload a document
Signing different types of documents from various accounts is made simple with eSign. To start the process, you need to upload a document to the service. Here is how to do it:
- Sign in to your eSign account. If you don’t have one, you can easily create a free account.
- Once you’re signed in, go to the eSign dashboard where you will see the option to upload a document. Click on it.
- Select the document that you want to upload from your computer and then fill out any necessary information or edits you need before uploading.
- After you have filled out the document, click on the “Upload” button and eSign will then process the document.
- When the document is uploaded, you can configure the settings for signing and accessing the document. You can choose who will be the signers and the view users, apply signature types, and more.
- After configuring the document, you can download it to your computer or send it to others for signature instructions.
- That’s it! Your document is ready to be signed electronically using eSign’s secure and qualified eSignature solution.
eSign offers a quick and easy way to sign and send documents electronically. With eSign, everything from applying signatures to filling out forms can be done in no time. Whether you’re a business or an individual, eSign by CCH® AssureSign is the world’s most trusted eSignature solution.
2 Apply your edits
Once you have created and uploaded your documents to the esignature service, the next step is to apply any necessary edits or modifications. Esign makes it simple for you to make changes to your documents before sending them out for signatures.
Here’s how you can apply your edits:
- Open the esignature service of your choice. There are different esignature services available, such as DocuSign, CCH AssureSign, Adobe Sign, and many more. Choose the one that works best for your business.
- Access your account by signing in with your username and password.
- Start the process of creating a new electronic signature. Depending on the esignature service you’re using, this step may vary slightly. Follow the instructions provided by the service.
- Upload the documents that you want to send for signatures. Most esignature services support various file types, such as PDFs, Word documents, and more. Simply select the files from your computer and upload them to the service.
- Fill in the necessary information, such as the names and email addresses of the signers. You can configure the signing order if needed.
- Apply any required edits to the documents. This can include adding form fields, removing unnecessary sections, or making changes to the existing content.
- Review your edits to ensure everything is in order.
- Click on the “Send” or “Finish” button to send the documents for signatures.
By following these steps, you can leverage the power of esignature technology to easily and securely sign and send your important business documents for electronic signatures. Esignatures offer a fast and efficient way to sign documents, saving you time and effort, and assuring that your documents are legally binding.
3 Create an eSignature
Setting up an eSignature is a quick and simple process that can make a big difference in your business. With eSign, you can easily sign and send documents electronically, eliminating the need for physical signatures. This not only saves time, but also ensures that your documents are secure and legally binding.
There are several different eSignature services available, each offering their own set of features and capabilities. Two popular options are DocuSign® and AssureSign. These services allow you to create a free account and start using their eSignature service right away.
When you sign up for an eSignature service, you will typically be guided through the process of configuring your account and setting up your eSignature. This may involve uploading a sample of your handwritten signature, or simply typing your name and choosing a font style for your electronic signature.
Once your eSignature is set up, you can use it to sign a wide variety of document types, including PDFs, Word documents, and more. Simply open the document in your eSignature service, follow the instructions to apply your signature, and then send the document to your signers. They will receive an email notification and can easily view and sign the document electronically.
One key benefit of using an eSignature service is that it offers a secure way to sign and send documents. Qualified eSignature services, like CCH eSign, comply with industry standards to ensure the integrity and authenticity of your electronic signatures. This gives you peace of mind knowing that your eSignature is legally binding and accepted around the world.
In addition to sending documents for signature, you can also leverage your eSignature for other purposes. For example, you can use it to fill out forms electronically, make edits to documents, or even sign up for online accounts. The possibilities are endless.
So, if you’re ready to start using an eSignature, follow these simple steps:
- Sign up for an eSignature service like DocuSign® or AssureSign.
- Configure your account and set up your eSignature.
- Create or upload the document you want to sign.
- Open the document in your eSignature service and follow the instructions to apply your eSignature.
- Send the document to your signers and wait for them to sign electronically.
With these easy steps, you’ll be on your way to a more efficient and streamlined document signing process. Start using eSignatures today!
4 Fill out the document
Once you have set up your esignature and configured the necessary settings, you can start filling out documents in a simple and quick way. There are several free and qualified esignature services available that offer a streamlined process for electronically signing documents. Two popular options are CCH eSign from Wolters Kluwer and DocuSign. Both of these services allow users to access and sign documents electronically, ensuring a quick and efficient process.
To fill out a document, simply follow these instructions:
| Step 1: | Create or upload the document |
| Step 2: | Open the document for editing |
| Step 3: | Fill out the required fields and make any necessary edits |
| Step 4: | Apply your esignature to the document |
| Step 5: | Download or send the completed document |
When you fill out a document using an esignature service, you can leverage the power of electronic signatures to quickly and efficiently complete business processes. These services support a variety of document types, including PDFs and Word documents, making it easy to start the esignature process with almost any type of document.
Configuring and setting up esignature services like CCH eSign and DocuSign is a simple process that can be done in just a few steps. Once you have set up your account, you can start accessing and signing documents in a matter of minutes.
5 Download your document for free
Once you have completed the electronic signing process, you can download your document for free. Here is a step-by-step guide on how to do it:
- Sign in to your eSign service provider account.
- Access your document from the list of signed documents.
- Click on the document you want to download.
- Choose the format in which you want to download the document. Most eSign services offer different types of formats, such as PDFs or Word documents.
- Click the download button to start the download process.
By following these simple instructions, you can easily download your signed documents for free. This way, you can view, share, or print the document whenever you need.
How to Make an Electronic Signature Leverage Your Business
An electronic signature, or eSignature, is a digital representation of a person’s handwritten signature that can be used to sign documents electronically. By using eSignatures, businesses can streamline the signing process, reduce paperwork, and increase productivity. Here are 5 simple steps to apply eSignature and leverage your business:
- Choose an eSignature service provider: There are various eSignature service providers available in the market, such as DocuSign, Adobe Sign, and AssureSign. Research and choose the one that best fits your business needs.
- Sign up and create an account: Once you’ve selected the eSignature service provider, sign up for an account. Most providers offer free trial accounts that give you a chance to try out their service before committing.
- Configure your eSignature settings: After creating an account, configure your eSignature settings according to your preferences. This includes choosing the types of documents you’ll be signing, setting up signers and their access levels, and customizing instructions for each signer.
- Upload the document you want to sign: Open the document you want to sign in the eSignature service, then upload it. You can upload different types of documents, such as PDFs and Word files.
- Sign and send the document: Once the document is uploaded, you can sign it electronically. Simply click on the designated signature area, and the eSignature service will guide you through the process. After signing, you can send the document to the intended recipients for their signatures.
By leveraging eSignatures in your business, you can save time and money, as well as ensure the security and legality of your documents. With the world’s leading eSignature service providers like DocuSign, Adobe Sign, and AssureSign, you can have confidence that everything is in order.
Whether you’re a small business owner, freelancer, or part of a large corporation, adopting eSignatures can greatly benefit your business by streamlining the signing process, eliminating the need for paper documents, and reducing the chances of errors or delays. Start configuring your eSignature accounts today and experience the quick and efficient way of signing documents!
Sending PDFs for electronic signature is simple and quick
When it comes to setting up esign for your business, there are several options to choose from. One of the most popular and widely-used services is Google’s electronic signature offering, which is known as Google Sign. This service makes it easy for you to create and send PDFs for electronic signature.
The process of sending PDFs for electronic signature using Google Sign is simple and can be done in just a few steps. First, you’ll need to make sure that you have a Google account. If you don’t have one, you can easily create one for free.
Once you have your Google account, you can start the process of configuring Google Sign for electronic signature. This involves accessing the Google Sign settings and following the provided instructions to set up the service according to your preferences.
After you have completed the configuration, you can upload the PDF documents that you want to send for electronic signature. When uploading the document, you can choose whether you want the signers to be able to make edits to the document or if you want it to be read-only.
Google Sign allows you to send the PDFs to multiple signers, who will then be able to electronically sign the documents. Once the signers have signed the document, you will receive a notification and can view and download the signed document.
If you’re looking for a different electronic signature service, there are several other options available. One of the world’s most popular electronic signature services is DocuSign, which offers a wide range of features and supports different types of documents. Another option is AssureSign, which provides a simple and quick way to send and fill out electronic documents.
Regardless of which electronic signature service you choose, the process of sending PDFs for electronic signature is quick and efficient. It allows you to leverage the power of technology to streamline your business processes and save time.
The world’s #1 way to electronically sign
When it comes to electronically signing documents, there are several options available, but the world’s top choice is undoubtedly DocuSign. With its innovative eSignature solutions, DocuSign ensures a secure and efficient process for businesses of all sizes.
DocuSign offers three different types of signatures:
- Standard Electronic Signatures: This is the most commonly used type of eSignature, where signers can access and sign documents electronically without the need for a physical signature.
- Certified Electronic Signatures: These signatures go a step further by applying a qualified digital certificate to authenticate the signer’s identity.
- Open eSignatures: This type allows signers to make edits or fill out the document before electronically signing it.
Using DocuSign is a simple process. First, you upload the document you want to send for electronic signature. Then, you add the signers and define the signing order. DocuSign will guide you through the configuration and provide instructions on how to set up the signing process.
Once the document is ready, it can be sent to the signers for review and signing. DocuSign works seamlessly with popular applications like Microsoft Word, PDFs, and Google Docs, making it easy to create, upload, and send documents for electronic signing.
DocuSign also offers a quick sign feature, which allows signers to quickly apply their electronic signature without going through the entire document. This feature is especially useful for signing multiple pages or documents.
With DocuSign, you can leverage everything from basic signing to complex workflows with multiple signers and conditional logic. The service provides a secure platform that allows users to view, sign, and access their accounts from any device.
DocuSign is trusted by businesses worldwide and is the industry leader in eSignature services. Its user-friendly interface, robust security features, and comprehensive configuration options make it the go-to choice for businesses of all sizes.
For a simplified and hassle-free way to electronically sign documents, DocuSign is the clear winner. Sign up for a free account today and experience the world’s #1 esignature service!


