

Cornhole, also known as bean bag toss, is a popular outdoor game that’s perfect for summer gatherings and backyard fun. If you’re looking to add a personal touch to your cornhole game, making your own cornhole bags is a great option. In this tutorial, we’ll guide you through the steps to create your own set of cornhole bags. Get ready to test your throwing skills and have a blast with your homemade bags!
Materials You’ll Need:
To make your own cornhole bags, you’ll need some simple materials that are easy to find. Here’s a list of what you’ll need:
- 6-inch by 6-inch pieces of cotton duck cloth (3 pieces per bag)
– The cotton duck cloth is a strong and durable material that will hold up well during the game. - Thread and sewing needle
- Corn or dried beans for filling (approximately 15-16 ounces per bag)
- Scissors
- Ruler or measuring tape
- Pencil or fabric marker
Step 1: Prepare the Fabric
Start by cutting the cotton duck cloth into 6-inch by 6-inch squares. You’ll need 3 squares per bag. Cut as many squares as you want to make bags.
Pro tip: If you’re making multiple bags, it’s a good idea to cut all the squares at once to save time.
Step 2: Mark the Stitching Lines
Lay one of the fabric squares on a flat surface. Using a ruler or measuring tape, mark a line 1/4-inch from the edge on all four sides of the fabric square. This will be your stitching line.
Pro tip: You can use a fabric marker or a pencil to make the markings.
Step 3: Sew the Edges
Thread your sewing needle with a strong thread and tie a knot at the end. Start sewing along one of the marked lines and continue until you reach the starting point. Make sure to backstitch at the beginning and end to reinforce the stitches.
Pro tip: You can use a sewing machine if you’re comfortable with it. It will make the process simpler and faster.
Step 4: Fill the Bags
Use a funnel or a rolled-up piece of paper to fill the bags with corn or dried beans. Fill each bag with approximately 15-16 ounces of filling. Make sure to fill them evenly for a balanced game.
Step 5: Sew the Opening
Once the bags are filled, fold the fabric at the opening to create a 1-inch hem. Sew along the edge of the hem to close the opening. Make sure to backstitch at the beginning and end to reinforce the stitches.
Pro tip: You can use fabric glue or a bead of hot glue to secure the opening if you don’t want to sew it.
Step 6: Season Your Bags
To make sure your bags slide smoothly on the cornhole board, it’s important to “season” them. This means playing a few practice games with your new bags to slightly scuff the surface. This will help the bags grip the board better and prevent them from sliding off.
Now that you’ve followed this tutorial, you’re ready to enjoy your homemade cornhole bags and have hours of fun playing the game with family and friends. Get outside, set up your cornhole boards, and show off your tossing skills. Happy playing!
Sources: wikiHow
- 25 DIY Cornhole Bags Homemade Bean Bags For Cornhole Game
- What you’ll need to make your own cornhole bags
- DIY Cornhole Bag Tutorial
- Making Your Own DIY Cornhole Boards in 11 Simple Steps
- STEP 1 Lay out the board frames
- STEP 2: Drill pilot holes for the frame’s screws
- STEP 3 Glue and screw the frame
- STEP 4: Cut and Attach the Plywood Tops
- STEP 5 Mark out the cornhole board holes
- STEP 6 Cut the cornhole board holes
- STEP 7 Prepare and drill holes for the legs
- STEP 8 Fill the visible screw head holes
- STEP 9 Stain and paint the cornhole boards
- STEP 10 Secure the legs
- STEP 11: Repeat steps for the second board
- Finally enjoy
- How to Make Cornhole Bags
- Sources
25 DIY Cornhole Bags Homemade Bean Bags For Cornhole Game
If you’re into DIY projects and enjoy playing cornhole games, why not make your own cornhole bags? Homemade bean bags are a great way to personalize your cornhole game and ensure that the bags are made to your own specifications. Plus, making your own bags can be a fun and rewarding project for any DIY enthusiast.
To make your own cornhole bags, you’ll need some basic materials and tools. Here’s a step-by-step tutorial on how to make the perfect cornhole bags:
| Step 1: | Prepare your materials. You’ll need 4 pieces of cotton fabric, each measuring 6 inches by 6 inches. Choose fabric patterns and colors that you like for a personalized touch. |
| Step 2: | Mark a 1/2-inch seam allowance around the edges of each fabric piece using a pencil or fabric marker. This will help you sew the bags together neatly. |
| Step 3: | Place two fabric pieces with their right sides together, aligning the edges. Stitch them together using a sewing machine or by hand, leaving one side open for filling. |
| Step 4: | Turn the bag right side out through the open side. You can use a pencil or a turning tool to push out the corners and make the bag’s edges crisp. |
| Step 5: | Fill the bag with approximately 14-16 ounces of dried corn, plastic pellets, or another suitable filling. This will give the bag the right amount of weight for a good cornhole toss. |
| Step 6: | Secure the open side of the bag with stitches or by using a sewing machine. Make sure the stitches are tight and secure to prevent the filling from coming out during gameplay. |
| Step 7: | Repeat steps 3-6 to make a total of 8 cornhole bags. This will give you enough bags for a complete cornhole game. |
| Step 8: | Now that your cornhole bags are ready, you can prepare the cornhole board. Paint or stain the wood board according to your preference. You can also add any desired designs or logos. |
| Step 9: | Measure and mark the board for the cornhole bags’ placement. The holes should be 6 inches in diameter and centered 9 inches from the top of the board. |
| Step 10: | Using a jigsaw, cut out the holes marked on the board. Make sure to cut slightly inside the marked lines to ensure a tight fit for the bags. |
| Step 11: | Attach the board to the frame using screws or nails. Reinforce the corners of the board with extra screws for added stability. |
| Step 12: | Place the cornhole bags in a corner of the board and enjoy your homemade cornhole game! |
Making your own cornhole bags is a DIY project that earns you a season of fun. With just a few materials and some simple sewing, you can have your very own set of homemade bean bags for hours of backyard entertainment. Share your DIY cornhole game with friends and family, and enjoy the satisfaction of playing with bags you made yourself!
What you’ll need to make your own cornhole bags
If you’re ready to start making your own cornhole bags, here’s a list of the essential materials and tools you’ll need:
- High-quality duck cotton fabric: This sturdy fabric is perfect for making durable cornhole bags.
- Scissors or a fabric cutter: Use these tools to cut the fabric into 6-inch squares.
- Thread and needle: A strong thread like cotton and a needle will be necessary for sewing the bags together.
- Filling material: Use dried corn, plastic pellets, or another suitable material to fill the bags.
- Measuring tape or ruler: These tools will help you ensure the bags are the correct size.
- Sewing machine or strong hand stitching skills: You can use either a sewing machine or stitch the bags by hand, depending on your preference.
- Iron: Use an iron to press the fabric and create crisp edges.
Once you have all the necessary materials, follow these steps to make your own cornhole bags:
- Prepare the fabric: Cut the duck cotton fabric into 6-inch squares, allowing for a 1/2-inch seam allowance on all sides.
- Pair up the fabric squares: Match up the fabric squares, ensuring the right sides are facing each other.
- Sew the bags: Stitch around the edges of the fabric squares using a 1/2-inch seam allowance, leaving a small opening for filling.
- Fill the bags: Fill each bag with approximately 10 to 12 ounces of filling material, such as dried corn or plastic pellets.
- Close the bags: Use a strong stitching method, like a ladder stitch, to close the opening after filling the bags.
- Repeat and share: Repeat the steps until you have the desired number of bags for your cornhole game. Share the joy of making your own cornhole bags with friends and family!
With these simple steps and the right materials, you’ll have your own homemade cornhole bags in no time. Enjoy the game!
Note: There’s a wide variety of cornhole bag making tutorials available online, so be sure to read multiple sources and find the method that works best for you.
DIY Cornhole Bag Tutorial
If you’re a fan of outdoor games, especially cornhole, then this DIY cornhole bag tutorial is for you! In just a few simple steps, you’ll learn how to make your own cornhole bags to enjoy with family and friends.
Step 1: Prepare the Materials
To make cornhole bags, you’ll need the following materials:
| Material | Quantity |
|---|---|
| Thread | 1 |
| Plastic | 3 ounces |
| Paint | 1 |
| Scissors | 1 |
| Needle | 1 |
| Fabric | 8 squares, 6-inch lengths |
Step 2: Prepare the Bags
Start by folding each fabric square in half with the good sides facing in. Using your sewing machine or a needle and thread, sew around the edges of the square, leaving a small space open. Turn the bags inside out through the space and fill them with dried beans or plastic pellets.
Step 3: Stitch the Bags
Using a needle and thread, sew the small space closed with tight stitches. Make sure the stitches are secure to prevent any beans from leaking out during the game.
Step 4: Prepare the Cornhole Boards
For this tutorial on making cornhole bags, you’ll need two cornhole boards. Lay them out on a flat surface and mark the hole placement using a pencil and a template. Using a jigsaw or a hole saw drill bit, cut the holes into the boards. Make sure the holes are 6 inches in diameter.
Step 5: Attach the Legs
Measure and mark 9 inches from the top of each cornhole board along the back edge. Attach the legs using screws and a screwdriver or power tool. Make sure the screws are strong enough to hold the boards in place during gameplay.
Step 6: Paint the Boards
Now it’s time to add some color to your cornhole boards! Using paint and a paintbrush or roller, paint the tops and sides of the boards. You can get creative with the colors and designs to make your boards stand out.
Step 7: Enjoy the Game!
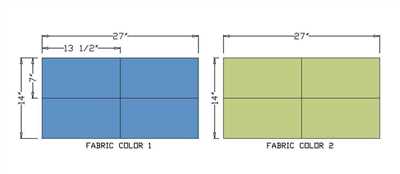
Once the paint is dry, your cornhole boards are ready to be used. Place them on a flat surface and position them about 27 feet apart. Take turns tossing the cornhole bags into the holes and keep track of the points. Have fun playing this simple and enjoyable outdoor game!
There you have it – a DIY cornhole bag tutorial that will have you ready to play in no time. So gather your family and friends, follow these steps, and start enjoying the cornhole season!
Sources: https://www.thesprucecrafts.com/how-to-make-cornhole-bags-1252193
Making Your Own DIY Cornhole Boards in 11 Simple Steps
If you enjoy playing cornhole, why not take it to the next level and make your own cornhole boards? With just a few materials and some basic tools, you can create custom cornhole boards that are perfect for your own space. Follow these 11 simple steps to make your own DIY cornhole boards:
- Prepare the materials and tools you’ll need. You’ll need two 2×4 boards, a 3/4-inch plywood board, screws, a drill, a saw, sandpaper, wood glue, a pencil, a measuring tape, and a staple gun.
- Measure and cut the plywood board into two 2×4-foot sections. These will be the tops of your cornhole boards.
- Mark the center of each board, about 9 inches from the top edge. Then mark a point 12 inches from each side edge and 9 inches from the bottom edge. These points will be where the holes for the cornhole bags will be.
- Use a 6-inch hole saw or jigsaw to cut the holes at the marked points. Make sure the holes are centered and smooth.
- Measure and cut the 2×4 boards to create the frame for the cornhole boards. Cut four pieces that are 48 inches long for the sides, and four pieces that are 22 1/2 inches long for the edges.
- Attach the frame to the top of each plywood board using wood glue and screws. Make sure the frame is tight and secure.
- If desired, paint or stain the boards to give them a unique look. You can also add any additional designs or decorations at this point.
- Allow the paint or stain to dry completely before moving on to the next step.
- Measure and cut a piece of plastic or cotton fabric into eight 6×6-inch squares. These will be the bags for the cornhole game.
- Use a sewing machine or needle and thread to stitch three sides of each square. Fill the bags with about 2 cups of corn or plastic pellets, then stitch the final side to close the bag.
- Finally, attach the legs to the bottom of each cornhole board. Measure and mark the points for the legs, then drill pilot holes and screw the legs into place. Make sure the legs are strong and stable.
There you have it – 11 simple steps to make your own cornhole boards. With some basic materials and a little bit of time, you can create a fun and entertaining game that you can enjoy in your own backyard or at any gathering. Get creative with your designs and personalize your boards to make them truly your own. Happy cornhole season!
STEP 1 Lay out the board frames
To start making your own cornhole game, you’ll need two board frames. Lay them out on a flat surface, ensuring they are parallel and well-aligned. The board frames consist of two sides and a top edge, forming a rectangle.
It’s necessary to make sure the board frames are of the correct dimensions. A standard cornhole board is 4 feet by 2 feet, but you can make them smaller or larger depending on your preference. Measure the sides to be 48 inches long and the top edge to be 24 inches long.
Use a pencil to mark the points where the sides and top edge come together. This will serve as a guide when attaching the frames together.
Drill pilot holes at the marked points on the top edge, then apply wood glue along the edges of the sides. Secure the sides to the top edge using screws.
To reinforce the board frames, use a jigsaw to cut 4-inch by 4-inch squares from plywood. Attach these squares to the inside corners of the frames, using wood glue and screws. This will provide extra strength and stability.
Once the frames are secure and reinforced, fill any visible screw holes with wood filler. Allow the filler to dry, then sand it smooth with a sanding block or a roller.
If desired, you can paint or stain the board frames to give them a more finished look. Use a paintbrush or roller to apply the paint or stain evenly, following the instructions on the can.
That’s it for Step 1! Now you have the board frames ready for the next steps in making your own cornhole game. Read on to learn how to sew the cornhole bags and attach the legs to the board frames.
STEP 2: Drill pilot holes for the frame’s screws
Now that you have all the necessary materials and tools, it’s time to start assembling the cornhole boards. The second step is to drill pilot holes for the frame’s screws. This will ensure that the screws go in straight and secure the frames firmly together.
To begin, mark the positions where you want to attach the frames on the plywood board. Measure and mark 10 inches from each edge along the length of the board. These marks will serve as a guide for the pilot holes.
Next, take your drill and drill bit. Choose a drill bit slightly smaller than the diameter of your screws. This will help prevent the wood from splitting. Attach the drill bit to your drill and start drilling pilot holes at each marked position. Make sure to drill straight down and through the plywood board.
Repeat this process for all 4 corners of the plywood board, making sure to evenly space the pilot holes along the edges of the board. You’ll need 8 pilot holes in total, 2 for each corner.
Once the pilot holes are drilled, take a screw and align it with one of the pilot holes. Insert the screw into the hole and use a screwdriver to tighten it. Repeat this process for all the remaining pilot holes and screws.
It’s important to note that the screws should be tightened snugly, but not so tight that they strip the wood. You want the frames to be secure, but not at the risk of damaging the plywood or creating a weak point.
By drilling pilot holes and using screws to attach the frames, you ensure a stronger and more durable cornhole board that will withstand many games and seasons of play.
Now that you’ve completed this step, you’re ready to move on to the next step – reinforcing the frames with a second layer of plywood. Stay tuned for STEP 3!
STEP 3 Glue and screw the frame
To assemble the frame, follow these steps:
- Start by laying two of the 2×4 boards together, ensuring they are flush and the edges align perfectly. These two boards will become the sides of the frame.
- Take a pencil and mark the spots where you’ll attach the frame. You’ll need at least one mark on each side, and two on the top and bottom.
- Using a drill with a pilot hole bit, drill holes at the marked spots. This will prevent the wood from splitting when you insert the screws.
- Apply wood glue along the edge where the two boards meet on the inside face.
- Align the two boards back together with the glued edge, making sure the corners are square.
- Using a roller or a 6-inch clamp, secure the boards together tightly and wipe away any excess glue.
- Insert screws into the pilot holes and tighten them securely. Repeat this process for the other two sides of the frame as well.
By gluing and screwing the frame, you’ll make it sturdy and strong. Now the frame is ready for the next step – attaching the top board.
STEP 4: Cut and Attach the Plywood Tops
Now that you have prepared the wooden frame and the fabric bags, it’s time to cut and attach the plywood tops. These tops will serve as the playing surface for your cornhole game.
- First, lay one of the plywood boards on a flat surface. This will be the top board of one cornhole game.
- Measure and mark a 6-inch square in each corner of the plywood board using a pencil and a ruler.
- Next, use a drill to create pilot holes at the marked corners. These holes will help you attach the plywood top securely to the frame later on.
- Repeat steps 1-3 for the second plywood board, as you need two tops for a complete cornhole set.
Once you have the two plywood tops ready, it’s time to attach them to the wooden frame:
- Place one of the plywood tops on the top of the frame, aligning it with the edges.
- Using screws and a drill, secure the plywood top to the frame by screwing through the pilot holes into the frame’s wood.
- Repeat this process for the other plywood top, ensuring it is also aligned and securely attached to the frame.
Congratulations! You have successfully cut and attached the plywood tops to complete your cornhole boards. The next step is to paint or stain the boards, which will not only enhance their appearance but also protect them from outdoor elements. Once you finish painting or staining, you’ll be ready to enjoy endless fun-filled cornhole games with family and friends!
STEP 5 Mark out the cornhole board holes
Now it’s time to mark out the holes on your cornhole boards. To achieve the standard cornhole size, you will need to position the holes 9 inches from the top and centered 12 inches from each side.
Start by measuring and marking the top edge of the board at 9 inches from each corner. Then, using a pencil or marker, make a small dot at each of these points.
To ensure accuracy, it’s helpful to create a template for the holes. You can easily make a template by drawing a 6-inch square on a piece of cardboard or plastic. Then, mark the center of the square and drill a small pilot hole to guide your jigsaw blade.
Place the template on the corner mark you made earlier and then trace the square onto the board using a pencil or marker. Repeat this process for the remaining three corners.
Next, you’ll need to cut out the holes using a jigsaw. Make sure to follow the marked lines and take your time for a clean cut. It’s a good idea to drill a hole near the edge of the marked square to enable you to start the jigsaw blade. Then, carefully cut along the lines, staying inside the marked squares.
Once the holes are cut out, sand the edges to remove any roughness or splinters. You can use a sandpaper block or a handheld electric sander for this task.
To make the holes more visible and aesthetically pleasing, you can paint or stain the edges of the holes. Use a small roller or brush to apply a coat of paint or stain to the inside edges of the holes. A contrasting color, such as white, works well to make the holes stand out.
Finally, to ensure that the holes are strong and durable, reinforce the edges. You can do this by using screws or bolts to secure a plastic or metal lining around the edges of the holes. This will prevent any fraying or damage to the edges of the holes over time as the bean bags are thrown into them.
With this step complete, your cornhole boards are almost ready for a game! Just a few more steps to go, and you’ll be able to enjoy your homemade cornhole boards and bean bags.
STEP 6 Cut the cornhole board holes
After you have built the homemade cornhole boards and painted or stained them to your liking, it’s time to cut the cornhole board holes. This step is important to complete the cornhole game setup. The holes should be 6 inches in diameter and centered 9 inches from the top of the board.
To cut the holes, you’ll need a jigsaw tool. Start by measuring and marking the center point of each board’s top edge using a pencil. From that center point, measure and mark 9 inches down along the edge, and make another mark. Repeat this step on the other side of the board.
Place a small nail or screw on each of the marks previously made. Then, using a string and a pencil, create a makeshift compass by tying one end of the string around the head of the nail or screw. Hold the pencil at the other end of the string and ensure it is pulled taut.
With the pencil held firmly in place, carefully trace a circle around the nail or screw head, keeping the string taut. This will create a perfect circle that will serve as the guide for cutting the holes.
Using the jigsaw tool, cut along the pencil line, following the circle as closely as possible. Take your time to ensure smooth and precise cuts. Once the cutting is complete, sand the edges of the hole to remove any roughness.
It’s important to reinforce the edges of the cornhole board holes to prevent any splitting or cracking. You can use clear silicone adhesive or a plastic bead of caulk to reinforce the inside edge of the hole. This will also serve to protect the wood from any damage caused by the bean bags.
With the cornhole board holes cut and reinforced, your cornhole boards are nearly complete. In the next step, you’ll learn how to attach the legs to make the boards sturdy and ready for gameplay.
STEP 7 Prepare and drill holes for the legs
Once you have completed the previous steps and have your cornhole board frame assembled, it’s time to prepare and drill the holes for the legs. This step is crucial as it will ensure that your cornhole boards are stable and can be easily set up for gameplay.
Here’s how to do it:
- First, lay out the two 2′ x 4′ plywood board tops so that their long edges are touching, forming a square shape.
- Measure and mark 1 inch in from each corner of the square. These marks will be where you drill your holes for the legs.
- Using a pencil and a straightedge, draw a line connecting the marks you made in the previous step. This will help guide your drilling.
- Using a jigsaw or a similar tool, carefully cut along the lines you drew in the previous step to create four 6-inch by 6-inch squares at each corner of the plywood square.
- Next, drill a hole in each of the 6-inch squares you just created. Make sure the hole is slightly larger than the diameter of the legs you’ll be using. This will allow the legs to fit snugly into the holes.
- Repeat this process for the second board top so that both cornhole boards have holes for the legs.
- Once the holes are drilled, you’ll need to secure the legs in place. To do this, place a bolt through each leg, from the inside of the cornhole board, and use a washer and nut to hold it in place. Make sure the legs are positioned so that the boards are slightly angled and stable.
- Finally, if desired, you can paint or stain the cornhole boards to give them a more personalized touch. Just make sure to let the paint or stain dry completely before playing any games.
With the holes for the legs drilled and the legs secured in place, your cornhole boards are nearly complete. All that’s left is to fill the cornhole bags you’ve made and enjoy a game with friends and family. Simply place the cornhole boards a regulation distance apart, and let the games begin!
STEP 8 Fill the visible screw head holes

Now it’s time to fill in the visible screw head holes on your cornhole boards. This step is important to make sure your cornhole boards look clean and finished.
If you followed the tutorial on how to make cornhole boards, you should have already attached the top frame to the sides of the board using screws. In this step, you’ll be filling in the holes left by those screws.
First, prepare a filler material. You can use wood filler, which is a strong, glue-like substance that you can find at your local home improvement store. Use a putty knife or a roller to apply the filler to the screw holes. Make sure to press it in tight so that it fills the holes completely.
After you’ve filled the holes, let the filler dry according to the manufacturer’s instructions. This usually takes around 15-25 minutes. Once the filler is dry, use sandpaper to sand down the surface of the boards so that the filler is flush with the board surface.
If there are any visible imperfections or rough spots, you can apply another layer of filler, let it dry, and sand it down again until the surface is smooth and even.
Finally, paint or stain your cornhole boards according to your preference. This step is not necessary, but it can add a nice finishing touch to your homemade cornhole boards.
Repeat this process for each corner of the board where there are visible screw head holes.
There you have it – a simple, step-by-step guide on how to fill the visible screw head holes on your cornhole boards. Now your boards are ready for a game of cornhole! Enjoy!
STEP 9 Stain and paint the cornhole boards
Now that your wood frames are well-built and sturdy, there’s a simple and DIY way to make your cornhole games look more attractive. Staining and painting the boards is a great way to add some style to your homemade cornhole set.
Here’s a step-by-step tutorial on how to stain and paint the cornhole boards:
- Lay your wood boards flat and use a roller or brush to apply wood stain evenly. Make sure to cover all sides of the boards.
- Allow the stain to dry completely as per the instructions on the can.
- Once the stain is dry, mark out the area for the hole on both the top and front sides of the boards. Use a pencil and measurements to get the placement perfect.
- Using a jigsaw, cut out the holes you marked in the previous step.
- Apply a coat of primer to the tops and sides of the boards. This will help the paint adhere better and give a smoother finish.
- Allow the primer to dry completely.
- Paint the tops and sides of the boards with your desired color. You can use a brush or roller for this step.
- Allow the paint to dry according to the paint can instructions.
- The final step is to attach the legs to the boards. Use a drill and pilot point screws to secure the legs in place.
- Now your cornhole boards are ready to use and enjoy!
By following these steps, you’ll have beautifully stained and painted cornhole boards that are not only functional but also visually appealing. This extra touch will make your DIY cornhole set stand out at parties, BBQs, and other outdoor events.
STEP 10 Secure the legs
Once your cornhole boards are complete, you’ll need to attach the legs to make them sturdy and ready for games. Here’s how:
1. Lay one of the boards on a flat surface with the front side facing down.
2. Measure and mark the center of the board’s width. This is where you’ll attach the legs.
3. Position one leg in the center of the board, with the screw holes on the leg’s flat side facing inward. Make sure the top of the leg is aligned with the top edge of the board.
4. Pre-drill pilot holes through the screw holes on the leg and into the board. This will prevent the wood from splitting when you screw in the screws.
5. Apply wood glue to the area where the leg will be attached.
6. Place the leg back onto the board, lining up the screw holes with the pilot holes. Make sure the leg is positioned straight and secure.
7. Attach the leg to the board by driving screws through the pilot holes and into the leg.
8. Repeat steps 3 to 7 for the second leg, ensuring that it is aligned with the first leg.
9. Once both legs are securely attached to the board, flip the board over to its front side.
10. Check and make sure the legs are straight and properly secured. Use a level if necessary to ensure they are at the correct angle for gameplay.
11. Finally, reinforce the legs by adding additional screws at an angle from the outside of the board into the legs. This will provide extra stability and strength.
Now your cornhole board’s legs are securely attached, and the frame’s structure is strong and ready for play. Enjoy your homemade cornhole game!
STEP 11: Repeat steps for the second board
Now that you have completed the first cornhole board, it’s time to repeat the process for the second board. Follow the same steps mentioned above:
- Cut a 2×4 wooden board into two 48-inch lengths and two 21-inch lengths.
- Drill pilot holes in the frame’s corners and attach the frame together with screws.
- Measure and mark 12 inches from the top of the board along the sides.
- Use a pencil to draw a line from the marking to the opposite corner of the board, creating a 12-inch diagonal line.
- Repeat the marking and drawing process for the other three corners, so you have four 12-inch squares on the board.
- Cut a piece of 10-ounce duck cloth or other durable fabric into two 6-inch squares.
- Pin the fabric squares to the top corners of the board, aligning the edges.
- Use a sewing machine or a needle and thread to stitch the fabric squares to the board along the edges.
- Flip the board over and staple the fabric to the underside, pulling it taut for a tight fit.
- Glue the legs to the bottom of the board, making sure they are evenly spaced and secure.
- Once the glue is dry, use a 1/2-inch drill bit to make pilot holes for the screws that will attach the legs to the boards.
- Screw the legs into place using the pilot holes.
- Repeat these steps for the second board, ensuring that both boards are identical.
Now you have a complete set of cornhole boards and bags! Enjoy playing this fun and simple game with your own homemade cornhole set.
Finally enjoy
After all the hard work, you can finally enjoy your handmade cornhole bags. The bags are made from durable materials like cotton duck, ensuring they will withstand many games of cornhole.
To play the game, you’ll need cornhole boards. Screw the legs into place and then flip the boards face up. Drill a hole in each corner of the board, about 6 inches from the edge. This will allow you to attach the bags later.
Next, make the bags using the tutorial outlined above. Remember to reinforce the stitches by backstitching and making sure there are no loose threads. Use strong, durable thread that won’t break or fray easily.
Once the bags are ready, it’s time to season the boards. This step is necessary to ensure the bags slide smoothly on the surface. Use a roller or a brush to spread the cornhole wax or silicone spray evenly over the plywood surface. Repeat this process at least 3 times, allowing each coat to dry before applying the next one.
Now, it’s time to paint and decorate your boards. You can stain the wood for a more rustic look or paint it in your favorite colors. Let your creativity shine and make the boards unique to your own style.
Once the paint or stain is dry, attach the magnetic locks to the top of the board frame’s inside edge. This will keep the boards together when not in use and make them easier to transport.
All that’s left to do is place the bags on the boards and start playing. The point of the game is to throw the bags into the holes and earn points. Each hole earns you 3 points, while landing on the board earns you 1 point.
Now that you know how to make cornhole bags, you can enjoy the game with family and friends. Share your DIY skills and make your own cornhole set. It’s a simple and fun project that will keep everyone entertained for hours.
How to Make Cornhole Bags
If you’re looking for a fun DIY project and enjoy playing cornhole, why not try making your own cornhole bags? This simple and straightforward guide will walk you through the steps required to create your very own set of cornhole bags. Let’s get started!
What You’ll Need:
– 2 squares of cotton fabric, 6 inches by 6 inches in size
– 25 ounces of plastic pellet filler
– Sewing machine or needle and thread
Step 1: Prepare the Fabric
Start by laying out your fabric squares, one on top of the other, with the right sides facing inward. Use pins to secure the squares together along three of the edges.
Step 2: Stitch the Fabric
Using a sewing machine or needle and thread, stitch along the three sides of the fabric squares, about 0.25 inches from the edge. Remember to leave one side open for filling the bags later.
Step 3: Fill the Bags
Turn the fabric right side out through the open side and fill the bag with about 12.5 ounces of plastic pellet filler. Be sure to distribute the filler evenly throughout the bag.
Step 4: Close the Bag
With the bag filled, fold the open edges of the fabric inward by about 0.25 inches. Use a needle and thread to stitch the open side closed using small, tight stitches. Repeat this process with the remaining fabric square to create a second bag.
Step 5: Reinforce the Stitches
To reinforce the stitches and ensure the bags withstand many games, repeat the stitching process about 0.25 inches inside the original stitches. This will provide extra strength along the seams.
Step 6: Enjoy Your Homemade Cornhole Bags
Once both bags are completed, your homemade cornhole bags are ready for use! Now, you can enjoy playing cornhole with your very own custom-made bags.
Remember, cornhole is a popular outdoor game that requires a cornhole board and 8 bean bags (4 for each player). If you don’t have a cornhole board yet, you can also make your own using plywood, screws, and a jigsaw. There are many DIY tutorials available online to guide you through the process of building a cornhole board.
So, what are you waiting for? Grab your tool kit, get your materials ready, and start making your own cornhole bags today. It’s a fun and simpler way to personalize your cornhole game and share it with friends and family!
Sources

When making cornhole bags, there are a few essential tools and materials you’ll need. Here’s a list of what you’ll need:
| 4 | 9-inch squares of sturdy fabric |
| 2 | wooden frames, 1 foot by 2 feet in size |
| 2 | plywood boards, 2 feet by 4 feet in size |
| 1 | drill |
| 1 | pencil or marking tool |
| 1 | scissors |
| 1 | strong thread and needle |
| 1 | paint or stain |
| 1 | paint roller or brush |
| 1 | glue |
| 1 | screwdriver |
| 1 | measuring tape |
| 1 | bean or corn filling, approximately 15-16 ounces for each bag |
| 1 | wood glue or wood screws |
These are just the basic materials and tools you’ll need. Depending on your preferences, you may need additional items such as a paintbrush and white paint for marking the scoring holes on the board.
It’s always a good idea to have extra fabric and thread on hand in case you make a mistake or need to reinforce any stitching.
Now that you have all the required materials, you’re ready to start making your homemade cornhole bags!


