

If you’re a fan of stickers, making your own can be a fun and creative way to express yourself. Whether you want to use them for personal decoration or even sell them, there are a few steps you need to take to get started. In this article, we’ll walk you through the process of preparing your supplies, designing your stickers, and printing them with minimal equipment.
Step One: Preparing Your Supplies
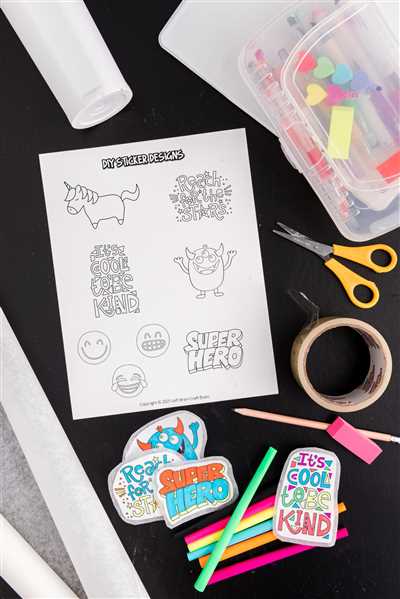
Before you start making your own stickers, it’s important to gather all the necessary materials. You’ll need a computer with design software, a printer, sticker paper or parchment paper, and a warm, well-lit work area. Additionally, if you want to make custom stickers, you’ll need a cutting tool like a Cricut machine.
Step Two: Designing Your Stickers
Once you have all the tools and supplies, it’s time to let your creativity shine! Use design software to create your own unique sticker designs. You can choose from a wide range of templates or start from scratch. Think about what type of stickers you want to make – funny, cute, motivational, or even educational. The possibilities are endless!
Step Three: Making Your Stickers
Now that you have your designs ready, it’s time to bring them to life. Load the sticker paper or parchment paper into your printer and adjust the settings accordingly. Start with a test print or a small batch to preview the quality and adjust if needed. Once everything looks good, you can start printing your stickers!
Step Four: Selling Your Stickers
After you’ve made a bunch of awesome stickers, why not share them with others? Whether you want to sell them online, at craft fairs, or even to your classmates or coworkers, there are plenty of opportunities to make some extra money. Consider creating a social media presence or setting up an online shop to showcase and sell your creations.
Now that you know the basics of how to make DIY stickers, it’s time to get started on your own sticker-making adventure. Remember to have fun, experiment with different designs, and let your creativity shine through each sticker you create!
- How to Make Stickers at Home With Minimal Supplies
- Preparing to make stickers...
- What You’ll Need
- Equipment & Tools
- Materials
- How to Make Your Own Stickers to Sell
- Step One: Pick Your Sticker Type
- Step Two: Add Your Custom Design
- Step Three: Preview and Adjust Your Sticker
- Step Four Start Selling
- Video:
- 3 Ways! How to Make Stickers/ DIY Stickers / Handmade Stickers / Homemade Stickers
How to Make Stickers at Home With Minimal Supplies
Making your own stickers at home is a fun and creative project that requires minimal supplies. With just a few tools, you can design and print your own custom stickers. Whether you want to decorate your personal items or start selling your designs, sticker-making is a great way to express your creativity.
Step 1: Preparing Your Designs
- Start by deciding what type of stickers you want to make. Will they be for personal use or for selling?
- Pick a design or create your own using graphic design software or online sticker design tools.
- Adjust the size and shape of your design to fit the sticker dimensions you want.
- Preview your designs and make any necessary adjustments before printing.
Step 2: Printing Your Stickers
- You’ll need a printer that can handle sticker paper. If you don’t have one, you can use a printing service or a friend’s printer.
- Load the sticker paper into your printer according to the manufacturer’s instructions.
- Print your designs onto the sticker paper. Make sure to use a high-quality printing setting for the best results.
- Let the printed stickers dry completely before moving on to the next step.
Step 3: Adding Stickiness to Your Stickers
- Once your stickers are printed and dry, you’ll need to make them sticky.
- Cut a piece of parchment paper slightly larger than your sticker sheet.
- Peel off the backing of the sticker sheet and place it on the parchment paper.
- Use a sticker machine or a DIY adhesive tool to add stickiness to each individual sticker.
- Run the sticker sheet through the machine or use the adhesive tool to apply stickiness to the back of each sticker.
Step 4: Preview and Sell
- Inspect your stickers to ensure they are properly sticky and free of any imperfections.
- If you plan on selling your stickers, take high-quality photos of them for your online listings.
- Upload your sticker designs to a selling platform or create your own website to start selling.
- Market your stickers on social media, in local communities, or to friends and family.
By following these steps and using minimal supplies, you can easily make your own stickers at home. Whether you want to decorate personal items or start a small business, sticker-making is a rewarding and enjoyable DIY project.
Preparing to make stickers...
Before you start making your own DIY stickers, you'll need to prepare a few things. Here's a step-by-step guide on what you'll need to do:
Gather your supplies: First, gather all the materials and tools you'll need for sticker making. You'll need a computer or laptop, a printer, sticker paper, scissors or a cutting tool, and a warm and well-lit workspace.
Pick your design: Next, decide on the design for your stickers. You can either choose from pre-made designs or create your own custom designs using software or online platforms like Cricut Design Space or sticker generator.
Adjust the design: After you've picked your design, you may need to adjust the size, colors, or layout to fit your sticker paper. Use software or online tools to make any necessary adjustments.
Preview and print your designs: Once you're happy with the design, preview it on your computer to make sure everything looks good. Then, print your designs onto the sticker paper using a printer.
Cut the stickers: After printing your designs, carefully cut them out using scissors or a cutting tool. Make sure to stay within the boundaries of your design and cut neatly.
Add stickiness: If you're using sticker paper that doesn't have a peel-off backing, you'll need to add stickiness to the back of each sticker. There are a few ways to do this, including using double-sided tape, adhesive spray, or a sticker machine.
Finish and sell: Once your stickers are ready, you can package them nicely and start selling them. Whether you want to sell them online, at local craft fairs, or give them away as gifts is up to you. Just make sure to have clear pricing and branding for your stickers.
Make adjustments if needed: As you start making stickers at home, you may realize that some designs or materials work better than others. Don't be afraid to experiment and make adjustments along the way to improve your sticker-making process.
Remember the stickiness: It's important to consider the stickiness of your stickers. If they don't stick well, customers might not be happy with their purchase. Make sure to test the stickiness of your stickers before selling them by sticking them onto different surfaces and seeing how well they hold.
Work on more designs: Keep working on more sticker designs to expand your collection. The more variety you offer, the higher the chances of attracting customers with different preferences.
Ask for feedback: If you're selling your stickers, don't hesitate to ask for feedback from your customers or even your friends and family. Their opinions can help you improve your designs or identify areas where you can make your stickers more appealing.
Start making stickers! Now that you've got everything you need and know what to do, it's time to start making your own DIY stickers. Have fun and enjoy the process!
What You’ll Need
When it comes to making your own custom stickers, you’ll need a minimal set of supplies. With just a few tools and materials, you can add a personal touch to your belongings or even start selling your own designs. Here’s a list of what you’ll need:
| 1 | A home printer or access to a printing machine |
| 2 | Stickiness-adjustable sticker paper |
| 3 | Parchment paper |
| 4 | Various designs or a design generator |
| 5 | A pair of scissors or a cutting machine like Cricut |
| 6 | A warm iron or a heat press machine |
| 7 | Optional: Clear sticker sheets for transparent stickers |
| 8 | Optional: Decorative elements like glitter or sequins |
Before you start making your DIY stickers, there are a few steps you’ll need to take. First, you’ll want to prepare your designs or find a design generator online if you’re not confident in your drawing skills. Next, you’ll need to adjust the stickiness of your sticker paper according to your preferences. This can usually be done using the settings on your printing machine or by using a specific type of sticker paper.
Once you have all your materials and designs ready, you can begin the printing process. Make sure to load the sticker paper properly and preview the print before you hit the “Print” button. After the printing is done, wait for the ink to dry completely before cutting out your stickers, either with scissors or with a cutting machine like Cricut.
Equipment & Tools
When it comes to making your own DIY stickers, there are a few essential tools you’ll need to get started. Here is a list of the equipment you’ll need:
1. Cutting Tool: First things first, you’ll need a tool to cut out your sticker designs. One popular option is a Cricut machine, a cutting machine that allows you to create custom designs. Alternatively, you can use scissors or an X-Acto knife if you prefer a more hands-on approach.
2. Materials: Next, you’ll need the right materials for making stickers. The two main components are adhesive vinyl and printable sticker paper. Adhesive vinyl is perfect for creating durable, long-lasting stickers, while printable sticker paper is great for designs that require intricate details.
3. Printer: If you’re planning on printing your own custom designs, you’ll need a printer. Ideally, use a high-quality inkjet printer for the best results. Make sure to adjust the printer settings to match the type of sticker paper you’re using.
4. Parchment Paper: Parchment paper is a handy tool that will come in useful later on in the sticker-making process. It can be used to protect your stickers and ensure they don’t stick together before you’re ready to use or sell them.
With these basic tools and materials, you’ll be well-equipped to start making your own DIY stickers. Later on, you can invest in additional tools based on your needs and preferences. Now, let’s move on to the next step: preparing your designs!
Materials
When it comes to making your own stickers, you’ll need a few materials to get started. Here’s a list of what you’ll need:
1. Design Tools: To create your own custom designs, you’ll need a design software or online graphic generator. You can either use a free one or invest in a higher quality tool.
2. Printing Supplies: Once you have your designs ready, you’ll need a printer to print them out. Make sure to adjust the printer settings to achieve the desired quality. You’ll also need sticker paper or adhesive vinyl sheets to print your designs on.
3. Cutting Machine: To cut out your stickers in any shape you want, you’ll need a cutting machine. A popular choice is the Cricut machine, which allows you to upload your designs and precisely cut them out.
4. Parchment Paper: To protect your stickers from sticking to each other, you’ll need parchment paper. It will also come in handy when transferring your stickers to different surfaces.
5. Tools for Preparing Stickers: You’ll need basic tools like scissors to trim your stickers and a ruler to measure them. A craft knife and a cutting mat can be useful for more intricate designs.
6. Stickiness Test Tool: To ensure that your stickers have the right amount of stickiness, you can use a stickiness test tool. It will help you determine the ideal stickiness level for different surfaces.
7. Preview App: Before printing and cutting out your stickers, you can use a preview app or software to see how they will look. This will help you make any necessary adjustments to your designs before moving forward.
With these materials, you’ll be ready to start making your own DIY stickers at home. Whether you’re making them for personal use or selling them, having the right equipment and supplies is essential for a successful sticker-making process.
How to Make Your Own Stickers to Sell
If you’re looking to start a small business or just want to make some extra money from the comfort of your own home, making and selling custom stickers can be a great option. With just a few simple tools and materials, you can create unique designs and turn them into profitable products.
Here are the steps you’ll need to follow to start making and selling your own stickers:
Step 1: Gather the necessary tools and equipment
First, you’ll need to gather the tools and equipment needed to make your own stickers. Here’s a list of what you’ll need:
- A computer and design software: You’ll need a computer with design software, such as Adobe Illustrator or Photoshop, to create your sticker designs.
- A printer: If you don’t have access to a printer at home, you can use a local print shop or an online printing service.
- Sticker paper: This is a special type of paper that has a sticky back. You can find sticker paper at craft stores or online.
- A cutting tool: To cut out your sticker designs, you can use scissors or a craft knife.
- Parchment paper: This will help protect your printer and ensure your stickers don’t stick to the printer rollers.
Step 2: Prepare your designs
Once you have all the necessary materials, you can start preparing your sticker designs. Use the design software of your choice to create the artwork you want to turn into stickers. You can either draw the designs digitally or scan hand-drawn artwork into your computer.
Step 3: Print your stickers
Next, it’s time to print your sticker designs onto the sticker paper. Adjust the settings on your printer to ensure the best print quality. Place a sheet of parchment paper on top of the sticker paper to protect your printer and prevent the stickers from sticking to the printer rollers.
Step 4: Cut out your stickers
After the printing is complete, carefully cut out your sticker designs using the cutting tool of your choice. It’s important to be precise and accurate to ensure your stickers look professional.
Step 5: Add stickiness to your stickers
If your stickers don’t already have a sticky back, you can add stickiness by using a sticker adhesive. There are various types of sticker adhesives available, so pick the one that best suits your needs.
Step 6: Preview your stickers
Before selling your stickers, it’s a good idea to preview them to make sure they meet your quality standards. Remove the backing from one sticker and test its stickiness and durability. Make any necessary adjustments before moving forward.
Step 7: Start selling!
Once you’re satisfied with the quality of your stickers, you can start selling them. There are many platforms where you can sell your stickers, such as Etsy, eBay, or your own website. Take appealing photos of your stickers and write informative descriptions to attract buyers.
With minimal investment and the right tools, you can turn your passion for design into a profitable business venture. Start making your own custom stickers and see how they sell!
Step One: Pick Your Sticker Type
If you’re ready to start making your own DIY stickers, the first step is to decide what type of stickers you want to create. There are several options to choose from, so consider your needs and preferences before making a decision.
Here are four popular sticker types that you can consider:
- Custom Stickers: If you want to design your own stickers and have complete control over the look and feel, custom stickers are the way to go. With these stickers, you can add your own designs, adjust the size, and even choose the stickiness level.
- Pre-made Stickers: If you don’t have the time or the design skills to create your own stickers, pre-made stickers are a great option. There are many online marketplaces where you can find a wide range of pre-designed stickers for various purposes.
- Printed Stickers: If you have a design that you want to turn into stickers and you don’t have a printer at home, you can use a printing service. There are many printing services that can print your designs on sticker paper, so make sure to choose a reliable and high-quality service.
- Machine-cut Stickers: If you want to create professional-looking stickers, you can invest in a sticker cutting machine. These machines come with software that allows you to design and cut your own stickers with minimal effort.
Once you’ve decided on the type of stickers you want to make, it’s time to gather the necessary materials and tools. Depending on the type of stickers you choose, you’ll need different supplies and equipment. For example, if you’re making custom stickers, you’ll need a design software and a printer. If you’re making machine-cut stickers, you’ll need a sticker cutting machine and sticker paper.
Before you start working on your stickers, it’s a good idea to prepare your workspace. Make sure you have a clean and well-lit area to work in. Gather all the supplies and tools you’ll need and have them within reach. It’s also a good idea to have some parchment paper on hand to protect your work surface.
Now that you’ve picked your sticker type and have all the necessary materials and tools, you’re ready to start making your own DIY stickers. The next step will depend on the type of stickers you’ve chosen, so stay tuned for the next step in the sticker-making process.
Step Two: Add Your Custom Design
First, decide on the type of design you want for your stickers. Are you going for a minimal and clean look, or a bold and colorful design? The choice is entirely up to you.
Next, you’ll need to prepare your design using a graphic design tool or software. If you don’t have any experience with professional design tools, don’t worry! There are plenty of free online tools and generators available that can help you create stunning sticker designs.
Once you’ve decided on your design and prepared it, it’s time to start making your stickers. If you have a Cricut machine, this will make the process much easier. Simply load your design onto the machine and adjust the settings according to your preferences.
If you don’t have a Cricut machine or other cutting tools, don’t worry! You can still make stickers at home. Print out your designs on a regular printer using sticker paper or regular paper and adhesive sheets. Later, you’ll need to cut out your stickers manually using scissors or a craft knife.
Before you start printing your stickers, make sure to adjust the stickiness of your adhesive. If you want your stickers to be easily removable, set the adhesive to a lower stickiness level. If you want them to be more permanent, set it to a higher stickiness level.
Once you’re ready, print out a preview of your designs on a regular piece of paper. This will give you an idea of how your stickers will look once they’re printed. Adjust any details or colors as needed.
If you’re planning on selling your stickers, keep in mind any requirements or preferences from your customers. For example, some people might prefer matte stickers over glossy ones. Take these considerations into account to ensure your stickers will appeal to a wider audience.
Now that you have everything set up, it’s time to start printing your stickers! Load your sticker paper into your printer and hit the print button. If you’re cutting them manually, make sure to leave some space between each sticker to make the cutting process easier.
Once your stickers are printed, let them sit and dry for a while. It’s best to place them on a flat surface like a parchment paper or a clean desk. This will prevent them from sticking to other surfaces while they’re still wet.
Now you have your custom-made stickers ready to use or sell! You can use them to decorate your belongings, give them as gifts, or even start your own sticker business. The possibilities are endless!
Step Three: Preview and Adjust Your Sticker
After preparing your designs and materials, you are ready to start making your own stickers at home. But before printing them, you need to preview and adjust them to ensure they will come out how you want.
One tool you can use for this step is a Cricut machine. This machine is a teacher’s best friend in the morning. With its built-in sticker design generator, you can pick from a variety of custom designs or create your own.
First, you’ll need to turn on your Cricut machine and warm it up. While it’s heating up, gather all the supplies you’ll need for this step – parchment paper, scissors, and a computer with the Cricut design tool installed.
Next, open the design tool and load your chosen design. Take a look at the preview of your sticker on the screen. This will give you an idea of how your sticker will look when printed.
If you are satisfied with the preview, move on to the next step. However, if something doesn’t look right, here’s where you can make adjustments. You can modify the size, position, colors, or any other element of your sticker design until you are happy with it.
Remember that the type of materials you’re using will also affect the final result. If you want a sticker with a minimal or transparent look, pick the right materials accordingly.
Once you have finalized your design and made any necessary adjustments, it’s time to print it. Load a sheet of sticker paper into your Cricut machine and let it work its magic. Make sure to follow the instructions provided with your machine.
After printing, let the stickers cool down for a few minutes. Then, carefully peel them off the parchment paper and check their stickiness. If they don’t stick well, you can add a layer of adhesive or adjust the settings on your machine for a better result.
Now that you have your stickers ready, you can use them for personal purposes or even sell them. Stickers are a popular item to sell, so if you enjoy making them, you might consider turning it into a small business or side hustle.
The process of making DIY stickers is quite simple, especially when you have the right tools and equipment. Just follow the steps outlined in this guide, and soon you’ll be creating your own unique stickers with ease.
Step Four Start Selling
Once you’ve finished making your own DIY stickers, it’s time to start selling them! Here’s what you’ll need to do:
- Prepare your materials and equipment: You’ll need a computer or laptop with design tools and a printer. If you’ve decided to use a Cricut machine, make sure it’s set up and ready to go.
- Adjust your design: If needed, make any final adjustments to your sticker designs. Use a preview tool or software to see how they will look when printed.
- Pick the right type of sticker: There are different materials and stickiness levels available, so choose the one that suits your needs. If you’re unsure, consult a teacher or someone experienced in sticker making.
- Print your stickers: Load the sticker paper into your printer and print out your designs. If using a Cricut machine, follow the instructions for printing with their specific tools.
- Warm up your machine: If using a Cricut machine, let it warm up for a few minutes before starting the cutting process. This will ensure precise cuts and better results.
- Cut out your stickers: Use the cutting tool of your choice to cut out the printed designs. If using a Cricut machine, follow their guidelines for cutting stickers.
- Prepare for selling: Collect your finished stickers and organize them for sale. Place them on parchment paper or any other suitable packaging to keep them safe.
- Sell your stickers: Decide how you want to sell your stickers. You can create your own online store, sell them at local markets or events, or even approach local stores to stock them.
Remember to add your own custom designs to make your stickers unique and appealing. Use a sticker generator tool if you need inspiration or want to create a custom design quickly.
With minimal investment and some creativity, you can turn your DIY sticker-making hobby into a small business. Good luck!


