

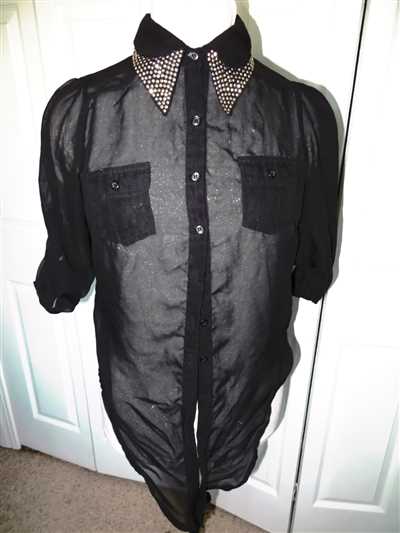
If you’ve always wanted to try making your own clothing but didn’t know where to start, don’t worry – we’ve got you covered. In this article, we’ll show you how to make a dickie, a fun and versatile accessory that can instantly turn any shirt into a stylish outfit. Whether you’re a DIY enthusiast or just looking to add a unique touch to your wardrobe, this step-by-step guide will make the process easy and enjoyable.
To start making your dickie, you’ll need a few basic materials:
- A shirt or top you want to enhance
- Elastic band or ribbon
- Fabric scissors
- Pins
- A sewing machine or needle and thread
Once you have gathered all the necessary items, you can begin by choosing the fabric for your dickie. You can use practically any type of fabric, from cotton to merino wool. If you want a more down-to-earth and casual look, opt for a patterned or striped fabric. On the other hand, if you prefer a more sophisticated and elegant style, go for a solid color fabric like silk or satin.
Once you have chosen your fabric, it’s time to measure and cut it to the desired size. Lay the fabric on a flat surface and place the shirt you want to enhance on top. Use the shirt as a guide to determine how long and wide the dickie should be. Leave a little extra fabric around the edges for seam allowance.
Next, fold the fabric in half with the right sides facing each other and pin the edges together. Sew along the pinned edges using a sewing machine or needle and thread. Make sure to leave a small opening at the bottom edge to turn the dickie right side out.
After sewing the edges, it’s time to attach the elastic band or ribbon. Measure the distance around your neck and cut the elastic band or ribbon to that length. Attach one end of the elastic band or ribbon to the inside of the back of the dickie, and the other end to the inside of the front.
Once the elastic band or ribbon is securely attached, you can try on your new dickie. Simply place it over your head and adjust the elastic band or ribbon to fit comfortably around your neck. The dickie should sit smoothly and snugly on your chest, underneath your shirt.
Now that you know how to make a dickie, you can experiment with different fabrics, colors, and styles to create your own unique accessory. Whether you wear it to add a touch of elegance to a casual outfit or to keep you warm and cozy in colder weather, a dickie is a versatile and fun addition to your wardrobe. So, get creative and enjoy the satisfaction of making something with your own hands!
DIY Kit – Striped Dickie – Merino No 5
The kit includes a striped merino wool fabric, elastic for the neckline, and a pattern for easy assembly. The fabric is made from soft and cozy merino wool, which is perfect for keeping you warm during the colder months. The elastic ensures a secure and comfortable fit, so you can wear your dickie with confidence.
The pattern provided with the kit is easy to follow, making the assembly process a breeze. Simply cut out the pattern pieces, sew them together following the instructions, and you’ll have your own stylish dickie in no time. The kit also includes detailed step-by-step instructions to help guide you through the process.
Once you’ve completed your dickie, you can wear it underneath your favorite shirt or sweater. The striped design adds a pop of color and style to any outfit, making it a versatile addition to your wardrobe. Whether you’re dressing up for a special occasion or just want to add some flair to your everyday look, this DIY kit is the perfect solution.
Ordering your DIY Kit – Striped Dickie – Merino No 5 is easy. Simply visit our website at hellotheassemblylineshop.com and add the kit to your cart. We accept credit card payment and offer a secure checkout process. Once your order is placed, we’ll quickly ship the kit to you, so you can get started on your DIY project right away.
If for any reason you’re not satisfied with your DIY Kit – Striped Dickie – Merino No 5, we offer a 30-day return policy. Simply notify us within 30 days of receiving your kit, and we’ll provide instructions for returning the item. Once we receive the kit back, we’ll issue a refund to your original method of payment.
Don’t miss out on this opportunity to make your very own dickie. Order your DIY Kit – Striped Dickie – Merino No 5 today and discover the joy of crafting your own stylish accessories.
The Confident Journal
The Confident Journal is a DIY culture-focused publication that aims to empower individuals to express their creativity through various craft projects. In this article, we will provide you with step-by-step instructions on how to make a dickie, a versatile and fashionable accessory that can instantly elevate any outfit.
First of all, let’s clarify what a dickie is. It is a false shirt front, usually made of fabric, that is worn underneath a sweater or a shirt. Dickies are designed to give the illusion of wearing a full shirt without adding bulk or causing discomfort. They are a practical and stylish solution for those who want to add a touch of elegance to their outfit without wearing a full shirt.
To make your own dickie, you will need a few items. The materials you will need include fabric (we recommend using merino wool or a similar elastic material for the best fit and comfort), thread, sewing machine or needle and thread, scissors, and a pattern. You can find a pattern for the dickie on our website, hellotheassemblylineshop.com.
Once you have gathered all the necessary materials, follow these steps:
- Print and cut out the pattern for the dickie.
- Pin the pattern to the fabric and cut out the shape.
- With the wrong side of the fabric facing up, fold and press the edges of the fabric towards the inside by about 1/4 inch.
- Using a sewing machine or needle and thread, sew along the folded edges to secure them in place.
- Measure and cut a strip of elastic that is long enough to go around your neck comfortably.
- Sew the ends of the elastic together to create a loop.
- Position the elastic loop on the wrong side of the fabric, near the top edge.
- Sew the elastic in place, making sure it is evenly distributed.
- Try on the dickie to ensure the elastic provides a snug and comfortable fit.
- Trim any excess fabric or thread.
Once your dickie is complete, you can wear it underneath a sweater or a shirt. Simply slip it over your head and adjust the elastic around your neck for a perfect fit. The dickie will stay securely in place and give the appearance of a neatly layered outfit.
If you are not completely satisfied with the outcome or find that the dickie does not meet your expectations, don’t worry! We offer a return and refund policy. Simply notify us within 5 days of receiving the dickie and return it to us in its original condition. Once we have received the returned item, we will process your refund and notify you of the payment. Please note that we do not accept worn or damaged items for return.
The Confident Journal aims to provide you with the confidence to experiment with new style ideas and unlock your creative potential. We believe that embracing a down-to-earth approach to fashion can lead to more confident and authentic self-expression. So go ahead and make your own dickie to add a unique touch to your wardrobe!
How to turn an unsuspecting shirt into a dickey in practically no time at all
Have you ever wanted to rock the look of a dickie but didn’t want to commit to buying a whole new garment? With the help of a DIY kit and a few simple steps, you can easily transform an unsuspecting shirt into a trendy dickey in no time! This down-to-earth method will have you confidently wearing your new dickie in no time.
To make your own dickey, you’ll need a few essential items. First, a shirt that you no longer wear or are willing to part with temporarily. It’s best to choose a shirt that has a front opening, like a button-up or striped shirt, as it will provide easy access for turning it into a dickey. You’ll also need an elastic strip, which you can find at most fabric or craft stores, and a sewing kit with all the necessary tools.
Here’s a step-by-step guide on how to turn your unsuspecting shirt into a dickey:
- Start by laying out your shirt flat on a table or any other smooth surface.
- Using a pair of scissors, carefully cut along the shoulder seams and down the sides of the shirt. Be sure to leave the collar intact, as it will serve as the mock neck of your dickey.
- Next, measure the circumference of your neck and cut an elastic strip to match that length.
- Sew the ends of the elastic strip together to create a loop.
- Align the looped elastic strip with the collar of the shirt and sew it in place, making sure to secure it tightly.
- Once the elastic strip is securely attached, flip the shirt over and fold the excess fabric underneath to create a neat finish.
- Sew the folded fabric down to hold it in place and give your dickey a polished look.
- Try on your new dickey and make any necessary adjustments. You may need to trim the excess fabric or tighten the elastic strip to achieve the perfect fit.
And that’s it! With just a few simple steps, you’ve successfully transformed an unsuspecting shirt into a stylish dickey. Now you can confidently wear it underneath any sweater, dress, or top to add an extra layer of warmth and style to your outfit.
If you’re not satisfied with the results, don’t worry. The kit you purchased should come with a return policy. Notify the seller within 5 days of receiving the kit, and they should automatically refund your payment. Most items can be returned for a full refund, but make sure to read the return policy to keep yourself informed.
So why wait? Turn your plain shirts into fashionable dickies and elevate your outfit with a touch of sophistication. Whether you’re attending a family gathering or going out for a night on the town, your DIY dickey will be a conversation starter and a stylish addition to your wardrobe.
For more information on DIY dickies and to purchase your own kit, visit hellotheassemblylineshop.com. Don’t miss out on this exciting fashion trend!
Make more with this pattern
If you’ve already made your first dickie using our pattern, congratulations! Now it’s time to take your skills further and make even more. The beauty of this pattern is that it’s so versatile, allowing you to create a variety of different styles and looks.
One way to make more with this pattern is by experimenting with different fabrics. While the original pattern calls for a merino wool blend, you can try using other materials such as polar fleece or striped cotton for a different look. These fabrics will give your dickie a unique touch and make it suitable for different occasions.
Another way to expand on this pattern is by modifying the design. You can add additional details to the front or back, such as pockets or decorative buttons. You can also change the length or width to create a shorter or wider dickie. The possibilities are endless, so feel free to get creative and make it your own.
If you’re thinking about making dickies for your family or friends, this pattern is perfect for that too. You can easily adjust the size to fit different body types and make them in various colors or prints. Your loved ones will always appreciate a handmade gift, and with this pattern, you can make something special for everyone.
Once you’ve mastered the basic method of making a dickie, you can also try your hand at making other items using the same pattern. For example, you could turn the dickie into a mock turtleneck or a sleeveless top. The versatility of this pattern allows you to create different garments for different occasions, all using the same foundation.
When it comes to returning to this pattern, you can always challenge yourself to make it faster and more efficiently. Look for ways to streamline the process, such as using an elastic band instead of a tie or incorporating a method that allows you to work with the fabric more easily. Don’t be afraid to think outside the box and make it your own.
Now that you know how to make a dickie, it’s time to put your skills to the test. Gather your materials, your pattern, and get started on your next sewing project. Whether it’s for yourself, your family, or as a gift, the possibilities are practically endless. Enjoy the process and happy sewing!


