

If you’re wondering where to start with designing and selling your own merchandise, look no further. In today’s progressive economy, creating and selling custom products has become easier than ever. Whether you’re a YouTube hero with a loyal following or a midwestern senator looking to spread your political message, making your own merch is a profitable way to engage with your audience.
Before we dive into the step-by-step process, it’s important to understand why merchandising is a smart move. Selling your own products allows you to tap into a new revenue stream and establish your brand online. It also gives you the opportunity to connect with your supporters on a more personal level and create a sense of fulfillment when they proudly wear or display your logo.
Now, let’s get into the three easy steps you need to follow to start selling your own merch:
- Designing your product: Choose a main item, such as t-shirts, hats, or tote bags, and pick a design that represents your brand or message. If you’re not a graphic design whiz, there are plenty of online design makers that can help you create professional-looking merch.
- Setting up your online platform: Whether you already have a website or prefer to sell through social media channels like Instagram or Facebook, create a user-friendly platform for your customers to browse and purchase your merchandise.
- Promoting and selling your merch: Now that you have your product and platform ready, it’s time to spread the word. Utilize your social media following, email lists, and other marketing channels to advertise your products.
When it comes to pricing your merchandise, consider factors such as production costs, desired profit margins, and market demand. While it may be tempting to markup your items as high as possible, keep in mind that offering fair prices can attract more customers and generate more sales in the long run.
In conclusion, making your own merch can be a rewarding endeavor. By following these three steps, you can turn your ideas into tangible products and connect with your audience in a meaningful way. So don’t wait any longer – start designing and selling your own merch today!
- How to Make Your Own Merch
- Step 1: Pick a Platform
- Step 2: Design Your Logo
- Step 3: Create Your Designs
- Step 4: Order Samples
- Step 5: Set Up Fulfillment
- Step 6: Apply Markup
- Step 7: Promote and Sell
- Step 8: Follow Up with Customers
- POLITICO Politico Logo
- How to Make Merchandise for Your YouTube Channel Five Easy Steps
- Step 1
- Sign Up
- Step 2
- Pick a Product
- Step 3
- Apply a Design
- Step 4: Applying Your Design and Selling Your Merchandise
- Order Samples
- Step 5
- Sell Custom Merch Online
- 8 Enter Your Profit Markup For Your Custom Merch
- Sources
How to Make Your Own Merch

If you’re a creator or influencer, making your own merchandise can be a great way to engage with your followers and make some extra profit. Whether you’re starting a line of products or just want to sell a few items, here are the steps to follow:
Step 1: Pick a Platform
The first step in making your own merch is to choose a platform to sell on. You can sell your merchandise on your own website, on an online marketplace like Etsy or Amazon, or through a print-on-demand service.
Step 2: Design Your Logo
Before you start designing your merchandise, you’ll need a logo to represent your brand. If you’re not a designer yourself, you can hire a professional or use online sources like Canva to create your logo.
Step 3: Create Your Designs
Once you have your logo, you can start creating the designs for your merchandise. Whether you’re designing t-shirts, hats, or other items, make sure the design is unique and appealing to your target audience.
Step 4: Order Samples
Before moving forward with your full order, it’s a good idea to order samples of your merchandise. This allows you to check the quality of the products and make any necessary adjustments before selling them to customers.
Step 5: Set Up Fulfillment
To ensure a smooth selling process, you’ll need to set up a fulfillment system. This can be done through a print-on-demand service, where they handle the printing, packaging, and shipping of your merchandise for you.
Step 6: Apply Markup
When pricing your merchandise, make sure to apply a markup that allows you to make a profit. Consider the cost of production, fulfillment, and your desired profit margin when setting the price for your products.
Step 7: Promote and Sell
Now that your merchandise is ready to go, it’s time to promote and sell it. Use your main platform, whether it’s a YouTube channel, social media account, or website, to showcase your merchandise and encourage your followers to make a purchase.
Step 8: Follow Up with Customers
After making a sale, it’s important to follow up with your customers to ensure their satisfaction. This will help build trust and loyalty, and encourage them to purchase from you again in the future.
That’s it! Now you know the steps to make your own merch and start selling it to your followers. Whether you’re a political influencer or a maker of custom products, these steps can apply to anyone looking to enter the merchandising world.
POLITICO Politico Logo
If you’re a progressive, liberal, or follow politics closely, you’re probably familiar with POLITICO. POLITICO is a popular online news platform that covers politics, policy, and governance. If you’re a fan of POLITICO and want to show your support, why not create your own POLITICO merchandise, starting with the iconic POLITICO logo?
The first step in creating your own POLITICO merchandise is designing a custom logo. The POLITICO logo is a simple yet impactful design, consisting of the word POLITICO in bold, capital letters. You can try designing your own logo or hire a graphic designer to help bring your vision to life.
Once you have your POLITICO logo ready, it’s time to move on to the next step. You need to decide what type of merchandise you want to create. POLITICO merchandise can range from t-shirts and hoodies to mugs and stickers. Pick a few items that you think your followers would be interested in.
After deciding on the merchandise line, it’s time to find a platform where you can sell your products. There are several online platforms available such as Etsy, Shopify, or even your own website. Choose a platform that suits your needs and sign up as a seller.
When it comes to selling merchandise, one important aspect to consider is the pricing and profit margins. You’ll need to calculate how much it costs to produce each item, including the cost of printing or embroidery and the base cost of the product itself. Then, you can add a markup to ensure that you make a profit with each sale.
Another important step is finding a fulfillment service. This is a third-party company that handles the production, shipping, and delivery of your merchandise. They will print, pack, and ship your products directly to your customers. Look for a fulfillment service that offers good quality, reliable shipping, and competitive prices.
Now that you have your logo, merchandise line, selling platform, and fulfillment service in place, it’s time to start selling! You can promote your merchandise on your website, social media platforms such as Facebook, Twitter, and Instagram, or even on YouTube if you have a channel. Create engaging posts and videos that showcase your merchandise and its connection to progressive politics.
To make your merchandise more appealing, you can offer special deals such as free shipping or discounts for buying multiple items. You can also provide samples or giveaways to generate buzz and attract more customers.
Remember that selling merchandise is not just about making a profit. It’s also a way to show your support for a cause or a political ideology. By wearing and using your own POLITICO merchandise, you become part of a community of like-minded individuals who share your values and beliefs.
In conclusion, creating your own POLITICO merchandise is a fun and rewarding process. Through designing your logo, choosing the right products, and implementing a robust selling strategy, you can turn your idea into a successful merchandise business. It’s a great way to support the causes and values you care about while also connecting with others who share your political passions.
How to Make Merchandise for Your YouTube Channel Five Easy Steps
If you have a YouTube channel with a growing number of followers, you may have considered creating merchandise to sell to your audience. Selling your own merch can be a great way to engage with your fans, monetize your channel, and showcase your unique brand. Here’s a simple guide to help you get started with creating your own merchandise:
- Step 1: Designing Your Merchandise
- Step 2: Finding a Merchandise Maker
- Step 3: Ordering Samples
- Step 4: Selling Your Merchandise
- Step 5: Fulfillment and Customer Service
The first step in creating your own merchandise is to come up with a design that represents your channel and brand. This could be a logo, slogan, or any other creative element that your viewers will associate with your channel. Make sure the design is eye-catching and memorable.
Once you have a design, you’ll need to find a merchandise maker who can turn your design into physical products. There are many online platforms and companies that offer custom merchandise printing, so do some research to find the one that best fits your needs and budget.
Before placing a bulk order for your merchandise, it’s a good idea to order some samples first. This will allow you to see the quality of the products and make any necessary adjustments to your design, if needed. It’s better to be sure about the quality of your merchandise before selling it to your fans.
Once you have received your samples and are satisfied with the quality, it’s time to start selling your merchandise. You can create a section on your YouTube channel where viewers can browse and purchase your products. Make sure to provide clear information about pricing, sizes, and shipping options.
After you receive an order, it’s important to fulfill it promptly and provide excellent customer service. Make sure to have a system in place for packaging and shipping your merchandise efficiently. Respond to any customer inquiries or issues in a timely manner to ensure a positive buying experience.
By following these five easy steps, you can create and sell merchandise for your YouTube channel. Remember, the main goal is to provide your fans with products that they will love and that reflect your brand. With a little creativity and planning, you can turn your YouTube channel into a full-fledged merchandise line!
Step 1
In order to make your own merch, you need to follow three progressive steps:
- Pick a platform
- Create your design
- Start selling your products
1. Pick a platform:
Before you can start designing and selling your own merchandise, you need to choose an online platform where you can apply your designs and sell them to customers. One popular platform you can consider is YouTube, especially if you already have a channel with a significant number of followers. You can sign up as a merch seller and use your YouTube channel as a marketing tool to promote your products.
2. Create your design:
Whether you are a professional designer or not, you can start creating your own custom designs for your merch. If you don’t have the necessary skills, you can hire a freelance designer or use online design maker tools to help you with the process. Make sure your design represents your brand or the message you want to convey to your audience. For example, if you are a liberal politician like Elizabeth Warren or Joe Biden, you can design merch with your logo or slogans related to progressive politics.
3. Start selling your products:
After you have your designs ready, it’s time to start selling them to customers. There are multiple options for selling your merch, including setting up your own online store or using a third-party fulfillment service. If you choose to set up your own store, you will be responsible for handling the order fulfillment process, which includes packaging and shipping the items to customers. On the other hand, using a third-party fulfillment service will take care of these tasks for you. You just need to upload your designs, set the price, and let the service handle the rest.
By following these five steps, you can make your own merch and start profiting from it. Remember to always consider the customer’s preferences and the current trends in the market, as these factors can greatly influence the success of your merch business.
Sign Up
Before you can start selling your own merchandise online, you’ll need to sign up with a fulfillment platform that can handle the actual production and shipping of your products. One popular platform that many entrepreneurs use is called Midwestern Merch.
To sign up, you’ll need to provide some basic information about yourself and your business. This typically includes your name, email address, and a password. Once you’ve created your account, you’ll be able to start designing your own products and selling them to customers.
When signing up, you’ll also need to decide whether you want to use Midwestern Merch’s main design platform or if you’d prefer to use their back-end API to integrate their services into your own website or app. If you’re just starting out, using their main design platform is usually the easiest option.
After signing up, you’ll be able to browse through Midwestern Merch’s catalog of items and select the products that you want to sell. They offer a wide range of options, from t-shirts and hoodies to mugs and phone cases. You can also upload your own custom designs and have them printed on the products.
Once you’ve chosen your products and uploaded your designs, you can set your own prices and determine the markup that you want to add on top of Midwestern Merch’s base prices. This will allow you to make a profit on each sale.
Before your products go live, Midwestern Merch will send you samples of each item to ensure that they meet your quality standards. Once you’ve approved the samples, your products will be available for sale on Midwestern Merch’s platform. You can also choose to add them to your own website or other selling channels.
When a customer places an order for one of your products, Midwestern Merch will handle all of the fulfillment and shipping. They’ll pick and pack the items, apply any custom packaging or inserts that you’ve designed, and ship them out to the customer. You won’t have to worry about any of the logistics – Midwestern Merch takes care of everything.
So, if you’re ready to start your own merch line and make some profit selling your own designs, follow these steps to sign up with Midwestern Merch and get started!
| Step | Description |
|---|---|
| Step 1 | Go to the Midwestern Merch website and click on the “Sign Up” button. |
| Step 2 | Fill in your name, email address, and create a password. |
| Step 3 | Choose whether you want to use the main design platform or the back-end API. |
| Step 4 | Browse through the available products and select the ones you want to sell. |
| Step 5 | Upload your own custom designs or use the design tools provided by Midwestern Merch. |
| Step 6 | Set your own prices and determine the markup for each product. |
| Step 7 | Review and approve the samples of your products. |
| Step 8 | Your products will now be available for sale on Midwestern Merch’s platform. |
Step 2
After you have come up with a design for your own merchandise, the next step is to pick a platform where you can sell your products. There are several options available for selling your merch online, each with its own pros and cons. Here are three of the most popular platforms:
1. YouTube: If you already have a YouTube channel with a good number of followers, this could be a great platform to sell your merch. You can create a video showcasing your merchandise and provide a link in the video description for your viewers to purchase. YouTube also has a built-in merch shelf feature that allows you to display and sell your products directly on your channel.
2. Online Marketplaces: There are many online marketplaces where you can sell your custom merchandise, such as Etsy, eBay, and Redbubble. These platforms have a large customer base and are easy to set up. You can list your products, including images and descriptions, and set your own prices. However, keep in mind that there might be fees and competition from other sellers.
3. Print-on-Demand Services: Print-on-demand services, like Printful and Teespring, allow you to create and sell your own merchandise without the need for inventory. You simply create your designs, upload them to the platform, and choose the items you want to sell (e.g., t-shirts, hoodies, mugs). The platform takes care of the printing, packaging, and shipping, and you earn a profit from each sale, after deducting the platform’s fees and the cost of the merchandise.
Before deciding on a platform, consider factors such as the size of your audience, the ease of use, the fees involved, and whether or not the platform offers any additional features that align with your goals. It’s also a good idea to do some research and read reviews or testimonials from other sellers who have used the platform.
Once you’ve chosen a platform, the next step is to sign up and create an account. After that, you can start designing your merchandise, upload your designs, and create product listings. Remember to consider factors such as your target audience, current trends, and the line of products you want to offer. You can also consider offering limited edition or exclusive designs to create a sense of urgency and exclusivity among your customers.
This step is crucial as it sets the foundation for your merch business. Mullin it over and make sure you choose the platform that best suits your needs and goals.
Pick a Product
When it comes to selling your own merchandise, the first step is to pick a product that you want to design and sell. This could be a t-shirt, hoodie, hat, phone case, or any other item that you think your followers or customers would be interested in purchasing.
Before you pick a product, it’s important to consider your branding and the message you want to convey through your merch. Think about what design or logo will represent your brand effectively. For example, if your channel or online presence is focused on politics, you might want to design liberal or progressive-themed items. On the other hand, if your focus is more on lifestyle or entertainment, you could go for a design that’s more fun or light-hearted.
Once you have a few ideas for a design, it’s time to pick a platform or online store where you can create and sell your merch. There are many platforms to choose from, such as Printful, Custom Ink, Teespring, and more. Research each platform to see which one offers the best pricing, quality, and fulfillment options for your needs.
After you’ve picked a platform, it’s time to enter your design and customize your merchandise. Most platforms will have an easy-to-use online design maker that allows you to upload your logo or design, choose the placement, and even add text or additional graphics if desired. Take your time and make sure you’re happy with the design before moving on.
Once you’re satisfied with the design, it’s time to order samples of your merchandise. This step is important because it allows you to see and feel the quality of the products before selling them to your customers. Make sure to order a few different items in different sizes to ensure that you’re happy with the fit and overall look of your merchandise.
After you’ve reviewed the samples and made any necessary adjustments, it’s time to start selling your merch! Sign up for an account on the platform you’ve chosen and set up your online store. Create product listings with high-quality photos and enticing descriptions to attract customers. You can even offer special promotions or bundles to encourage sales.
When it comes to pricing your merchandise, it’s important to consider both the cost of production and the profit you want to make. Research similar products and see what price range they fall into, then determine your markup accordingly. Keep in mind that a higher markup may result in higher profits, but it could also affect customer demand. Find a balance that works for you and your customer base.
Now that you have the steps to follow, go ahead and start designing and selling your own merch! Whether it’s to support your favorite political cause or to make a profit, having your own line of merchandise can be a fun and rewarding venture.
Sources: Politico, Mullin, Yellen
Step 3
Once you have a design in mind for your merch, it’s time to turn that idea into a tangible product. Before you start selling, you’ll need to pick a platform to sell your merch on. There are many options available, whether you’re selling online or offline. You can choose to sell on your own website, through a third-party platform like Etsy or Shopify, or even through social media channels like Instagram or Facebook.
When choosing a platform, consider factors like ease of use, customer reach, and fees or costs associated with selling your products.
After you’ve chosen a platform, it’s time to apply your design to the merchandise. You can use a custom merch maker to create items like t-shirts, hats, or even phone cases with your design. Many online merch makers make it easy to upload your design, choose the type of product you want to sell, and place an order.
Once you have your merchandise ready, the next step is to set a price for your products. You’ll want to consider factors like the cost of production, any applicable taxes or fees, and the profit margin you want to make. It’s important to factor in these costs to ensure you’re making a profit from your sales.
Now that you have your products ready and priced, it’s time to start selling your merch. One effective way to promote your merch is through social media channels. You can showcase your products on platforms like Instagram or Facebook, and even create a YouTube channel to share videos or samples of your merch.
Another way to promote your merch is by collaborating with influencers or your own followers. You can send free merch to influencers in exchange for them promoting your products to their followers or have giveaways on your social media platforms.
Once you start receiving orders for your merch, you’ll need to think about fulfillment. This is the process of packaging and shipping your products to your customers. You can either handle fulfillment yourself or work with a fulfillment service that takes care of this for you.
Moving forward, it’s important to listen to customer feedback and make improvements to your merch or customer service based on their input. This will help you build a loyal customer base and ensure repeat sales.
Remember, starting your own merchandise line is a journey. It may take time to build up your brand and customer base, but with persistence and dedication, you can create a successful merch business without relying on politics or current events. After all, your fans and customers are more interested in the design and quality of your merch than in your political stance or affiliations.
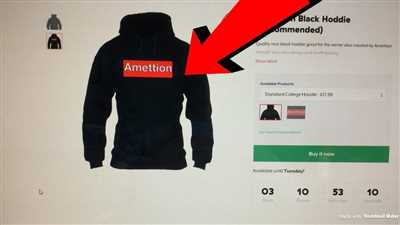
Apply a Design
Once you have your own merchandise line ready, it’s time to apply a design to your products. This step is crucial as it is what will attract customers and make your merchandise stand out. Follow these steps to design and apply your own custom logo:
| Step 1: Designing your Logo |
| Start by brainstorming ideas for your logo. Consider the main theme of your channel or brand and what image or symbol represents it best. Make sure the design is relevant to your target audience and portrays your brand’s identity. If you’re not confident in your design skills, you can also hire a professional logo maker to create a unique logo for you. |
| Step 2: Creating Product Samples |
| Before ordering a large number of products, it’s a good idea to create a few samples first. This will allow you to review the design and make any necessary adjustments before mass production. You can start with three to five samples to test the market and get feedback from your followers. |
| Step 3: Applying the Design |
| Once you’re satisfied with the design, choose an online platform or service that offers custom merchandise printing and fulfillment. There are many options available, such as Printful, CustomInk, and Printify. Sign up for an account and follow their instructions to upload your logo and select the products you want to apply the design to. |
| Step 4: Pick Your Sales Channel |
| Decide where you want to sell your merchandise. You can sell directly from your website or use popular online marketplaces like Etsy, Amazon, or eBay. Each platform has its own pros and cons, so do some research to determine which one aligns best with your goals and target audience. |
| Step 5: Marketing and Selling Your Merch |
| After your products are ready for sale, it’s time to market and promote them to your audience. Use your social media channels to create buzz and attract potential customers. Consider running ads or collaborating with influencers in your niche to reach a wider audience. Monitor your sales and customer feedback to improve your merch line and maximize your profit. |
Follow these steps to apply a design to your own custom merchandise. Remember that designing and selling merch is more than just a creative endeavor – it’s a business. Make sure to consider the economics and politics in your region and target audience for a successful merch line.
Step 4: Applying Your Design and Selling Your Merchandise
Once you have completed the first three steps of designing your own merch, it’s time to apply your design and start selling your items. Here are the five steps to follow:
1. Sign up and enter a platform: There are many online platforms that allow you to sell your custom merchandise without the need for a physical store. One example is the popular website Shopify. Sign up to create an account and enter the digital marketplace where you can showcase your products.
2. Pick a product: Choose the main product or products that you want to sell. You can offer a variety of items, such as t-shirts, hoodies, mugs, or phone cases. Pick the ones that best fit your design and target audience.
3. Apply your design: Upload your custom design to the platform. Make sure the design is aligned correctly and that it fits the product you have chosen. You may need to adjust the size and position of the design before it is ready for sale.
4. Set your markup and profit: Decide on the price markup for your products. This is the amount you will add to your manufacturing cost in order to make a profit. Consider factors like production costs, shipping fees, and your desired profit margin. It’s important to find a balance that allows you to make a profit while keeping your prices competitive.
5. Fulfillment and sale: After setting up your product and pricing, it’s time to start selling. Customers can visit your online store, browse your products, and make a purchase. The platform will handle the processing of the order, production of the merchandise, and shipping to the customer. You can track the progress of each sale and receive notifications when an order is placed.
Applying your design and selling your own merch has never been easier with the help of online platforms. Whether you have a YouTube channel, a social media following, or you’re a political influencer like Senator Elizabeth Warren or former President Donald Trump, creating and selling your own merchandise allows you to monetize your brand and connect with your audience on a deeper level.
Remember, the key to successful selling is to create high-quality designs that resonate with your target market. Take your time to choose the right merchandise, design your logo or artwork, and set your prices. With a little effort and strategic planning, you can start making a profit from your own line of merchandise!
Order Samples
Before moving forward with designing your own merchandise, it’s important to order samples. Ordering samples is a crucial step in the process, as it allows you to evaluate the quality of the products before selling them to your customers.
There are several sources where you can order samples. One of the most popular sources is online merchandise platforms such as Mullin or Prose. These platforms offer a wide variety of customizable products that you can choose from.
Here are the steps to order samples:
- Enter the platform where you want to order samples from. Whether it’s Mullin or Prose, make sure to sign up for an account first.
- Pick the type of product you want to order samples for. You can choose from items like t-shirts, hoodies, mugs, or hats.
- Select the design or logo that you want to apply to the samples. If you don’t have a design yet, you can either hire a designer or use a design maker tool available on the platform.
- Decide how many samples you want to order. It’s usually recommended to start with a smaller quantity, like five items, before placing a larger bulk order.
- Add the samples to your cart and proceed to the checkout process. Make sure to check if there are any additional fees or markups applied.
- Enter your shipping and billing information and complete the order.
- After you receive the samples, evaluate their quality and check if they meet your expectations. Pay attention to the printing, fabric, and overall craftsmanship.
- If you’re satisfied with the samples, you can start selling your own merch! If not, consider making changes to the design or exploring other sources for samples.
Ordering samples is an essential step that allows you to ensure the quality of your merchandise and make any necessary adjustments before selling them to your customers. It’s an easy and straightforward process that can help you kickstart your own merch business!
Step 5
Once you have your own merch designs ready, it’s time to start selling them. One of the easiest ways to do this is by creating an online store on a platform like Shopify or Etsy. These platforms allow you to easily set up your own store, choose a custom domain name, and start listing your products.
Before you start selling, it’s important to pick the right platform for your business. Do some research and compare different platforms to find the one that best fits your needs. Consider factors such as pricing, ease of use, and the features they offer.
After you’ve chosen a platform, follow the steps to sign up and create your store. Enter all the necessary information, including your logo and product descriptions. Take high-quality photos of your merchandise to showcase them in the best possible way.
It’s also a good idea to order samples of your products before you start selling. This will allow you to check the quality and make any necessary adjustments to your designs or product descriptions. Don’t rush this step; it’s important to ensure that your customers will receive high-quality merchandise.
Once you’re ready to start selling, make sure to promote your store and products. Utilize social media platforms like Instagram, Facebook, and Twitter to reach a wider audience. You can also consider starting a YouTube channel where you can showcase your designs and give your followers a behind-the-scenes look at your merch-making process.
When it comes to pricing your products, consider factors such as the cost of materials, production, and any platform fees. Remember to also include a markup to ensure that you make a profit. Research the market and see what similar products are selling for to get an idea of a competitive price point.
As your merch business continues to grow, don’t be afraid to expand your product line. Offer different items, such as shirts, hats, or accessories, to cater to a wider audience. Keep an eye on the latest trends and incorporate them into your designs, but also stay true to your own style and brand.
Fulfillment is another important aspect to consider. Decide whether you want to handle the process yourself, or use a fulfillment service. Fulfillment services can take care of the packaging and shipping of your products, allowing you to focus on the creative side of your business.
In conclusion, making and selling your own merchandise can be a progressive and profitable venture. By following these steps, you can turn your merch-making hobby into a successful business. So get started, and embrace your creativity in the world of merch!
Sell Custom Merch Online
If you have your own merchandise or would like to create custom products to sell online, there are several easy steps you can follow to get started. Whether you are a YouTube influencer, a progressive political pundit, or a midwestern mom with a knack for design, selling your own merch can be a profitable venture.
Step 1: Designing Your Products
The first step in selling custom merchandise online is designing your products. This can include creating a unique logo or artwork that represents your brand or message. You can use design software or hire a graphic designer to help bring your vision to life. Once your designs are ready, you’re ready to move on to the next step.
Step 2: Choosing an Online Platform
After you have your designs ready, it’s time to choose an online platform to sell your custom merch. There are many popular platforms available, such as Shopify, Teespring, and Printful. These platforms offer easy-to-use interfaces and fulfillment services, making it simple to create an online store and start selling your products.
Step 3: Setting Up Your Online Store
Once you’ve chosen a platform, you’ll need to set up your online store. This involves entering your product information, setting prices, and adding product descriptions and images. You can also apply your own markup to the products to ensure a profit. Make sure to include high-quality images and engaging product descriptions to attract customers.
Step 4: Ordering Samples
Before moving forward, it’s a good idea to order samples of your products to ensure their quality. This will also help you make any necessary adjustments before putting them up for sale. You can also use these samples for promotional purposes or as giveaways to your followers.
Step 5: Fulfillment and Shipping
Once you start making sales, the fulfillment and shipping process will be handled by the platform you’re using. They will pick, pack, and ship the items to your customers on your behalf. This makes the selling process easy and efficient, allowing you to focus more on marketing and growing your brand.
Selling your own custom merch online can be a great way to monetize your brand or passion. Follow these simple steps to get started and join the ranks of entrepreneurs like Paulmullin, who started their own merch lines and turned them into successful businesses. With the right platform, product design, and marketing strategy, you can start selling custom merch online and make a profit without all the hassle of setting up your own physical store.
8 Enter Your Profit Markup For Your Custom Merch
Once you have completed all the previous steps of designing and setting up your own custom merchandise, it’s time to determine your profit markup. The profit markup is the amount of money you want to make from each sale of your merchandise, above and beyond the cost of production.
Before deciding on your profit markup, it’s important to consider a few factors. First, think about the price range that your target audience is willing to pay for your merchandise. Research similar products and see what price points they are selling at. This will give you an idea of what is reasonable for your own merchandise.
Next, take into account the cost of production for your custom merchandise. This includes the cost of materials, printing or production fees, and any other expenses associated with creating your products. You’ll want to ensure that your profit markup is enough to cover these costs and provide you with a profit.
Consider also the current market trends and demand for your merchandise. If your custom merchandise is related to a popular trend or topic, you may be able to sell it at a higher price point. On the other hand, if your merchandise is more niche or targeted to a specific audience, you may need to competitively price it to attract customers.
Once you have considered these factors, you can determine your profit markup. This is typically a percentage added to the cost of production. For example, if the cost of producing your custom merchandise is $10, and you want to make a 50% profit, you would set your profit markup at $5.
There are various online platforms and tools that can help you calculate your profit markup. Some merchandise makers have built-in profit markup calculators that can automatically determine the price for your custom merchandise based on your desired profit margin.
When entering your profit markup, make sure to apply it consistently across all of your products. This will ensure that you’re making a profit on each item you sell, rather than losing money on some items and making more on others.
After setting your profit markup, you can proceed with fulfilling customer orders. Whether you choose to handle fulfillment yourself or use a third-party fulfillment service, make sure to keep track of your profit margins and adjust your pricing strategy if necessary.
In summary, determining your profit markup for your custom merchandise is an important step in making your own merch. Consider factors such as target audience, production costs, market trends, and demand when deciding on your profit margin. Use online tools and platforms to help you calculate your profit markup, and ensure consistency in your pricing strategy. By following these steps, you can start selling your custom merch and building your own brand!
Sources
If you’re thinking about starting your own merchandise line or selling custom products online, there are several sources you can turn to for help. Whether you want to design your own logo, pick the items you want to sell, or find a platform to fulfill your orders, these sources can make the process easier for you.
1. Merch by Amazon: This platform allows you to upload your own designs and sell them as products on Amazon. You don’t have to worry about inventory or fulfillment – Amazon takes care of that for you. Simply apply to become a merch seller, and once approved, you can start selling your designs to a wide customer base.
2. Print-on-Demand Services: Websites like Printful, Printify, and Redbubble allow you to create and sell your own merchandise without having to manage inventory. They have a wide range of products, from t-shirts and hoodies to mugs and phone cases, that you can customize with your designs. When a customer places an order, the service prints and ships the product directly to them.
3. E-commerce Platforms: If you want to have complete control over your online store, you can use e-commerce platforms like Shopify, WooCommerce, or BigCommerce. These platforms provide you with the tools to set up your own store, manage orders, and accept payments. You can also integrate them with print-on-demand services to automate the fulfillment process.
4. YouTube Channel: If you already have a YouTube channel with a decent number of followers, you can leverage your audience to sell your merchandise. There are several ways to do this, such as promoting your products in your videos, linking to your store in the description, or even doing giveaways to increase engagement and sales.
5. Social Media: Social media platforms like Instagram, Facebook, and Twitter can also be great channels for promoting and selling your merchandise. Create engaging posts with high-quality images of your products, provide links to your store, and engage with your followers to build a loyal customer base.
Remember, before you start selling your own merch, make sure you research and understand the legal and copyright implications, especially if your designs include copyrighted characters or logos. Following these steps will help you get started on the right track to building your own profitable merchandise line without breaking the law.


