

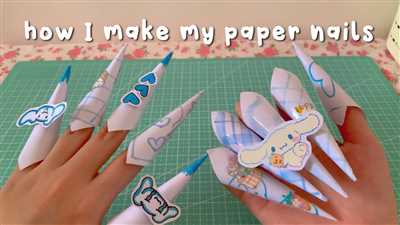
If you’re tired of the same old nail polish and want to try something new and unique, then paper nails might be just the thing for you. Paper nails are a clear and common way to create custom nail designs using waterslide decals. With a few simple steps, you can have a whole new set of nails that will have people wondering how you made them.
The first step in making paper nails is to gather all the necessary materials. You will need a printer, an inkjet printer is recommended, as well as waterslide decal paper. You can find this paper at most craft stores and online. Once you have everything you need, it’s time to get to work.
Start by creating the design or image you want to use for your nail decals. This can be done using any graphic design software or even just a simple program like Microsoft Paint. Make sure to measure the size of your nails with a ruler, so you know how big to make the decals.
After you have the design ready, it’s time to print it out onto the waterslide decal paper. Follow the printer settings recommended by the decal paper manufacturer to ensure the best results. Once the decals are printed, let them dry for a few minutes to ensure the ink has fully set.
Now you can start applying the decals to your nails. First, make sure your nails are clean and free of any polish or oils. Then, cut out the decals and place them in a bowl of water. The decals will start to separate from the backing, making them easier to apply. Gently pick up a decal using a pair of tweezers and slide it onto your nail, making sure to press it down firmly to remove any air bubbles.
Once all the decals are applied, let them dry for a few minutes. You can speed up the drying process by using a hairdryer on the cool setting. After the decals are dry, apply a clear coat of nail polish to seal them in place. This will help them last longer and protect the design.
And there you have it, your very own paper nails! These unique nail decals are a fun and different way to express yourself and create one-of-a-kind designs. So go ahead and give it a try, and see why paper nails are becoming a popular trend in the world of nail art.
Fungal Nail Infections
Fungal nail infections, also known as onychomycosis, are a common condition that affects many people around the world. When a fungal infection occurs, it can cause the nails to become discolored, thickened, and brittle. The fungus thrives in warm and moist environments, like swimming pools, locker rooms, and showers, making it easy for the infection to spread.
There are different types of fungal nail infections, and they can be caused by several species of fungi. Dermatophytes, yeasts, and molds are the most common culprits. These fungi can enter the nail through small cuts or separation between the nail and the nail bed.
The symptoms of a fungal nail infection can vary, but some common signs include discoloration of the nail, thickening or crumbling of the nail, and a distorted shape. In some cases, the infection can cause pain, especially when pressure is applied to the affected nail.
Diagnosing a fungal nail infection usually requires a visit to a dermatologist. The dermatologist will examine the nail and may take a sample for analysis in a laboratory. Once a diagnosis is confirmed, the dermatologist can recommend appropriate treatment options.
Treatment for fungal nail infections can include topical antifungal creams or oral medications. In some cases, the infected nail may need to be removed so that antifungal medications can be applied directly to the affected area. It is important to note that treating a fungal nail infection can take a long time, often several months, as nails grow slowly.
Preventing fungal nail infections is key, and there are several steps that people can take to reduce their risk. Keeping the feet clean and dry, avoiding walking barefoot in public areas, wearing breathable shoes, and regularly changing socks can all help prevent fungal infections.
In conclusion, fungal nail infections are a common condition that can be caused by different types of fungi. It is important to visit a dermatologist for a proper diagnosis and to follow their recommended treatment plan. By taking preventive measures, such as keeping the feet clean and dry, people can reduce their risk of developing a fungal nail infection.
How To Make And Apply Waterslide Decals To Nails
Waterslide decals have become a very popular and trendy way to decorate nails. People like them because they are easy to apply and can create unique designs that are not possible with traditional nail polish. In this tutorial, we will show you how to make your own waterslide decals and apply them to your nails.
To make waterslide decals, you will need a few materials. Here is a list of everything you will need:
- A color inkjet printer
- Clear waterslide decal paper
- Scissors
- A ruler
- A bowl of room-temperature water
- A nail file
- A matte top coat
First, you will need to create and print the images for your decals. You can use any image or design that you like. Just make sure that it is sized to fit your nails. Set your printer to the appropriate settings for printing on decal paper.
Once your images are printed, cut them out with scissors. Leave a small margin around the design to ensure that the decal will cover the entire nail. You can use a ruler to help you cut straight lines.
Now it’s time to prepare the decal for application. Fill a bowl with room-temperature water and place the decal in the water. Let it sit for a few seconds, or until the decal starts to slide off the backing paper.
While your decal is soaking, prepare your nails. Make sure they are clean and free of any oils or lotions. Use a nail file to shape and smooth the surface of your nails.
Once your decal is ready, carefully remove it from the water and slide it onto your nail. You can use tweezers or your fingers to help position it. Press down gently to remove any air bubbles or wrinkles.
After the decal is applied, let it dry completely. This usually takes a few minutes. Once dry, apply a coat of matte top coat to seal the decal and give your nails a finished look.
Waterslide decals can last for up to two weeks on your nails, depending on how well you take care of them. To ensure longevity, avoid harsh chemicals and excessive moisture.
In summary, creating and applying waterslide decals to your nails is a fun and creative way to express yourself. With just a few materials and some patience, you can have beautiful and unique nail designs that will impress everyone you meet.
Matte Evergreen Nails
If you’re looking for a unique and eye-catching nail design, matte evergreen nails are a perfect choice. These nails are not only beautiful but also easy to create with just a few simple steps. Whether you’re attending a holiday party or simply want to show off your personal style, matte evergreen nails are sure to turn heads.
To create matte evergreen nails, you’ll need the following items:
- Water
- A clear nail polish
- Matte nail polish in an evergreen shade
- Nail decals or inkjet decals
- A printer with matte settings
- A ruler
Start by ensuring your nails are clean and free from any oils or lotions. This will help the nail polish adhere better and last longer. You can use a cotton pad soaked in nail polish remover to cleanse the nails.
If you are using nail decals, follow the instructions provided with the decals to apply them. If you are using inkjet decals, you will need to print the images onto the decal paper using a printer with matte settings. Make sure to cut out the decal images and remove any excess paper around them.
Once your nails are prepped and the decals are ready, apply a clear base coat to your nails. This will help protect your nails and give the nail polish a smooth surface to adhere to.
Next, apply two coats of the matte evergreen nail polish. Let each coat dry completely before applying the next one. The matte finish will give your nails a unique and sophisticated look.
When the nail polish is dry, dip the decal into water for a few seconds and then carefully slide it off the backing paper. Place the decal onto your nail and press it down gently with a clean object, like a ruler or the end of a pen. Make sure to remove any excess water or air bubbles from under the decal.
Once all the decals are placed onto your nails, apply a top coat of clear nail polish to seal in the decals and give your nails a glossy finish. This will also help the decals last longer and prevent them from peeling or getting damaged.
Matte evergreen nails are a great way to express your creativity and stand out from the crowd. Whether you’re a nail art enthusiast or just like to have fun with your manicures, these nails are sure to impress. So, why not give them a try and add a touch of elegance and sophistication to your look?
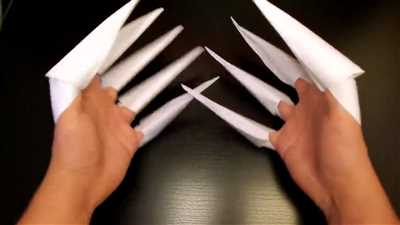
How to Make Paper Claws
To make paper claws, you will need a few materials:
- Water-slide decals or printer decals
- Dermatol or clear-coat
- A ruler
- A matte object or hayes mat
- Origami paper in different colors
- A pair of scissors
- A pen or pencil
First, start by selecting the origami paper you want to use for your claws. Choose colors that speak to your unique style and personality. Cut the paper in half, and fold it in half again lengthwise. Use a ruler to measure and mark the center of the folded paper.
Next, you’ll need to create the claw shape. Start from the center point you marked earlier and draw a diagonal line towards one corner of the folded paper. Repeat this step on the other side, creating a triangle shape. Cut along the lines you drew, and when you unfold the paper, you will have a unique claw shape.
Now, it’s time to apply the decals. Water-slide decals work best for this project. Cut out the decal you want to use and place it in water for a few seconds. Once the decal has become pliable, remove it from the water and carefully place it on the claw. Gently press the decal onto the paper, smoothing out any wrinkles or air bubbles.
If you are using printer decals, you will need to apply them slightly differently. Follow the instructions on the decal packaging to print the decals using your inkjet printer. Once your decals are printed, cut them out and apply a clear-coat of dermatol onto the paper claws. This will help protect the decal and keep it in place.
After you have applied the decals, let the claws dry completely. This usually takes a few minutes. Once the claws are dry, you can wear them just like you would wear regular acrylic or gel nails. If you want to make your claws last longer, you can even apply a matte clear-coat over the whole nail surface for added protection.
Now, you may be wondering why someone would choose paper claws over traditional nail options. Well, there are a few reasons. First, making paper claws can be a fun and creative project. It’s like a mini-art project that you can wear on your fingertips. Second, paper claws are easier to remove than traditional nails. If you get tired of the design or want to switch it up, simply peel off the decal and you’re back to your natural nails. Finally, paper claws are a great option for people who have concerns about nail infections or fungal issues. Since the claws are made out of paper, there is no risk of trapping moisture underneath and causing infections.
So, the next time you have a meeting, a party, or just want to try something different with your nails, why not give paper claws a go? This unique and innovative trend is sure to turn heads and spark conversations. Plus, you can unleash your creativity and make claws that are truly one-of-a-kind!
Why see a dermatologist
When it comes to nail care, many people think that they can handle it on their own. However, there are certain situations where it is important to see a dermatologist.
One common issue that may require a visit to a dermatologist is fungal infections. Fungal infections can cause your nails to become discolored, thickened, or brittle. If left untreated, they can spread to other nails and even onto the surrounding skin. A dermatologist can properly diagnose the infection and provide appropriate treatment.
Another reason to see a dermatologist is if you notice any changes in your nails that could indicate a more serious underlying condition. For example, if you have suddenly developed pits or ridges in your nails, it could be a sign of a systemic disease like psoriasis or lupus. A dermatologist can help identify and manage these conditions.
Some people may also choose to see a dermatologist for cosmetic reasons. If you’re unhappy with the appearance of your nails, a dermatologist can offer solutions to improve their appearance. This could include treatments for brittle nails, repairing damaged or split nails, or even rejuvenation procedures to make your nails look healthier and more youthful.
Additionally, a dermatologist can provide guidance on proper nail care and prevention. They can recommend the best techniques and products for maintaining healthy nails, and offer advice on how to avoid common issues like nail infections or damage from frequent polish application.
Overall, seeing a dermatologist for your nail concerns can help ensure that you receive the proper care and treatment. They have the expertise and knowledge to address both medical and cosmetic concerns, and can work with you to create a treatment plan that fits your individual needs.


