

If you’re looking to add a touch of elegance to your home, building a mirror frame is a simple and cost-effective way to do it. With just a few materials and some basic woodworking skills, you can create a stunning frame that will beautifully complement any mirror.
The first step in building your mirror frame is to gather your materials. You’ll need a piece of lumber for the frame, as well as some wood glue, polyurethane, and sandpaper. If you’re going for a more modern look, you can also use metal or plastic instead of wood. Make sure to measure the size of your mirror so you know what size to cut your lumber.
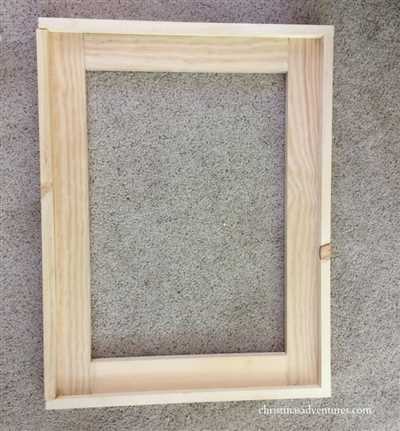
Once you have your materials ready, it’s time to start building. Begin by cutting your lumber into four pieces to create the frame. You can choose to miter the corners for a more professional look, or simply butt joint the pieces together if you prefer a simpler style.
Next, sand the edges of the lumber to remove any splinters or rough spots. If your lumber is old or weathered, you may need to use a rougher grit sandpaper to remove any stains or imperfections. After sanding, wipe away any dust or debris with a damp cloth.
Now it’s time to stain or paint your frame. You can use a wood stain, like Minwax, to enhance the natural beauty of the wood. Alternatively, you can paint the frame to match your existing furniture or decor. Apply the stain or paint according to the manufacturer’s instructions, and allow it to dry completely before moving on.
Once your frame is dry, it’s time to attach it to the mirror. Lay the mirror face down on a soft, clean surface, and carefully place the frame on top. Use wood glue or another strong adhesive to secure the frame to the mirror, making sure to press firmly and evenly. Allow the glue to dry completely before flipping the mirror over.
Finally, seal the edges of the frame with a clear polyurethane to protect the wood and give it a finished look. Apply the polyurethane with a brush or sponge, following the manufacturer’s instructions. Allow the sealant to dry completely before hanging the framed mirror on your wall.
And there you have it – a unique and modern mirror frame that you built yourself! Not only does this DIY project save you money, but it also allows you to customize the frame to fit your personal style. Whether you’re going for a classic look or something more contemporary, you’ll love the way your new mirror frame adds a touch of elegance to any room in your home.
How To Frame a Mirror
Framing a mirror is a simple and cost-effective way to give your home a unique, modern look. With just a few tools and materials, you can transform an old, plain mirror into a stylish statement piece. In this step-by-step guide, you’ll learn how to build a mirror frame that is not only functional but also adds beauty to any space.
Step 1: Measure the Size
Start by measuring the size of your mirror. This will determine the dimensions of the frame. Make sure to measure both the height and width.
Step 2: Remove the Mirror from its Sealing
Once you have the measurements, carefully remove the mirror from its sealing. Use caution to avoid any damages to the mirror.
Step 3: Sand the Wood
Sand the wood that will be used for the frame. This will ensure a smooth surface for staining or painting.
Step 4: Cut the Lumber
Using a mitered saw or a miter box, cut the lumber into four pieces, each with a 45-degree angle at each end. These will be the corners of the frame.
Step 5: Assemble the Frame
Apply wood glue to the mitered ends of the lumber and then join them together to form the frame. Use clamps to hold the pieces in place while the glue dries.
Step 6: Sand the Frame
Once the frame is assembled, use sandpaper to sand any rough edges or imperfections. This will give the frame a polished look.
Step 7: Stain or Paint the Frame
Apply a stain or paint of your choice to the frame. This will enhance the wood’s natural beauty or match your existing home decor. Allow the stain or paint to dry according to the product instructions.
Step 8: Apply Polyurethane
For added protection and a glossy finish, apply a coat of polyurethane to the frame. This will also help seal the wood and prevent any future damage.
Step 9: Attach the Frame to the Mirror
Using a strong adhesive, attach the frame to the mirror. Be sure to align the frame properly with the mirror edges for a seamless look.
Step 10: Install the Mirror
Finally, install the framed mirror in your desired location. If needed, secure it to the wall using screws or other appropriate hardware.
By following these simple instructions, you’ll be able to create a beautiful mirror frame for your home without spending a fortune. Whether you prefer a modern or a more traditional look, framing a mirror is a DIY project that can be completed in just a few hours. So why wait? Start building your mirror frame and enjoy the stunning transformation it brings to your space.
Egg Carton Flower Frame
If you’re looking for a unique and modern way to frame your mirror, then this Egg Carton Flower Frame is just what you need. Not only is it a cost-effective means of adding a good look to your home, but it is also a simple and fun DIY project.
Here’s how to build this one-of-a-kind frame in just a few easy steps:
Step 1: Measure and cut the lumber
First, measure the size of your mirror and cut four pieces of lumber to fit. These will be the four sides of your frame. Make sure to miter the ends at a 45-degree angle to create a seamless corner.
Step 2: Sand and stain the wood
Next, sand down the rough edges of the wood using sandpaper. Then, apply a coat of Minwax stain to give the wood a beautiful finish. Let it dry according to the instructions on the can.
Step 3: Build the frame
Once the stain is dry, use wood glue and clamps to assemble the frame. Start by attaching the bottom piece to the two side pieces. Then, attach the top piece. Make sure everything is aligned and secure. Let the glue dry completely.
Step 4: Prepare the egg carton flowers
While the frame is drying, cut out flower shapes from an old egg carton. You’ll need about 30 flower petals. Remove any labels or stickers that are already on the carton.
Step 5: Paint and seal the flowers
Paint the flower petals using acrylic paint in any colors you like. Once the paint is dry, seal the petals with a coat of polyurethane to protect them and give them a glossy finish.
Step 6: Attach the flowers to the frame
Using hot glue or a strong adhesive, attach the flowers to the top corner of each side of the frame. Arrange them in a flower-like pattern, overlapping the petals to create depth. Allow the glue to dry completely before moving the frame.
And there you have it – a beautiful and unique Egg Carton Flower Frame for your mirror. This DIY project is not only a great way to add a personalized touch to your home decor, but it also gives new life to old materials and is budget-friendly. Enjoy!
how to build a simple modern mirror frame for only 30 dollars
If you’re looking for a unique and modern mirror frame to enhance the look of your home, building one yourself can be a great option. Not only will this save you money, but it also allows you to customize the frame to your liking. In this guide, we’ll show you how to build a simple modern mirror frame for just 30 dollars.
Here’s what you’ll need:
- 1 piece of lumber (already cut to the size you want your frame to be)
- Sandpaper for sanding the wood
- Minwax stain in your desired color
- Polyurethane for sealing the frame
- Mitered corner brackets
- Wood glue
- A mirror
Step 1: Sand the wood – Start by sanding the wood piece to ensure a smooth and even surface. This will help the stain to adhere properly and give the frame a good finish.
Step 2: Stain the wood – Apply a coat of Minwax stain to the wood using a clean cloth or a brush. Make sure to follow the instructions on the stain can and allow it to dry completely. Apply a second coat if desired for a darker color.
Step 3: Seal the wood – Once the stain has dried, apply a coat of polyurethane to seal the wood. This will protect the frame from any damage and give it a shiny finish. Allow it to dry completely before moving on to the next step.
Step 4: Assemble the frame – Place the four pieces of wood together to form a rectangle. Use wood glue to secure the corners and hold them in place. You can also use mitered corner brackets for extra support. Let the glue dry completely.
Step 5: Attach the mirror – Once the frame is fully dry, place the mirror inside the frame and secure it using mirror clips or adhesive. Make sure the mirror is centered and level.
Step 6: Final touches – If desired, you can add some decorative elements to the frame, such as flowers or other embellishments. This will give the mirror a more personalized touch.
And there you have it! By following these simple steps, you can build a modern mirror frame for just 30 dollars. Not only will you save money, but you’ll also have a one-of-a-kind piece that adds a stylish touch to your home.
1 Remove the old frame
If you’re planning to build a new mirror frame, the first step is to remove the old frame. This means taking apart the pieces that were already framed around your mirror. Use a screwdriver or a flat tool to carefully remove the frame from the mirror.
Once the old frame is removed, you’ll need to sand the surface to make it smooth and ready for the new frame. Use sandpaper with a medium grit to sand the edges and corners of the mirror. Be sure to sand evenly and in circular motions to avoid any scratches or uneven surfaces.
If there are any leftover stains or blemishes on the mirror, you can use a gentle cleaner or a mixture of warm water and mild soap to remove them. Rinse the mirror thoroughly and let it dry completely before continuing with the next step.
Before you start building the new frame, measure the size of your mirror to ensure a perfect fit. Use a measuring tape to determine the length and width of the mirror, and then add a few additional inches to account for the frame. This will give you the dimensions you need to cut the lumber or other materials for the frame.
If you want a unique and modern frame design, you can choose to go with a mitered corner frame. This style involves cutting the frame pieces at a 45-degree angle to create clean and seamless corners. However, if you prefer a simple and straightforward frame, you can opt for a standard straight-cut design instead.
Once you have your lumber or other materials cut to size, you can begin sanding and staining them. Sand the edges and surfaces of each piece to smooth out any rough spots or imperfections. Then, apply a coat of wood stain using a brush or a rag. Allow the stain to penetrate the wood for a few minutes, and then wipe off any excess with a clean cloth. Let the stain dry completely before proceeding.
To ensure that your frame is protected and well-sealed, apply a layer of polyurethane or another sealant. This will help prevent scratches and moisture damage. Follow the instructions on the sealant product for the best results.
With the bottom piece of the frame as the base, start assembling the frame around the mirror. Use wood glue or screws to secure the corners and edges together. Make sure that the frame fits tightly and securely around the mirror.
These instructions only cover the basic steps for building a mirror frame. Depending on your style and preferences, you can add decorative elements such as baseboards, flower designs, or even a unique shape like an egg or a doll. The cost of materials for this project can vary, but you can expect to spend around 30 dollars for lumber and other supplies if you’re building a simple frame.
Once you’re done building and framing your mirror, you can hang it up in your home and enjoy the fresh new look. You’ll be proud of the unique and modern mirror frame that you created with your own hands.
2 Measure your mirror
Before you start building your mirror frame, you need to measure the size of your mirror. This step is crucial to ensure that your frame fits perfectly and looks well-proportioned.
Grab a tape measure and carefully measure the height and width of your mirror. Write down the measurements so you don’t forget.
If your mirror has any unique features, like rounded corners or a beveled edge, make sure to measure those as well. You’ll need these measurements later to cut the wood for your frame.
Once you have your measurements, head to your local lumber store and purchase the necessary materials. Look for a type of wood that matches the style of your home and the look you’re going for with your mirror frame.
Some popular options include oak, pine, and maple. You can also choose to use reclaimed wood for a more rustic or eclectic look.
Keep in mind that you’ll also need sandpaper, wood stain, and polyurethane for sanding, staining, and sealing your frame.
If you already have a piece of lumber that you’re using for your frame, you can skip this step. Just make sure it’s in good condition and free from any damage or rot.
Once you have all your materials, you can move on to the next step and start building your mirror frame!
2 Measure and cut your lumber
Once you have a good understanding of what size you want your mirror frame to be, you’ll need to measure and cut your lumber. This step is crucial in ensuring a good fit and a unique piece.
Start by measuring the length and width of your mirror. Take into account any trim or baseboards that you may need to work around. Once you have these measurements, you can head to your local home improvement store to purchase the wood for your frame. If you’re on a budget, a simple carton of wood will do just fine.
Using these measurements, determine how long each piece of your frame needs to be. Remember to account for the thickness of the wood when measuring for the inside dimensions of the frame. If you already have wood on hand, you can save some money and use the wood you already have.
Once you have your measurements, you can start cutting your wood. Use a miter saw to achieve clean and precise cuts. Make sure to cut each piece at a 45-degree angle so that they can be joined together in a mitered corner. This technique will give your frame a professional and modern look.
After cutting, take some sandpaper and sand the edges of each piece to remove any splinters or rough spots. Be sure to round the corners as well to give the frame a softer look. If you’re working with old wood, you may need to use a paint stripper to remove any old paint or polyurethane finish.
Once you have sanded and prepared your wood, you can choose to stain or paint it. If you prefer a natural wood look, apply a coat of Minwax stain in your desired color. Follow the instructions on the can for best results. If you prefer a painted look, use a primer and then apply your chosen paint color.
Allow the stain or paint to dry completely before proceeding to the next step. You may want to apply multiple coats for a richer color or deeper finish.
Before assembling the frame, you may want to seal the wood to protect it from moisture and damage. You can use a clear polyurethane finish for this purpose. Apply a thin, even coat to the entire frame and allow it to dry completely.
Once the wood is dry and sealed, you can begin assembling the frame. Lay the pieces out on a flat surface and ensure they fit together well. Use wood glue or screws to secure the corners together. Be careful not to overtighten the screws, as this can split the wood.
Now your frame is ready to be attached to the mirror. Lay the framed mirror face-down on a soft surface, such as an egg carton, to avoid scratching the glass. Attach the frame using mirror clips or metal brackets.
And there you have it – your very own custom mirror frame! With these simple instructions, you can build a unique and stylish frame for your mirror at a fraction of the cost of buying one from a store. Enjoy your new mirror!
Step 2 Sanding Staining and Sealing
Once you have built the base for your mirror frame, it’s time to move on to sanding, staining, and sealing the wood. This step will give your mirror frame a polished and finished look.
Start by sanding the wood. Use sandpaper to smooth out any rough edges or imperfections. Make sure to sand in the direction of the wood grain for a better result. Sanding will also help the stain adhere better to the wood.
After sanding, wipe away any dust with a clean cloth or a soft brush. This will ensure smooth and even staining.
Next, choose a stain color that you like. There are many options available, from a simple wood color to a modern and unique finish. Apply the stain using a brush or a cloth, following the instructions on the stain can. Make sure to cover the entire surface of the wood, including the mitered corners.
After applying the stain, let it sit for a few minutes to allow the wood to absorb the color. Then, using a clean cloth, wipe off any excess stain. This will give your mirror frame a more even and polished look.
Once the stain is dry, you can proceed to sealing the wood. Apply a coat of polyurethane or a similar sealing product to protect the wood and give it a glossy finish.
If you’re using an old mirror or already have a mirror size in mind, make sure to measure it before building the frame. This will ensure a perfect fit.
Overall, sanding, staining, and sealing are important steps in building a mirror frame. They not only enhance the look of the wood but also protect it from damage and give it a professional finish.
Remember, you can customize your mirror frame to fit your home decor by choosing a stain color and finish that you like. This means you’ll have a unique and personalized mirror frame that adds a touch of elegance to your space.
By doing these steps yourself, you can save money on a store-bought mirror frame. The cost of materials like lumber, stain, and polyurethane can add up, but it will still be much more affordable than buying a framed mirror for your home.
So, if you’re up for the challenge, follow these instructions and build your own mirror frame. You’ll end up with a beautiful piece that’s not only functional but also a reflection of your creativity and skills.
Sand the baseboards
Before you start building the frame for your mirror, it’s important to sand the baseboards. This step is crucial for creating a smooth and even surface for your frame. Sanding will remove any rough edges or imperfections and ensure that the wood is ready for staining or sealing.
You’ll need a piece of sandpaper, like 120-grit or 220-grit, to sand the baseboards. Start by sanding any old paint or stain off the wood. If the baseboards are already in good condition, you can skip this step and move on to sanding the wood well.
Use a simple sanding technique to sand the baseboards. Sand along the grain of the wood, moving in a circular motion. Be sure to sand both the front and back of the baseboards to ensure a uniform finish.
If you have mitered corners on your baseboards, be careful not to sand too much off the corners. You want them to be crisp and defined, so sand them lightly to remove any rough edges.
Once you’ve finished sanding the baseboards, wipe away any dust or debris with a clean cloth. This will ensure that your frame adheres well to the baseboards when you attach it.
Now that the baseboards are sanded, you can move on to the next step of building your mirror frame. Whether you’re staining or sealing the wood, this preparation step is essential for achieving a professional-looking and durable frame.


