

Are you ready to create a stunning banner for your website or social media page? Look no further than Adobe Photoshop, one of the leading graphics design tools available. In this guide, we will show you how to make a banner in Photoshop using simple and free tools. So, if you’re happy and ready to commit some time to designing the best banner for your website, let’s dive right in!
Step 1: Open a New Document
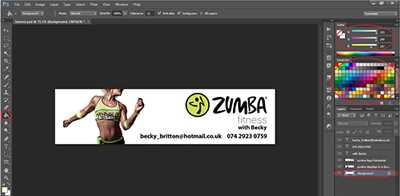
First, open Photoshop and create a new document. Choose the suitable name, size, and resolution for your banner. You can also download free banner graphics from the internet and open them in Photoshop
Step 2: Fill the Background
Select the “Background” layer and choose a color or add a photo as the background for your banner. Make sure to leave enough space for your main design elements.
Step 3: Add Text and Icons
Click on the “Text” tool and choose a font, size, and color for your text. Then, type in the phrase or words you want to display on your banner. You can also search for icons online and add them to your banner to give it a more appealing look.
Step 4: Design the Foreground
Create new layers for different elements like ribbons, squares, or lines. Use the various tools available in Photoshop to design these elements according to your preferences.
Step 5: Adjust and Flatten
After designing all the elements, adjust their positions, sizes, and colors to make them visually appealing. Once you’re satisfied with the arrangement, flatten the layers to merge everything together into a single image.
Step 6: Final Settings and Export
Make any final adjustments to the overall design, such as adjusting brightness, contrast, or adding extra effects. When you’re happy with the final result, go to the “File” menu and choose the “Export” option to save the banner in a suitable format.
Step 7: Show Your Banner to the World
Now that your banner is ready, it’s time to upload it to your website or social media platforms. Let it show off your creativity and capture the attention of your target audience.
In conclusion, Photoshop offers a variety of tools and options to create stunning banners. By following this step-by-step guide, you can design a professional-looking banner that will make your website or social media page stand out from the crowd. So, why wait? Start creating your banner today!
- How do I make a ribbon banner in Photoshop
- How to make a YouTube banner in Photoshop
- Step 1: Open Photoshop and create a new document
- Step 2: Choose a background
- Step 3: Add text and design elements
- Step 4: Adjust and align
- Step 5: Save and export
- Step 6: Upload to your YouTube channel
- In conclusion
- Step 1 Create a new document
- Step 2: Open the template
- Step 3: Adding Background Graphics
- Step 4: Adjust the background
- Step 5: Adding Text to Your Photo
- Step 6: Add social icons
- Step 7 Add extra elements
- How do you make a big banner in Photoshop?
- Step 6 Save and Export Your Banner
- Conclusion
- Video:
- How to create banner in photoshop
How do I make a ribbon banner in Photoshop
If you’re designing a banner for your website or social media channels, creating a ribbon banner in Photoshop can be a great way to add some extra flair to your design. In this step-by-step guide, I’ll show you how you can easily make a ribbon banner using Adobe Photoshop.
Step 1: Open a new document in Photoshop and choose the size that is suitable for your banner. You can also search for free banner templates online if you want to save some time.
Step 2: Create a new layer by clicking on the “New Layer” button on the right side of the Photoshop window. Name this layer “ribbon” or any other name that you prefer.
Step 3: Choose the Pen Tool from the tools panel on the left side of the Photoshop window. Use this tool to create the shape of the ribbon. You can click to create straight lines and click and drag to create curved lines. Once you have created the shape of the ribbon, right-click on the path and choose “Make Selection”.
Step 4: Fill the selection with a color of your choice. You can use the Paint Bucket Tool to fill the selection with a solid color, or you can add gradients or patterns to make it more interesting.
Step 5: Add some text or icons to your ribbon. You can use the Text Tool to add words or phrases, or you can search for icons online and import them into Photoshop. Place the text or icons on top of the ribbon shape.
Step 6: Adjust the settings of your ribbon. You can change the color, size, and position of the ribbon by using the various options in the Photoshop toolbar and menu.
Step 7: Finally, flatten the image by right-clicking on the ribbon layer and selecting “Flatten Image”. This will merge all the layers together and make it easier to export the image.
To export your ribbon banner, click on “File” in the top menu and choose “Export” or “Save for Web”. You can then choose the file format and save your banner to your desired location.
In conclusion, creating a ribbon banner in Photoshop is a fun and easy way to add some visual interest to your design. By following these steps, you can create a unique and eye-catching banner that will make your website or social media channel stand out. So go ahead and give it a try!
How to make a YouTube banner in Photoshop
Creating a YouTube banner in Photoshop is a great way to showcase your channel and add a professional touch to your videos. In this step-by-step tutorial, I will show you how to design a YouTube banner using Adobe Photoshop.
Step 1: Open Photoshop and create a new document
First, open Adobe Photoshop and create a new document. Choose the right dimensions for your YouTube banner, which is 2560 x 1440 pixels. This ensures that your banner will be suitable for all devices and screen sizes.
Step 2: Choose a background
Next, choose a background color or add a photo or graphics that match the theme of your channel. You can search for free photos or download graphics from websites like Shutterstock or Photopea.
Step 3: Add text and design elements
Now, it’s time to add text and design elements to your banner. Use the text tool to type in your channel name or any other phrase you want to showcase. Experiment with different fonts, styles, and sizes to find the best look for your banner. You can also add icons, graphics, and lines to make your banner more visually appealing.
Step 4: Adjust and align
After adding all the elements, you may need to adjust and align them to create a balanced composition. Use the move tool to position the text and graphics, and make sure there is enough space around them. You can also use the alignment options in Photoshop to align everything perfectly.
Step 5: Save and export
Once you are happy with your design, it’s time to save and export your YouTube banner. Click on “File” and then “Export” to save your banner as a JPEG or PNG file. Remember to choose the highest quality settings to ensure the best resolution and clarity.
Step 6: Upload to your YouTube channel
Now that you have created your YouTube banner, it’s time to upload it to your channel. Go to your YouTube channel settings, click on the “Customize Channel” option, and then click on the “Add channel art” button. Select the banner file you just created and upload it.
In conclusion
Creating a YouTube banner in Photoshop is a simple and effective way to make your channel stand out. By following these step-by-step instructions, you can design a professional-looking banner that represents your brand and attracts more viewers to your channel.
Step 1 Create a new document
Creating a new document is the first step in designing a banner in Photoshop. To do this, you need to follow a few simple steps to set the right settings for your banner.
1. Open Adobe Photoshop or any other graphics design tool like Photopea.
2. Go to the File menu and click on the “New” option. This will open a dialog box where you can set the size and other properties of your new document.
3. In the New Document dialog box, enter a suitable name for your banner in the “Name” field. For example, “Banner 1”.
4. Choose the appropriate width and height for your banner. You can either select a preset size or enter custom dimensions. For example, 1200 pixels by 300 pixels is a common size for website banners.
5. Set the resolution to 72 pixels/inch for web banners and 300 pixels/inch for print banners.
6. If you want a transparent background for your banner, select the “Transparent” option under the Background Contents dropdown menu.
7. Click on the “Create” button to create the new document with the specified settings.
Now you have a new canvas to work on. You can see the square edges representing the boundary of the banner. The foreground color is set to black by default, but you can change it later according to your design needs.
By following the step-by-step instructions, you have successfully completed Step 1 and created a new document in Photoshop to start designing your banner. Now you are ready to move on to the next steps of adding text, graphics, and more to your banner.
Step 2: Open the template
Once you have Adobe Photoshop installed, it’s time to open the template that you will be working with for your banner design. If you don’t have Photoshop, you can also use free alternatives like Photopea or search for other graphic design tools on Youtube.
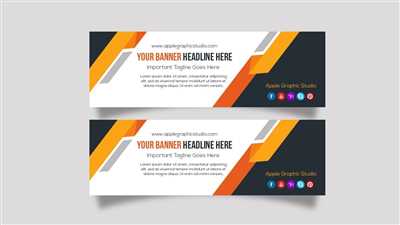
There are several websites where you can download free banner templates. Choose a template that suits your needs and download it to your computer.
Now, open Adobe Photoshop and go to File > Open to select the template file from your computer. You will then see the template on your Photoshop workspace.
Take a moment to familiarize yourself with the template. You will see that it consists of different layers, each representing a different part of the banner design. The layers are labeled, so it’s easy to identify them.
To start customizing the banner, right-click on the layer that you want to edit and choose the “Edit Contents” option. This will enable you to make changes to the specific layer without affecting other elements of the design.
For example, if you want to change the color of the background, select the background layer and go to the “Fill” option in the top bar. Choose the desired color and click “OK” to apply the changes.
Continue adding or modifying the elements of your banner design using the same step-by-step approach. You can add more layers, text, graphics, icons, or any other elements that you want to include in the final design.
Don’t forget to save your progress regularly to avoid losing any work. You can also use the “Save As” option to save different versions of your banner design and track your progress.
Once you are happy with the final result, it’s time to export your banner. Flatten the layers by right-clicking on any layer and choosing the “Flatten Image” option. Then, go to File > Export and choose the file format and settings that are appropriate for your needs.
In conclusion, opening the template is the second step in creating a banner in Photoshop. Familiarize yourself with the layers, add and adjust the elements to create your desired design. Save your work regularly and export the final banner when you’re done. Happy designing!
Step 3: Adding Background Graphics
Now that we have our banner template ready and the color scheme set up, it’s time to add some eye-catching background graphics. These graphics will enhance the overall design of the banner and make it more visually appealing.
1. Open Adobe Photoshop (or any similar software you are using) and open the document where you have saved your banner template.
2. Search for suitable background graphics that align with the theme and purpose of your banner. You can find free graphics online or create your own using graphic design tools.
3. Choose the graphics that best represent your website or the message you want to convey through the banner. Download them and open them in Photoshop.
4. If the graphics you downloaded have extra elements or colors that don’t fit well with your design, you can make some adjustments. Use tools like the eraser, clone stamp, or selection tools to remove any unwanted elements or adjust the colors to match your color palette.
5. After making the necessary adjustments, select all the graphics layers and click on the “Flatten Image” option to merge them into a single layer.
6. Now you can add the flattened graphics layer into your banner template. Simply drag and drop it into the template document.
7. If the graphics layer appears too big or doesn’t fit well with the rest of the design, you can resize it. Use the transform tools to adjust the size and position of the graphics layer until it looks perfect.
8. If you want to add more depth or dimension to your background graphics, you can apply layer styles like drop shadows, gradients, or patterns. Experiment with different styles to find the best one that complements your design.
9. Once you’re happy with the placement and styling of the background graphics, save your final banner design. Give it a suitable name and choose the desired file format and settings for exporting.
10. Congratulations! You have successfully completed the process of creating a banner in Photoshop. Now you can use this banner to showcase your website or promote your products and services on social media platforms or other advertising channels.
Remember, creating a visually appealing banner involves a combination of designing the layout, adding suitable text and icons, and optimizing the color scheme and background graphics. By following the step-by-step instructions in this tutorial, you’ll be able to create professional-looking banners in no time!
Next: Step 4 – Adding Text and Icons
Step 4: Adjust the background
Now that you have the basic design elements in place, it’s time to adjust the background of your banner. This step will help enhance the visual appeal and make your banner more suitable for the purpose it serves. Here’s how you can do it:
- Open your design document in Adobe Photoshop or any other graphics editing software of your choice.
- Choose the “Background” layer from the layers panel on the right.
- Click on the “Fill” option in the toolbar to choose a suitable background color or fill pattern for your banner. You can either pick a color from the swatches or use the eyedropper tool to sample a color from an existing image or your website.
- If you want to add a bit more depth and texture to your banner, you can search for free graphics or icons on websites like Freepik or Flaticon. Download the graphics and open them in Photoshop, then drag them into your banner document.
- Position the graphics where you want them to show on your banner and adjust their size if needed. Use the transform tools in Photoshop to rotate, scale, and move the graphics until they are properly placed.
- If you’re designing a banner for a social media platform like YouTube, you might want to add a big ribbon or a leading line to draw attention to your channel name or any other important phrase. You can create such elements using shapes and lines in Photoshop or use pre-made templates for convenience.
- Once you’re happy with the background and all the extra elements you’ve added, flatten the layers to merge them together. Right-click on any layer and select the “Flatten Image” option.
- Go to the “File” menu, click on “Save As”, and choose the file format and location to save your final banner design. It’s always best to export the banner in a high-quality image format like PNG or JPEG.
Congratulations! You’ve successfully adjusted the background of your banner. Now you’re ready to move on to the next step and add more elements or finalize the design according to your preference.
Step 5: Adding Text to Your Photo
After creating the background and adding graphics to your banner in Photoshop, it’s time to add some text. Here’s a step-by-step guide on how to do it:
- Open Photoshop and your banner template.
- Choose the text tool from the toolbar on the left. It looks like a big “T”.
- Click on your photo where you want to add the text. A text box will appear.
- Type in the phrase or word you want to display on your banner. For example, if you’re designing a banner for a social media campaign, you can add the hashtag or the name of the campaign.
- Adjust the size and color of the text using the options at the top of the screen. You can also choose a different font from the dropdown menu.
- If you want to add multiple lines of text, press Enter on your keyboard to create a new line within the text box.
- Position the text box by clicking and dragging it to the desired location.
- Once you’re happy with the text, you can make further adjustments by adding effects or applying layer styles.
- Commit the changes by clicking on the checkmark icon in the top toolbar.
- If you’re creating a banner for a website, it’s important to consider the legibility of the text. Make sure it stands out from the background and is easy to read.
- Save your document by clicking on File, then Save.
- You can also export your banner as a PNG or JPEG file by clicking on File, then Export.
Adding text to your photo is an essential step in creating effective banners. By choosing the right words and creating visually appealing text elements, you can give your banner the final touch it needs to make it stand out. Whether you’re promoting a product, announcing an event, or simply spreading a message, adding text will help your banner communicate your message with clarity and impact.
Step 6: Add social icons
Adding social icons to your banner is a great way to make it more interactive and engaging. You can choose from a variety of social media icons that are available on the web. Here’s how you can add them:
- Open your Photoshop document. If you’re happy with the size and design of your banner, proceed to the next step.
- In the toolbar, select the Shape tool (U key). From the options bar at the top, choose the “Rectangle” option. This will create a square shape.
- Draw a square shape on your banner where you want to place the social icons. Make sure it is big enough to accommodate the icons and leave some space for text or other elements.
- Right-click on the shape layer in the Layers panel and choose “Convert to Smart Object”. This will allow you to apply styles and effects to the shape later on.
- Open a new browser tab and search for “free social media icons”. You’ll find many websites offering free icon sets that you can download and use in your design.
- Choose the social media icons that best suit your banner and download them to your computer.
- In Photoshop, go to File > Place Embedded. Select the social media icon file you downloaded and click “Place”. This will add the icon as a new layer on top of your shape.
- Resize and position the icon to fit within the square shape.
- Repeat steps 6-8 for each social media icon you want to add to your banner.
- Once you’ve added all the social media icons, click on the “File” menu and choose “Save” to save your final banner design.
- You can also export the banner as a JPEG or PNG file for use on your website or social media channel.
Adding social icons to your banner is a great way to give your audience more ways to connect with your brand or website. It shows that you are active on social media and encourages viewers to follow or share your content. Follow these step-by-step instructions to add social icons to your banner, and you’ll have a professional-looking design in no time!
Step 7 Add extra elements
Now it’s time to add some extra elements to make your banner design more appealing and professional. You can choose from a variety of icons, graphics, and styles to enhance your banner.
1. Open the Adobe Photoshop or Photopea document that you have been working on. Make sure you have saved your progress so far.
2. In the right tools panel, click on the “Shape” tool. It looks like a square with lines coming out from it.
3. In the options bar at the top of the screen, click on the “Shape” drop-down menu. Choose a suitable shape for your extra elements, such as a ribbon, square, or lines.
4. Create a new layer by clicking on the “New Layer” button at the bottom of the layers panel. Name the layer according to the element you are creating.
5. Use the shape tool to draw the element on the banner. You can adjust the size, color, and position of the element by using the options bar and dragging it with the move tool.
6. If you want to add text to the element, select the “Text” tool from the tools panel and click on the area where you want to add the text. Type in the desired phrase or word and adjust the font, size, and color using the options bar.
7. To add icons or graphics, you can search for free icons or download them from websites. Then, insert them into your banner design by dragging and dropping them onto a new layer.
8. To give the extra elements a more three-dimensional and realistic look, you can add shadows and highlights. Use the “Layer Style” option in the layers panel to add these effects.
9. Once you’re happy with the final design, save your banner as a Photoshop document (.psd) or export it as a suitable image file format (such as .jpg or .png).
By following these step-by-step instructions, you can create a stunning banner for your website, YouTube channel, or any other platform. Just remember to be creative and experiment with different elements and styles to make your banner stand out!
How do you make a big banner in Photoshop?
If you want to create a big banner in Photoshop, you’ll first need to open the software and create a new document. Click on “File” and then “New” to choose the settings for your banner. Make sure to give your document a name and set the dimensions to be suitable for a big banner.
Next, you’ll need to choose a background for your banner. You can either search for a suitable image online and download it, or create your own custom background using the tools in Photoshop. To add a background image, click on “File” and then “Open” to select the photo you want to use. Once you’ve opened the photo, drag and drop it into your Photoshop document.
After adding the background, you can add more elements to your banner, such as text, icons, or graphics. Click on the appropriate tools in Photoshop to create and adjust these elements as needed. You can also add styles and effects to make your banner more visually appealing.
Once you’re happy with the design of your banner, it’s time to save and export it. Click on “File” and then “Export” or “Save As” to choose the desired file format and location. For web banners, it’s usually best to save the final banner as a JPG or PNG file.
In conclusion, creating a big banner in Photoshop involves several steps. By following a step-by-step process, you can easily design and create a customized banner for your website, YouTube channel, or social media. With the right tools and settings, you’ll be able to make a big banner that stands out and effectively conveys your message.
Step 6 Save and Export Your Banner
After creating your banner in Photoshop, it’s time to save and export it so that you can use it on your website, YouTube channel, social media, or anywhere you desire.
Here’s how you can save and export your banner in Adobe Photoshop:
- First, make sure all the layers in your banner design are flattened. To do this, go to the Layers panel and right-click on any layer. Then, choose the “Flatten Image” option.
- Next, go to the File menu and click on the “Save As” option. Choose a suitable name for your banner file and select the location where you want to save it.
- In the Save As dialog box, choose the file format that suits your needs. For example, you can save your banner as a JPEG, PNG, or GIF file.
- Adjust the settings and options according to your preferences. For JPEG files, you can choose the quality level and whether to include the color profile. For PNG files, you can choose between indexed or RGB color and the transparency options.
- Click on the “Save” button to save your banner using the selected settings.
- Finally, to export your banner, go to the File menu again, but this time choose the “Export” option. Select the format you want to export your banner as, such as JPEG or PNG.
- Adjust the export settings to your liking and click on the “Export” button to create the final version of your banner.
And there you have it! You’ve successfully saved and exported your banner from Photoshop. Now you can use it on your website, social media profiles, YouTube channel art, or anywhere else you want to display your design.
Remember, if you’re new to Photoshop or don’t have access to it, there are many free online tools like Photopea that can help you create banners as well, following a similar step-by-step process. So don’t be afraid to try different options and explore the world of banner designing!
In conclusion, creating a banner in Photoshop can be a fun and rewarding process. By following the step-by-step guide, you can create a banner that is suitable for your needs, with the right graphics, icons, and text elements. With the right color scheme, background, and foreground, your banner will become an eye-catching addition to your website or social media profiles.
Conclusion
In conclusion, creating banners in Photoshop can be a fun and rewarding process. By following the step-by-step guide outlined in this article, you can easily design and customize banners that are suitable for your website, social media profile, or advertisement.
Throughout the process, there are various tools and options available in Photoshop to add and adjust elements such as text, graphics, and colors. You can choose from a wide range of styles and templates, or create your own unique design from scratch.
By using layers and channels, you have the flexibility to work with different elements and create a visually appealing banner. Moreover, you can make use of Photoshop’s advanced features to adjust the foreground and background, add effects, and give your banner the right look and feel.
Once you are happy with your design, you can save the final document or export it into a suitable format for your specific needs. There are also free banner-making websites and tools like Photopea available that offer more options and designs to choose from.
In conclusion, by following the step-by-step instructions and utilizing the various tools and options in Photoshop, you can create professional-looking banners that will stand out and attract attention to your content or brand. So go ahead, unleash your creativity, and make your banners shine!


