

If you want to develop a Flutter app, you’re in the right place! Flutter is a popular open-source framework for building cross-platform mobile applications. It offers a fast and efficient way to create apps for both Android and iOS platforms, using a single codebase.
Before you get started, make sure you have Flutter installed and set up on your machine. You can find detailed instructions on how to install Flutter on the official Flutter website. Additionally, you must have the following packages installed:
- parse_server_sdk_flutter: This package uses Parse Server SDK and provides you with the necessary tools for working with Parse Server and Parse database.
- appwrite: Appwrite is a complete open-source backend server infrastructure that offers various features like authentication, database management, and more.
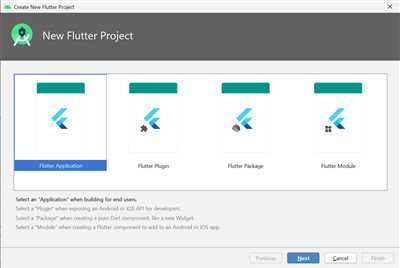
Once you have all the necessary packages, you can start building your Flutter app. The first step is to create a new Flutter project. Open your terminal or command prompt and navigate to the directory where you want to create your project. Then, run the following command:
flutter create your_project_name
This will create a new Flutter project with all the necessary files and folders. Make sure to replace “your_project_name” with the actual name you want to give to your app.
Next, navigate to the lib folder of your project and open the main.dart file. This is the main entry point of your Flutter app. In this file, you can start adding the necessary code to implement the desired features of your app.
For example, if you want to implement user authentication, you can use the parse_server_sdk_flutter package to handle authentication. You’ll need to import the package at the top of your file using the import statement and set up the necessary ParseObject and ParseQuery instances.
Below is an example of how the code might look:
import 'package:parse_server_sdk_flutter/parse_server_sdk_flutter.dart';
void main() async {
await Parse().initialize(
'applicationId',
parseServerUrl,
clientKey: 'clientKey',
autoSendSessionId: true,
);
runApp(MyApp());
}
class MyApp extends StatelessWidget {
@override
Widget build(BuildContext context) {
return MaterialApp(
title: 'My Flutter App',
theme: ThemeData(
primarySwatch: Colors.blue,
),
home: LoginPage(),
);
}
}
class LoginPage extends StatelessWidget {
final TextEditingController usernameController = TextEditingController();
final TextEditingController passwordController = TextEditingController();
void _loginUser() async {
String username = usernameController.text;
String password = passwordController.text;
try {
ParseUser user = await ParseUser.login(username, password);
// User is logged in successfully, navigate to the home screen
Navigator.push(
context,
MaterialPageRoute(builder: (context) => HomeScreen(user: user)),
);
} catch (e) {
// Handle error
}
}
@override
Widget build(BuildContext context) {
return Scaffold(
appBar: AppBar(
title: Text('Login'),
),
body: Padding(
padding: EdgeInsets.all(20.0),
child: Column(
mainAxisAlignment: MainAxisAlignment.center,
crossAxisAlignment: CrossAxisAlignment.stretch,
children: [
TextField(
controller: usernameController,
keyboardType: TextInputType.emailAddress,
decoration: InputDecoration(
labelText: 'Username',
),
),
TextField(
controller: passwordController,
obscureText: true,
decoration: InputDecoration(
labelText: 'Password',
),
),
SizedBox(height: 20.0),
RaisedButton(
onPressed: _loginUser,
child: Text('Login'),
),
],
),
),
);
}
}
In this example, we’ve created a simple login page where users can enter their username and password. When the “Login” button is clicked, the _loginUser callback function is executed. It uses the ParseUser.login method to authenticate the user with the provided credentials. If the login is successful, the user is navigated to the home screen. Otherwise, an error is displayed.
This is just a simple example of how you can handle user authentication in your Flutter app using the parse_server_sdk_flutter package. You can use similar techniques to implement other features, such as handling user registration, retrieving and displaying user data, and more.
Keep in mind that this is just the beginning of your Flutter app development journey. There are many more concepts, packages, and techniques to explore. As you gain more experience, you’ll be able to create more complex and feature-rich apps.
- Optional Create and review some of the sample applications
- Run the app
- How to Build a Flutter Backend Using a Backend as a Service
- Project Introduction
- Prerequisites
- Create App
- Understanding APIs
- Creating a Flutter Project
- Defining the UI
- Integrating Firebase
- Working with Databases
- Securing API Keys
- PostgreSQL Database
- Admin Panel
- Securing the App
- CRUD API Testing With Flutter
- Video:
- Build Your Flutter App 10x Faster with FlutterGPT | Flutter Tutorial 2023
Optional Create and review some of the sample applications
To further enhance your understanding of how to make a Flutter app, it’s beneficial to create and review some sample applications. These applications can serve as a management tool or a reference guide for your own project.
One sample application you can create and explore is the Parse Server SDK Flutter app. This app is written in the main.dart file and is responsible for querying and reading information from the Parse Server. By toggling the placeholders’ value, you can follow the sample queries and print the selected zip code and users in the console.
To create this sample app, you will need to override the proper methods, define a PostgreSQL database instance, locate the Parse Server, and discuss any necessary configurations. The app utilizes the Parse Flutter package and the Parse Server SDK Flutter package.
Another sample application you might consider is the Appwrite Flutter app. This app allows you to communicate with your Appwrite backend by executing different commands, such as file writing and reading. Within this app, you can also create, update, and delete objects in the database. You will need to replace the default query with your own query and handle authentication as per your needs.
To create this sample app, make sure you have the Appwrite package installed, and create a Appwrite client. You can then use the created client to perform CRUD (Create, Read, Update, Delete) operations on selected collections, such as contacts or activities. You can also specify the columns to retrieve, sort the results, and paginate through the data using the same commands as in the Appwrite API documentation.
By reviewing and understanding these sample applications, you can gain a better understanding of how to create your own Flutter app and implement the necessary functionalities.
Run the app
To run the Flutter app that we’ve just created, we need to follow these steps:
1. Make sure you have the Flutter project folder open in your preferred code editor.
2. Open a terminal window and navigate to the project folder.
3. Run the command flutter run to build and launch the app on your connected devices (real or virtual).
4. If you have multiple devices connected, a prompt will appear asking you to select the device you want to run the app on. Use the arrow keys to navigate and press enter to select.
5. Once the app is launched, you should see a blank screen on your device. Now, click the button on the screen to initiate the CRUD operations.
6. The app will communicate with the backend server using the Appwrite client package (parse_server_sdk_flutter). This package offers a number of features for user management, file management, and more.
7. When you click the button, a request will be sent to the backend server to create a new contact object in the database. The server will respond with the contact ID.
8. After the creation of the contact, the app will perform a query to fetch all the contacts from the database and display them in a column of cards on the screen.
9. You’ll be able to review the list of contacts and perform CRUD operations on them, such as deleting or updating a contact.
10. If you want to test the app using your own backend server, make sure you have Appwrite installed and running on your infrastructure. You can follow the official Appwrite documentation for the installation and setup process.
By following the steps above, you’ll be able to run the Flutter app and see the actual result of the CRUD operations on your device.
It’s worth mentioning that Appwrite is an open-source backend server that offers a scalable and easy-to-use infrastructure for managing your Flutter apps. It provides a number of client SDKs for different technologies, making it a good option for any Flutter app that requires server-side functionality.
Now that you have a basic understanding of running the app and using Appwrite for backend management, you can start building more complex Flutter apps with CRUD operations and take advantage of the various features Appwrite offers.
How to Build a Flutter Backend Using a Backend as a Service
If you are building a Flutter app and need a backend to store and retrieve data, one option is to use a Backend as a Service (BaaS) provider. BaaS providers offer prebuilt server-side services and APIs that can be integrated with your app, allowing you to focus on the frontend development.
One popular BaaS provider is Firebase, which offers a variety of services including a real-time database, authentication, and cloud functions. In this tutorial, we will use Firebase to build a backend for our Flutter app.
Before we get started, make sure you have Flutter installed and a basic understanding of how to write Flutter apps. If you need help getting started with Flutter, there are many tutorials and resources available online.
Step 1: Set Up Firebase
First, you will need to set up a Firebase project. Go to the Firebase website and create a new project. Once your project is set up, you will need to retrieve your Firebase project credentials including the API key and project ID.
Step 2: Set Up the Firebase Dart Package
In your Flutter project, open the pubspec.yaml file and add the following line to the dependencies:
firebase_core: ^1.0.0
firebase_database: ^7.1.0
Save the file and run flutter pub get to install the Firebase Dart package.
Step 3: Initialize Firebase
In your main Flutter project file, typically lib/main.dart, add the following code to import the Firebase packages and initialize Firebase:
import 'package:firebase_core/firebase_core.dart'; // import the Firebase Core package
// ...
Future main() async {
WidgetsFlutterBinding.ensureInitialized();
await Firebase.initializeApp(); // initialize Firebase
runApp(MyApp()); // run the app
}
Step 4: Use Firebase APIs
Now that we have Firebase set up, we can start using its APIs. For example, if we want to read data from the Firebase database, we can use the following code:
import 'package:firebase_database/firebase_database.dart'; // import the Firebase Database package
// ...
DatabaseReference databaseReference = FirebaseDatabase.instance.reference(); // get a reference to the database
databaseReference.child('contacts').once().then((DataSnapshot snapshot) {
print(snapshot.value); // print the value of the 'contacts' node
});
This code will retrieve all the data under the ‘contacts’ node in the Firebase database and print it to the console.
Step 5: Writing Data
If we want to write data to the database, we can use the set() function:
databaseReference.child('contacts').set({
'name': 'John',
'email': '[email protected]',
'phone': '1234567890'
});
This code will set the specified data under the ‘contacts’ node in the Firebase database.
Step 6: Querying and Reading Data
Firebase also provides querying and reading capabilities. For example, if we want to query contacts with a specific ZIP code, we can use the following code:
Query query = databaseReference.child('contacts').orderByChild('zipcode').equalTo('12345');
query.once().then((DataSnapshot snapshot) {
print(snapshot.value); // print the matched contacts
});
This code will return all the contacts whose ZIP code is equal to ‘12345’ from the Firebase database.
Step 7: Authentication and User Management
In addition to the database, Firebase offers authentication and user management capabilities. You can use Firebase to authenticate users and manage their accounts, including features like email and password login, social login, and more.
Step 8: Cloud Functions
Firebase also provides cloud functions, which allow you to run server-side code in response to events triggered by your app. Cloud functions can be used for tasks such as sending notifications, processing data, and performing CRUD (Create, Read, Update, Delete) operations on the database.
Step 9: Deploy and Test
Once you have implemented the necessary functionality in your Flutter app and Firebase backend, you can deploy and test your app on a device or emulator. Use the Flutter CLI or an IDE like Android Studio or Xcode to build and run your app.
In conclusion, using a Backend as a Service provider like Firebase can greatly simplify the process of building a backend for your Flutter app. Firebase offers a wide range of features and technologies for authentication, database management, cloud functions, and more. By leveraging the power of Firebase, you can focus on the frontend development and create a robust and scalable app.
Project Introduction
When developing a Flutter app, one of the first things you need to do is set up the project and create the necessary infrastructure. In this project, we will discuss the basic steps involved in developing a Flutter app from scratch.
To start, open up your code editor and create a new Flutter project. You can do this by running the following command in your terminal:
flutter create my_app
After the project has been created, navigate to the project directory by running the following command:
cd my_app
Next, you will need to build the app’s user interface. Flutter provides a rich set of pre-built UI components, called widgets, that you can use to build your app’s UI. You can find these widgets in the Flutter package repository.
One important widget to note is the MaterialApp widget. This widget is required to set up the app’s basic infrastructure, such as the title of the app and the initial screen that is displayed when the app is launched. Here is an example of how you can create a simple Flutter app:
void main() {
runApp(MaterialApp(
title: 'My Flutter App',
home: Scaffold(
appBar: AppBar(
title: Text('My App'),
),
body: Center(
child: Text('Hello, World!'),
),
),
));
}
In the above code, we create a new Flutter app using the runApp method and passing in the MaterialApp widget. Inside the MaterialApp widget, we define the app’s title and initial screen. In this case, we use the Scaffold widget as the initial screen and specify the app bar title and body content.
Once you have set up the basic UI, you can start adding more features to your app. This might include things like making API calls to fetch data from a backend service, handling user input, and navigating between different screens.
In order to make API calls, you will need to use a package like http or dio. These packages provide functions and classes that you can use to send HTTP requests and handle the responses. Here is an example of how you might use the http package to fetch data from an API:
import 'package:http/http.dart' as http;
Future fetchData() async {
final response = await http.get('https://api.example.com/data');
if (response.statusCode == 200) {
return response.body;
} else {
throw Exception('Failed to load data');
}
}
In the above code, we import the http package and define a function called fetchData that uses the package to send a GET request to a specified endpoint. If the request is successful (i.e., the response status code is 200), we return the response body. Otherwise, we throw an exception.
Another important aspect of app development is working with databases. Flutter provides several options for working with databases, including SQLite, Firebase, and PostgreSQL. In this project, we will be using a simple open-source database called Parse Server.
Parse Server is a server-side tool that allows you to store and query structured data. It provides a and the ability to define custom data models and query the database using a querying language called Parse Query. Here is an example of how you might use Parse Server in your Flutter app:
import 'package:parse_server_sdk_flutter/parse_server_sdk.dart';
void main() async {
WidgetsFlutterBinding.ensureInitialized();
await Parse().initialize(
'my_app_id',
'my_js_key',
'https://api.example.com/parse',
);
final query = QueryBuilder(ParseObject('Contact'));
query.whereEqualTo('name', 'John Doe');
final result = await query.query();
final contacts = result.results.cast();
for (final contact in contacts) {
print(contact.objectId);
print(contact.name);
print(contact.phone);
}
}
In the above code, we import the parse_server_sdk_flutter package and initialize Parse Server with our app credentials and server URL. We then create a query to retrieve contacts from the database, filtering by the name ‘John Doe’. We execute the query and iterate over the results, printing out the contact’s object ID, name, and phone number.
This is just a basic introduction to developing a Flutter app. There are many more features and functions you can explore, such as handling user input, navigating between screens, and integrating third-party libraries. As you continue building your app, you will discover new tools and techniques to make your app even better.
Prerequisites
Before you can start building your Flutter app, there are a few prerequisites that you should have in order to ensure a successful development process:
1. ObjectID and ContactID: You should have a basic understanding of ObjectIDs and ContactIDs, as they will be used throughout the app for data management.
2. Constants and Values: Familiarize yourself with the concept of constants and values. These are variable names that hold a fixed and unchanging value, which will be used in various parts of your app.
3. Name and Title: Make sure you have a clear understanding of how to handle names and titles within your app. This includes proper naming conventions and taking into account any special characters or formatting requirements.
4. Simple Query Management: Learn and understand how to write simple query management code. This will allow you to efficiently retrieve and manipulate data from your app’s database.
5. Authentication and User Management: Get familiar with the process of authentication and user management. This will involve handling user login, sign up, and account settings within your app.
6. API Integration: Understand how to integrate external APIs into your app. This includes sending and receiving data from API endpoints, as well as handling any authentication or data formatting requirements.
7. CRUD Operations: Brush up on your knowledge of CRUD (Create, Read, Update, Delete) operations. These operations will be essential for managing data within your app’s database.
8. Simulator or Real Devices: Decide which platforms you want to develop your app for. Flutter allows you to run and test your app on various simulators or real devices, so make sure you have them set up and ready to go.
9. ContactSet and ContactSave: Understand how to create and save contacts within your app. This will involve handling contact information such as names, phone numbers, and email addresses.
10. Placeholder Values: Learn how to use placeholder values within your app. These are temporary values that can be used as defaults or null placeholders until the user provides the actual input.
By following the above prerequisites, you will be well-prepared to start building your Flutter app. It is recommended to review each topic in detail and practice writing code examples to solidify your understanding.
Create App
Creating a Flutter app involves several steps, including handling API calls, defining UI elements, and integrating databases. In this section, we will discuss how to create an app using Flutter and Firebase.
To start, make sure you have the necessary prerequisites installed, including Flutter SDK and Android Studio or Xcode for iOS development. Once everything is set up, you’re ready to begin developing your app.
Understanding APIs
APIs, or Application Programming Interfaces, allow your app to interact with external services or databases. These can be used to retrieve data or perform certain operations. In our case, we’ll be using Firebase, a Backend-as-a-Service (BaaS) platform, to store and fetch data for our app.
Creating a Flutter Project
To get started, open your preferred command-line tool and navigate to the directory where you want to create your app. Run the following commands:
flutter create my_app
cd my_app
This will create a new Flutter project with the name “my_app” and navigate into its root directory.
Defining the UI
Next, open the main.dart file located within the lib directory. This is where you’ll define the main UI and the logic for your app.
Inside the main.dart file, you’ll find a class called MyApp, which serves as the entry point for your app. Within this class, you can define the UI elements using Flutter’s widget system. For example, you can add a FloatingActionButton and handle its click event using the onPressed parameter.
Integrating Firebase
To integrate Firebase into your app, you’ll need to add the necessary dependencies to your pubspec.yaml file, which is located in the root directory of your Flutter project. Add the following line under the dependencies section:
firebase_core: ^1.0.0
After adding the dependency, save the file. Then, open the main.dart file again and import the necessary packages:
import 'package:firebase_core/firebase_core.dart';
Next, within the MyApp class, you’ll need to override the initState function. This is where you’ll initialize Firebase and any other operations that need to be performed before the app is launched.
To initialize Firebase, use the following code:
void initState() {
 Firebase.initializeApp();
 }
Make sure to include the async keyword when overriding the initState function.
Working with Databases
To store contact information in Firebase, you’ll need to define a class that represents a contact, including its fields and any necessary functions. One option is to use the ParseObject class provided by the parseobject package.
For example, you can create a class called Contact with fields such as name, phoneNumber, and zipcode. You can also include optional parameters and functions for handling contact operations, such as saving or deleting a contact.
Securing API Keys
When working with APIs, it’s important to properly secure your API keys. In Flutter, you can do this by storing your keys in a separate file, such as a secrets.dart file, and adding it to your .gitignore file to prevent it from being committed to version control.
Within the secrets.dart file, you can define a class called Secrets and add a static variable to hold your API key.
For example:
class Secrets {
 static const String apiKey = 'YOUR_API_KEY';
 }
This way, you can access your API key within your app by referencing Secrets.apiKey, and your key will not be exposed in your code repository. Make sure to replace YOUR_API_KEY with your actual API key.
By following these steps, you’ll be well on your way to creating your own Flutter app with API integration and a secure development process.
PostgreSQL Database
When developing a Flutter app, one important aspect to consider is how to manage and store the data. One popular option for storing and querying data is to use a PostgreSQL database. PostgreSQL is a powerful, open source relational database management system.
To get started with PostgreSQL in your Flutter app, you need to install the necessary dependencies and set up a PostgreSQL server. Once you have the server up and running, you can create a database and define tables to store your app’s data.
In your Flutter project, you can use various packages to interact with the PostgreSQL database. One commonly used package is ‘postgresql: ^2.2.0’. This package offers a simple and flexible API for connecting to a PostgreSQL database and executing queries.
To make the connection to the PostgreSQL database, you will need the necessary connection parameters such as the host, port, database name, username, and password. These credentials will allow your Flutter app to access the database and perform actions such as inserting, updating, and querying data.
Once you have the connection set up, you can start executing SQL queries against the database. For example, you may want to fetch all contacts from the ‘contacts’ table. You can write a SQL query for this purpose and send it to the database using the ‘execute’ method.
Here’s a sample code snippet that demonstrates how to query data from a PostgreSQL database using the ‘postgresql’ package:
import ‘package:postgresql/postgresql.dart’;
…
// Establish a connection to the PostgreSQL database
var connection = await connect(…);
// Execute a SQL query
var result = await connection.query(‘SELECT * FROM contacts’);
// Parse the resulting rows
result.forEach((row) {
print(row);
});
This code snippet demonstrates a simple query to select all rows from the ‘contacts’ table. The returned result is an iterable over the rows, which you can parse and handle as desired.
Working with a PostgreSQL database in Flutter allows you to handle complex data models and perform efficient data storage and retrieval operations. Ensuring the security of your database is also crucial. Make sure to implement necessary security measures, such as authentication and authorization, to protect your data from unauthorized access or modifications.
In conclusion, integrating PostgreSQL into your Flutter app can be a good choice when working with large amounts of structured data. It offers a reliable and scalable solution for storing and querying data. With the right setup and proper implementation, you can build a robust and efficient app that utilizes the power and flexibility of PostgreSQL as the backend database.
Admin Panel
In order to make a Flutter app with an admin panel, you can use back4app’s Parse Server, a powerful platform that allows you to easily create and manage a backend for your app.
One of the first steps to securing your admin panel is to make sure you have proper authentication in place. This can be done by requiring users to log in with their credentials before gaining access to the panel.
To make use of Parse Server in your Flutter app, you can utilize the parseobject package. After importing it and setting up your Parse initialization, you can define the necessary objects and classes for your panel. For example, you can create a “User” class to hold information about the users of your app.
Once you have created the necessary objects, you can build your admin panel. This can be done by using Flutter’s widget building system to assemble the various components of your panel. For example, you can create a column with buttons to navigate to different sections of your app.
If you want to open a specific file on Xcode or launch a specific emulator from Xcode, you can make use of the following command:
xcrun simctl openurl booted URL
Within your admin panel, you can also discuss and review the data that your app has collected. For example, you can create a table to view and print data about selected zip codes. This can be done by defining a query that selects the desired data from your database.
For CRUD operations within your admin panel, you can make use of Parse Server’s built-in features. For example, to create a new object, you can call the ParseObject constructor, and to update an existing object, you can use the save() method. If you want to delete an object, you can use the delete() method, passing in the objectId of the object you want to delete.
If you need to handle user authentication within your admin panel, you can use Parse User’s login() method to authenticate the user. You can also override the default login UI by creating your own custom UI.
When testing your admin panel, you can make use of Flutter’s main.dart file. This is where you can handle the logic and commands for your panel. For example, you can define a FloatingActionButton that, when clicked, sends a query to the database to retrieve user information.
It’s good practice to secure your admin panel by using the right technologies and infrastructure. You must also consider the security of your data by quickly and securely processing any requests and responses sent to and from your admin panel. Make sure to follow best practices for securing your admin panel.
In conclusion, building an admin panel for your Flutter app can be done using back4app’s Parse Server and the parseobject package. By defining the necessary objects and classes, creating the UI components, and utilizing Parse Server’s features, you can create a functional and secure admin panel for your app.
Securing the App
Securing your app is an essential aspect of app development that should not be overlooked. In this section, we will discuss how to ensure the security of your Flutter app.
One way to secure your app is by implementing backend security measures. This involves protecting any sensitive data that you might have, such as user information or valuable assets. Multiple technologies can be used for backend security, including Firebase, Parse, or custom server-side solutions.
For example, with Parse, you can create a Parse Object to represent each piece of data you want to secure. You can then define access permissions for each object, allowing only specific users or roles to perform certain operations on the data. This ensures that only authorized users can read, write, or update the data within your app.
Another important aspect of app security is securing the data transmission between your app and the backend server. You can achieve this by using encryption protocols such as HTTPS or SSL/TLS. This ensures that any data sent between the app and the server is encrypted and cannot be easily intercepted or tampered with.
In addition to securing the backend, you should also consider securing the frontend of your app. One way to do this is by implementing user authentication and authorization. This involves verifying the identity of users and providing them with access only to the features and data they are entitled to.
When creating your app, you must also be aware of potential security vulnerabilities that might arise from the use of third-party packages or libraries. Always ensure that you are using reputable packages from trusted sources and regularly update them to the latest versions to mitigate any security risks.
It is also important to educate yourself about common security best practices and follow them throughout the app development process. This includes practices such as input validation, access control, secure coding, and secure storage of sensitive data.
Finally, before releasing your app, it is always a good idea to conduct thorough security testing to identify any vulnerabilities or weaknesses. This can include techniques such as penetration testing and code review to ensure that your app is secure and free from any potential threats.
By taking these steps to secure your app, you can ensure the confidentiality, integrity, and availability of your app and protect your users’ data.
CRUD API Testing With Flutter
When developing a Flutter app, it’s crucial to be able to test API functionality, including the ability to create, read, update, and delete data. In this guide, we will explore how to perform CRUD operations using an API in a Flutter app.
Step 1: Setting up the environment
Before we dive into the actual testing, we need to set up the necessary dependencies and configurations. First, we need to install the relevant packages to handle API requests. One of the most popular packages is parse_server_sdk_flutter, which allows us to communicate with the server-side instance of our app.
To install this package, add the following line to the dependencies section in your pubspec.yaml file:
dependencies:
parse_server_sdk_flutter: ^2.0.0-nullsafety.2
Step 2: Writing the test case
Now that we have the necessary packages installed, we can start writing our test case. For this example, let’s assume we are building a simple app that allows users to save and retrieve contacts.
To write the test case, we will define a model class to hold the contact’s information. We will also define a button that, when pressed, should navigate to an activity where the user can save a new contact.
import 'package:parse_server_sdk_flutter/parse_server_sdk_flutter.dart';
class Contact {
String objectId;
String name;
String email;
Contact({this.objectId, this.name, this.email});
}
class ContactSaveButton extends StatelessWidget {
final Contact contact;
ContactSaveButton(this.contact);
@override
Widget build(BuildContext context) {
return RaisedButton(
onPressed: () {
// Perform save operation here
},
child: Text('Save'),
);
}
}
Step 3: Performing CRUD operations
In the onPressed function of the save button, we can write the necessary code to interact with the API. Here, we will use the ParseServerSdk class provided by the parse_server_sdk_flutter package to perform CRUD operations.
import 'package:parse_server_sdk_flutter/parse_server_sdk_flutter.dart';
class ContactSaveButton extends StatelessWidget {
final Contact contact;
ContactSaveButton(this.contact);
@override
Widget build(BuildContext context) {
return RaisedButton(
onPressed: () async {
ParseObject contactObject = ParseObject('Contact');
contactObject['name'] = contact.name;
contactObject['email'] = contact.email;
await contactObject.save();
// Perform any necessary actions after saving
},
child: Text('Save'),
);
}
}
Step 4: Testing the CRUD operations
Now that our code is ready, we can launch the app in an emulator or a real device to test the CRUD operations. Make sure you have specified the necessary API credentials and server settings in your app’s configuration files.
Step 5: Optional features
Depending on your needs, you may want to add additional features to your app, such as updating or deleting contact records. The parse_server_sdk_flutter package offers functions like update and delete to handle such operations.
With the above steps, you should now be able to perform CRUD API testing in your Flutter app. By using a scalable backend service like Back4App or Appwrite, you can efficiently handle all the API requests and focus on developing the frontend of your app.


