

Memories is a fantastic feature on iPhone that allows users to create special videos based on their photo library. By using this feature, you can easily save and make memories with just a few clicks.
To open the Memories feature on your iPhone, you need to go to the Photos app and tap on the “Memories” tab at the bottom. There, you will see a collection of automatically created montages or you can create your own by selecting specific photos and videos.
When you create a memory, you can choose a title for it and even edit the selected content as well as the duration of the memory. You can also change the theme and settings to further customize the memory. The iPhone offers various options, such as changing the selected media, adding or removing photos/videos, changing the length of the memory, and even hiding specific pictures or videos if you want.
Once you have fine-tuned your memory, you can click on the “Play” button to see the magic of your created video. The iPhone will automatically create a beautiful movie by combining all the selected photos and videos, and you can view it right away.
If you want to save the memory video, you can tap on the “Done” button and choose to save it to your photo library or share it with your friends and family. The Memories feature on iPhone truly makes it easy and fun to create and share memorable videos.
How to create Memories based on specific photos
If you want to create memories based on specific photos, your iPhone’s “Memories” feature is a great tool to use. With this feature, you can easily turn your photos into beautiful videos and slideshows.
To get started, open the “Photos” app on your iPhone and go to the “Albums” tab. There, you’ll find the “Memories” album which contains all the memories that have been automatically created by your iPhone using its artificial intelligence.
Now, if you want to create memories based on specific photos, you can click on the “Memories” album and then select the specific photos you want to include in your memory. To select multiple photos, simply tap on each photo you want to add.
Once you have selected your photos, click on the “More” button (represented by three dots) and then choose “Create Memory”. This will open a new screen where you can customize your memory.
On the top of the screen, you can add a title to your memory. This will appear at the beginning of your memory video. You can also change the theme of your memory by clicking on the “Themes” tab and selecting a different theme.
If you want to fine-tune your memory even more, you can click on the “Settings” tab. Here, you can adjust the duration of your memory, the music that plays in the background, and even choose whether you want your memory to be a movie or a slideshow.
Within the “Settings” tab, you can also add specific dates to your memory. This means that your memory will only include photos that were taken within a certain time frame. For example, if you had a vacation and want to create a memory of it, you can set the dates for when the vacation took place.
Once you have finished customizing your memory, simply click on the “Done” button and your memory will be created. You can find your newly created memory in the “Memories” album along with the other memories.
If you want to make further edits to your memory, you can click on it and then select the “Edit” button. This will allow you to remove or add photos, change the length of the memory, and even hide certain photos if you want.
So, next time you want to create memories based on specific photos, try using the “Memories” feature on your iPhone. It’s a fun and easy way to turn your photos into beautiful videos, and you can even create your own personalized memories with the fine-tuned settings and themes.
How to Create Photo Memories
Creating photo memories on your iPhone is a great way to bring your media library to life. With the Memories feature, you can easily create personalized photo movies that combine photos and videos from your library into a single, fine-tuned memory. Here’s how you can create your own photo memories:
- Open the “Photos” app on your iPhone.
- Go to the “Albums” tab and select “Memories” from the list of albums.
- Click on the memory you want to edit or create a new one by clicking on the “+” button.
- Add a title to your memory, or let the app generate one for you based on the content.
- Choose the photos and videos you want to include in your memory by selecting them from your library.
- You can also change the settings of the memory, such as the length of the movie and whether to include dates and titles for the slideshows.
- Once you have selected the content and adjusted the settings, click on the “Done” button to create your memory.
- From there, you can further edit your memory by adding or removing photos and videos, as well as rearranging them within the memory.
- If you want, you can also hide specific photos or videos from appearing in the memory.
- Save your memory, and it will be added to your Memories album.
Creating photo memories on your iPhone is an easy and fun way to bring your photos and videos together into a single, personalized movie. With the magic of the Memories feature, you can create beautiful montages of your favorite moments in no time. So why wait? Start making your own memories today!
Magic Movies
Do you want to transform your photos into magical movies? With your iPhone, you can easily create your own memories videos that will bring your photos to life. It’s as easy as a few clicks!
Within the Photos app on your iPhone, there is a feature called “Memories” that allows you to create videos based on specific dates, locations, or even selected photos and videos. You can add your own title to the movie to make it even more personal.
To create a Memories video, simply open the Photos app and click on the “Memories” tab. From there, you can select the photos and videos you want to include in your movie. You can also change the length of the video, as well as the title and the music that accompanies it. There are also settings that allow you to fine-tune the content of your movie.
Once you have selected the photos and videos you want to include, click on “Create” and the app will automatically generate a movie for you. You can then edit the movie if you want to make any changes or remove specific content.
Making memories videos on your iPhone is not only easy but also a fun way to relive good times. You can save these movies within your Photos library and even hide them if you don’t want them to be visible to others.
The “Memories” feature is a great way to make slideshows and montages of your photos and videos. You can add music, change the title, and the length of the movie. The app will do all the magic for you and create a beautiful memory for you to enjoy. So why not give it a try and make your own magic movies?
Make your own “Memories“ video
With the magic of your iPhone, you can create your own personalized “Memories” video that captures the essence of a special event or a cherished moment. By simply clicking a picture, the memory is created and stored in your albums. Photos from different sources are brought together within the “Memories” feature and turned into beautiful slideshows. You can also add your own title and even change the selected media based on specific dates if you want to fine-tune your memories.
To make your own “Memories” video, follow these easy steps:
- Open the Photos app on your iPhone.
- Go to the “Memories” tab.
- Select the “Edit” button on the top right corner.
- Select the “Add” button to create a new “Memories” project.
- Select the photos and videos you want to include in your “Memories” video. You can choose from your entire photo library or specific albums.
- Click on “Next” to proceed.
- Add a title to your “Memories” project if you wish.
- Change the settings to customize the length, style, and content of your “Memories” video.
- Click on “Done” to save your changes.
Once you have created your own “Memories” video, you can further enhance it by adding music, adjusting the order of the photos and videos, or removing any content you don’t want. With the “Memories” feature on your iPhone, making your own videos has never been easier. So go ahead and create your own unforgettable memories!
Edit your Memories
After you have created a Memories video on your iPhone, you can edit it to your liking. When you open the Memories tab in the Photos app, you will see a grid of memory titles, dates, and even the source of the content. To create a new memory from these specific memories, simply click on the “+” button.
When making your own Memories video, you can customize many aspects of it. You can change the title and the dates of the memory, as well as add or remove photos and videos from it. If you want to hide certain content, you can select it and then click on the “Hide” button. On the other hand, if there are specific photos or videos you want to add to the memory, you can select them from your library and add them to the project.
The Memories feature also allows you to create fine-tuned slideshows based on a specific memory. You can choose the duration and transition style for each slide, as well as add music from your own library. If you don’t want to spend too much time editing, you can simply click on “Create Movie” and let the app work its magic to create a good-looking memory video.
Once you have finished editing your memory, you can save it and it will be stored in your Albums. From there, you can watch it anytime you want or even share it with your friends and family. Remember that memories can be a powerful way to relive past moments and create new ones, so don’t hesitate to make the most out of this feature on your iPhone.
Change the title
When creating a Memories video on your iPhone, the title of the video is automatically generated based on the content and dates of the selected photos and videos. However, if you want to change the title to something more personal or fitting, you can easily do so.
To change the title of a Memories video, first open the “Photos” app on your iPhone. Then, go to the “Albums” tab and select the album that contains the Memories video you want to edit.
Within the album, find the Memories video and open it. At the bottom of the screen, you will see various editing options. Tap on the “Edit” button located in the top-right corner of the screen.
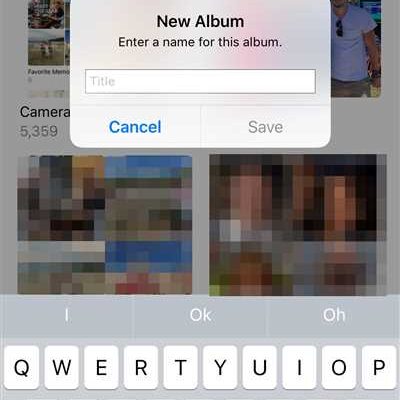
Next, scroll down and tap on the “Title” field. A keyboard will pop up, allowing you to enter a new title for the Memories video. Type in the desired title and click “Done” on the keyboard to save the changes.
Changing the title of a Memories video is a quick and easy way to make the video more personalized and meaningful to you. Whether you want to hide the original title, create a title that reflects the specific memory, or simply change it to your own liking, the process is straightforward.
By changing the title, you can also make it easier to find specific Memories videos within your media library. This can be especially useful if you have created multiple Memories videos and want to organize them based on their titles.
Additionally, by giving your Memories videos unique and personalized titles, you can create a cohesive movie-like experience when viewing them together. This fine-tuned control over the titles allows you to set the tone of your Memories videos and further enhance the overall storytelling aspect.
So, don’t be afraid to change the title of your Memories videos on your iPhone. With just a few simple steps, you can make the content even more meaningful and enjoyable to watch.
Add and remove photos within a Memory
If you want to edit or add photos to your own memories videos on your iPhone, you can easily do so within the Memories feature. With this feature, you can create slideshows and montages based on the content in your photo library.
To add photos to a memory, simply open the memory from your Photos app and then click on the “Edit” button. From there, you can click on the “Add” button to browse through your photo library and select the photos you want to add. You can add as many photos as you like to create your own personalized memory.
While making your own memories video, you can also fine-tune the content by hiding specific photos or changing the length of each picture displayed. This way, you can create a memory that is well-suited to your own preferences and captures the essence of the time, dates, and events you want to remember.
If you have created a memory that you no longer want, you can easily remove it from the memory project. Simply open the memory and click on the “Settings” button. From there, click on the “Remove” button and confirm your choice. This will remove the memory from your iPhone, but it will still be available in your Albums and can be accessed again if needed.
The Memories feature on the iPhone is a great way to save and make videos with your own photos and videos. It’s easy to use and allows you to create memories that are based on the content you have in your photo library. So go ahead and create your own memories video using the powerful “Memories” feature on your iPhone!
Change the length of a Memory

If you’ve created a Memory on your iPhone and want to fine-tune its length, you can easily change it with a few clicks. Memories are created based on the content in your photo library, so you can also add specific photos and videos to them.
To change the length of a Memory:
- Open the Photos app on your iPhone.
- Go to the “Memories” tab.
- Select the Memory you want to change the length of.
- Tap the “Edit” button.
- On the bottom of the screen, you’ll see a timeline of the photos and videos within the Memory.
- Drag the handles on either end of the timeline to adjust the length of the Memory. You can make it shorter or longer, depending on your preference.
- Once you’re happy with the new length, tap “Done” to save your changes.
- You can also click on the “Settings” button to customize the title, dates, and music of the Memory.
By changing the length of a Memory, you can create your own personalized movie-like montages. You can remove or hide certain photos or videos that you don’t want to include, as well as add your own selected content to make the Memory even more unique.
The Memories feature on iPhone is a great way to save and share your favorite moments in a captivating video format. With just a few clicks, you can create and edit memories that are tailored to your liking. So go ahead and experiment with making your own memories and enjoy the magic of reliving your past through videos and pictures!
Sources
When creating memories videos on the iPhone, you have several sources from where you can gather content. You can add photos and videos from your own media library or even hide specific ones that you don’t want to include. The “Memories” feature allows you to open your albums and select the photos and videos you want to use.
Additionally, if you have created your own movies using the iPhone’s video editing feature, you can also include them in your memories video. This is a great way to make your memories video more personalized and unique to your specific taste.
Within the Memories feature, you can also change the length of the slideshow, add a title to your video, and save or edit the content as much as you want. You can also fine-tune the settings based on the dates of the photos and videos, and even remove or add specific ones.
The memories videos are created with a touch of magic, as the iPhone intelligently selects and arranges the photos and videos to create a captivating memory. The selected content is then blended together, creating a beautifully crafted movie that captures the essence of the memory.
So, if you want to create memories videos on your iPhone, just open the “Memories” feature and start selecting the photos and videos you want to include. With just a few clicks, you can transform your collection of pictures and videos into a memorable movie that you can share with others or keep for yourself.


