

Are you looking to start your own online business and sell products to customers worldwide? With Shopify, you can easily create a professional and customizable e-commerce website that has everything you need to get started. In this article, we will guide you through the process of creating a Shopify website in just a few simple steps.
Step 1: Sign up for Shopify
To get started, you’ll need to sign up for a Shopify account. Simply visit the Shopify website and follow the signup process. You’ll be asked to provide some basic details about your business, such as your business name, address, and phone number. Once you’ve completed the signup process, you’ll have access to the Shopify dashboard where you can begin customizing your online store.
Step 2: Customize Your Website
One of the great things about Shopify is its wide range of themes and customizable features. You can choose from many different themes that are specifically built for e-commerce websites, and then customize them to match your brand. You can also add your own logo, change the color scheme, and create unique sections to highlight your products and services.
Step 3: Add Products and Details
Now that your website is set up and customized, it’s time to start adding products. Shopify makes it easy to add products to your store, with options to include details such as product descriptions, prices, and even shipping options. You can also add product images and showcase them in a visually appealing way.
Step 4: Set Up Payment Gateways
To ensure a smooth and secure shopping experience for your customers, you’ll need to set up payment gateways. Shopify offers a wide range of payment options, including popular gateways like PayPal and Stripe. By setting up payment gateways, you can securely process customer payments and offer a seamless checkout experience.
Step 5: Customize Your Shipment Settings
Shipping is an important aspect of any e-commerce business. With Shopify, you can easily customize your shipment settings to offer different shipping options to your customers. You can set up shipping rates based on location, weight, or order value, and even integrate with popular shipping carriers for real-time shipping rates.
Step 6: Publish Your Website
Once you’ve customized your website, added products, and set up the necessary settings, it’s time to publish your website. Shopify offers a seamless publishing process, allowing you to make your website live with just a few clicks. Once published, your website will be accessible to everyone and ready for customers to start shopping.
By following these 6 simple steps, you can create a professional and fully functioning e-commerce website using Shopify. Whether you’re building an online store for your business or starting a new e-commerce project, Shopify has all the features and services you need to make your online business a success.
- How to Use Shopify to Make Your Online Store Website in 2023
- Step 1: Sign Up for Shopify
- Step 2: Choose a Theme
- Step 3: Add Products
- Step 4: Set Up Payment and Shipment Options
- Step 5: Customize Your Website Settings
- Step 6: Publish Your Website
- Get everything you need for your Shopify store ready
- How to Create a Shopify Website
- Step 1 – Signup on Shopify
- Step 2- Set Up Your Online Store
- Step 3 – Customize Shopify Website Design
- Shopify Website Design Prototype with Mockitt
- Step 4 – Add Products
- Step 5 – Set Payment Gateways
- Step 6 – Taxes and Shipment
- Step 7 – Add Domain
- How Much Does it Cost to Build a Shopify Website
- Building your services business
- Video:
- BEST Shopify Tutorial in 2023 — Set Up A Profitable Shopify Store Step-By-Step
How to Use Shopify to Make Your Online Store Website in 2023
Creating an online store website can be an exciting venture for any business in 2023. With the advancements in e-commerce and the ever-growing popularity of online shopping, having your own online store can greatly expand your reach and increase your sales. Shopify is a powerful platform that can help you build and launch your online store quickly and effortlessly. In this article, we will guide you through the process of setting up your online store using Shopify.
Step 1: Sign Up for Shopify
The first thing you need to do is sign up for a Shopify account. You can do this by visiting the Shopify website and clicking on the “Get Started” button. Follow the steps provided to create an account and provide the necessary details for your store, such as your store name, address, and other contact information.
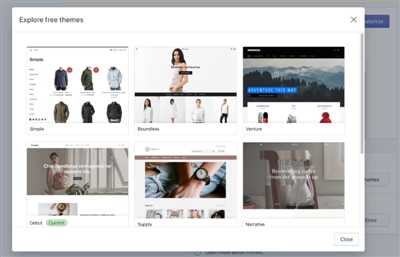
Step 2: Choose a Theme
Once you have created your account, you can start customizing your online store’s appearance. Shopify offers a wide range of professionally designed themes that you can choose from. These themes are ready-to-use and can be easily customized to fit your brand identity. Select a theme that suits your business and preferences and apply it to your store.
Step 3: Add Products
After selecting a theme, it’s time to add your products to your online store. Shopify provides an intuitive product management system that allows you to easily add and organize your products. Enter the details and images of your products, and Shopify will take care of displaying them in an attractive and user-friendly manner.
Step 4: Set Up Payment and Shipment Options
Shopify offers various payment and shipment options to provide a seamless buying experience for your customers. Set up the payment gateway that you prefer to receive payments from your customers, and choose the shipping carriers and methods that you will use to deliver your products. Configure the tax settings according to your business location and requirements.
Step 5: Customize Your Website Settings
Further customize your website by adjusting the settings provided by Shopify. This includes adding your domain, configuring SEO settings, and setting up navigation menus. Shopify provides comprehensive documentation and support to guide you through these settings and make sure everything is set up correctly for your online store.
Step 6: Publish Your Website
When you are satisfied with the design and settings of your online store, it’s time to publish it to the world. Shopify makes it easy to launch your website with just a few clicks. Once your website is live, you can start promoting it to attract customers and grow your online business.
Using Shopify and its offered services, you can create a professional and attractive online store website in 2023. The platform includes everything you need to start and run your business online, from building and customizing your website to managing products, orders, payments, and shipments. With Shopify’s user-friendly interface and powerful features, you can focus on delivering a better shopping experience to your clients and growing your business.
So, if you want to make your mark in the e-commerce industry in 2023, sign up for Shopify today and start building your online store with ease!
Get everything you need for your Shopify store ready
When it comes to building an e-commerce website, Shopify is one of the most popular platforms out there. Whether you are just starting your online business or already have an established store, Shopify provides all the essential features and tools you need to create, customize, and manage your website.
Before you can start building your Shopify store, there are a few things you need to have in place. Here is a step-by-step guide on how to get everything ready:
Step 1: Sign up for a Shopify account
The first thing you need to do is sign up for a Shopify account. You can easily sign up through their website by providing your email address, password, and store name. Shopify offers a 14-day free trial, so you have enough time to explore the platform and decide if it’s right for you.
Step 2: Choose a theme for your store
Once you have signed up and logged in, the next step is to choose a theme for your store. Shopify offers a wide range of free and premium themes that you can customize to match your brand. You can browse through the theme store and choose one that suits your business style and needs.
Step 3: Customize your theme
After selecting a theme, you can start customizing it to make it unique to your brand. Shopify’s theme editor allows you to make changes to the layout, colors, fonts, and more. You can also add your logo and custom images to further personalize your store.
Step 4: Add your products
Once your theme is set up, it’s time to add your products. Shopify makes it easy to create product listings, including product images, descriptions, prices, and inventory management. You can also set up various product options, such as size, color, and more.
Step 5: Set up payment gateways
Shopify offers a variety of payment gateways to choose from, including popular options like PayPal and Stripe. You need to set up at least one payment gateway so that your customers can make purchases on your website securely.
Step 6: Configure shipping settings
Configuring shipping settings is an important step to ensure smooth order fulfillment. You can set up shipping rates based on location, weight, or order value. You’ll also need to select your preferred shipping carriers and configure the options for domestic and international shipments.
Step 7: Get started with mockup services
If you want to create a custom design for your Shopify website and improve user experience, you can use services like Mockitt by Wondershare. Mockitt is a prototyping tool that allows you to create interactive mockups of your website before development. This way, you can get feedback from clients or your team and make necessary changes before starting the actual website development.
Setting up a Shopify store doesn’t have to be a complicated process. By following these steps and getting everything ready, you’ll be well on your way to building a successful online business.
How to Create a Shopify Website
Creating a Shopify website is a great way to start your own online store. With Shopify, you can easily set up and customize your store to fit your unique needs. Whether you want to sell custom products or set up an e-commerce business, Shopify has everything you need to get started.
Before you begin building your website, there are a few things you’ll need to do. First, sign up for a Shopify account. This popular e-commerce platform offers a user-friendly interface and a wide range of features to help you create a professional-looking website.
Once you’ve signed up for an account, you can start building your website. Shopify offers a variety of themes and templates to choose from, allowing you to customize the design of your site. You can add your own logo, customize the colors, and even change the layout of your website to make it unique to your brand.
After you’ve customized the look of your website, you can start adding products. Shopify makes it easy to add and manage your products, with features like product variants, pricing options, and inventory management. You can also set up payment gateways and shipping options to make it simple for your customers to make a purchase.
If you want to go further in customizing your website, you can use a tool like Wondershare Mockitt to create mockups of the pages you want to design. This will give you a better idea of how your website will look and function before you start development.
Once you’re satisfied with your website’s design and settings, you can go ahead and open your store to the public. Shopify makes it easy to set up a custom domain for your store, so your customers will know exactly where to find you.
When it comes to the cost of creating a Shopify website, it will depend on the features and services you choose to use. Shopify offers different plans with varying levels of functionality, so you can find one that fits your budget.
In conclusion, creating a Shopify website is a straightforward process that anyone can do. Whether you’re a beginner or an experienced business owner, Shopify provides all the tools and resources you need to build a successful online store and start selling your products to a wider audience.
Step 1 – Signup on Shopify
If you want to start your own e-commerce business and sell products online, Shopify is the perfect platform for you. With its user-friendly interface and powerful features, setting up a Shopify website is quick and easy. In this step, we will guide you through the process of signing up on Shopify and getting your e-commerce store up and running.
- Go to the Shopify website (www.shopify.com) and click on the “Get Started” button.
- Fill in your email address, password, and store name. Your store name will be a unique domain that your customers will use to visit your website (e.g., www.yourstorename.com). Make sure to choose a name that reflects your business and is easy to remember.
- Click on the “Create your store” button.
- Next, you’ll be asked a few questions about your business and your products. This is to help Shopify customize your store settings to fit your needs. Provide as much detail as possible to get the most out of the platform.
- Once you’ve completed the initial setup, you can start adding products to your store. Shopify provides a user-friendly interface for adding products, setting prices, and managing inventory. You can also organize your products into collections to make it easier for your customers to browse and find what they’re looking for.
- In addition to adding products, you can also customize your website design using Shopify’s built-in theme editor. You can choose from a wide range of pre-designed themes or create your own custom design using HTML and CSS.
- Set up payment gateways to accept payments from your customers. Shopify offers various payment gateway options, such as PayPal and Stripe, which allow you to securely process customer transactions.
- Configure your shipping settings to determine how you want to handle order shipment. You can set up shipping rates based on the weight or price of the products, and even offer free shipping for certain orders.
- Once you’ve completed these steps, your Shopify website is ready to go live. You can publish your website and start attracting customers to your online store.
Signing up on Shopify is just the first step in building your e-commerce business. In the following steps, you’ll learn how to market your products, optimize your website for search engines, and drive traffic to your online store. With the right strategies and the powerful tools offered by Shopify, you can build a successful e-commerce business and start selling to customers all over the world.
Step 2- Set Up Your Online Store
Once you have created your Shopify website, the next step is to set up your online store. This section will guide you through the necessary steps to get your store up and running.
Step 1: Customize your store design
Use the built-in themes and design options in Shopify to customize the look and feel of your store. You can use these themes as a starting point or further customize them to suit your business needs.
Step 2: Add products to your store
Add your products to your store by using the “Products” section in the Shopify admin. You can add details such as the product name, description, price, and images. This will make your products ready for publishing.
Step 3: Set up payment and shipping
In order to make your store fully functional, you need to set up payment and shipping options. Shopify offers many different payment gateways and shipping services that you can integrate into your store. Follow the settings in the Shopify admin to enable these services.
Step 4: Customize the checkout process
The checkout process is an important part of your e-commerce website. Use the Shopify admin to customize the checkout settings to match your business requirements. You can add custom fields, enable taxes, and set up order fulfillment options.
Step 5: Publish your store
Once everything is set up, you can publish your store and make it live. This will allow customers to visit and purchase products from your online store.
Step 6: Further customize your store
If you want to make further customizations to your store, you can use the Shopify admin and add apps or integrations to enhance the functionality of your store. This can include adding features like customer reviews, loyalty programs, or advanced analytics.
Step 7: Get your own domain
If you want to have your own domain for your store, you can purchase a custom domain through Shopify or use a domain you already own. This will give your store a professional and memorable web address.
In conclusion, creating an online store with Shopify is a simple and straightforward process. By following these steps, you can set up your store, customize its design, add products, set up payment and shipping options, and publish your store to start your e-commerce business.
Step 3 – Customize Shopify Website Design
Once you have signed up and created your Shopify website, it’s time to customize its design. This step is crucial as it allows you to tailor your online store to better meet the needs and preferences of your customers.
To start customizing your Shopify website, go to the “Themes” section of your Shopify dashboard. Here, you’ll find a variety of pre-built themes that you can use for your store. Shopify offers over 70 different themes, so you’re sure to find one that suits your brand and aesthetic.
Before selecting a theme, consider the features you need for your online store. For example, if you plan to sell physical products, you’ll want a theme that includes a product page and a shopping cart. If you’re offering services, you may need a theme that can integrate booking or scheduling features.
Once you’ve chosen a theme, click on the “Customize” button to make further modifications. Through the customization settings, you can change the colors, fonts, and layout of your website. You can also add your logo and set up payment gateways to accept online payments from your customers.
If the built-in customization options don’t fully meet your needs, you have two options. First, you can hire a Shopify Expert to create a custom design for your website. This can be a costly option, with prices ranging from $500 to $2023 on average. Second, you can use a website development service like Wondershare Mockitt to create a custom prototype of your website. This allows you to visualize and experiment with design ideas before implementing them on your live site.
Furthermore, you can customize the layout and structure of different sections on your Shopify website. You can add or remove sections to showcase your products or display additional information about your brand or policies. This allows you to create a unique and engaging experience for your customers.
When customizing your Shopify website, remember to consider important details such as shipping and taxes. You’ll need to set up shipping options and determine how taxes will be calculated and collected from your customers. Shopify provides easy-to-use tools for managing these aspects of your online store.
After customizing your website to your satisfaction, you can publish it and make it live for everyone to see. Before doing so, it’s a good idea to go through a final testing phase to ensure that everything is working correctly. You can place a test order to see if the payment gateway, shipment, and order fulfillment process are functioning as expected.
To sum it up, customizing your Shopify website design is an essential step in creating a successful e-commerce store. By paying attention to every detail and using the available customization features, you can create a website that stands out and provides a seamless shopping experience for your customers.
Shopify Website Design Prototype with Mockitt
Shopify is an open e-commerce platform that caters to the needs of many businesses looking to build their online stores. If you’re planning to start an e-commerce project in 2023, and want to build a Shopify website, you can use Mockitt to create a design prototype before getting it built. This section will guide you through the steps of designing your Shopify website prototype using Mockitt.
- Sign up for a Mockitt account: To start using Mockitt, you’ll need to sign up for an account using your email address. Mockitt offers both free and paid services, so you can choose what suits your needs.
- Create a new project: Once you’re signed up, create a new project for your Shopify website design. You can use templates and customizing options offered by Mockitt to make the design process better and easier.
- Add and customize sections: Use Mockitt’s drag and drop features to add and customize sections for your website. Mockitt offers many ready-made components that you can use to create a visually appealing design for your Shopify website. Add a header, navigation bar, footer, and sections for product listing and adding details.
- Design the product pages: Design the product pages of your Shopify store using Mockitt’s tools. Add details like product images, descriptions, pricing, and shipping features. You can also add customizing options like color and size choices.
- Set up payment gateways: Mockitt also allows you to add and customize payment gateways for your Shopify website. You can add popular gateways like PayPal and Stripe to offer convenient payment options to your customers.
- Mockup the checkout process: Use Mockitt to create a mockup of the checkout process, including the order summary, customer details, and shipment options. This will help you visualize and improve the user experience of your Shopify store’s checkout process.
- Preview and feedback: Once you’ve designed all the necessary sections and pages, preview your design prototype in Mockitt. Share it with your team or clients to gather feedback and make any necessary changes.
- Publish your design: Once you’re satisfied with your design, you can publish it to Shopify. You can export your design from Mockitt and use it as a reference when building your actual Shopify website.
By following these steps, you can create a Shopify website design prototype using Mockitt. It’s a great tool to help you visualize and build a better Shopify website for your online business.
Step 4 – Add Products
Once you have your Shopify website up and running, the next step is to add products to your store. Adding products is essential as it will showcase the items or services that you offer to your customers.
Before getting started, make sure you have all the details of the products or services that you want to add. This includes the product name, description, price, and any variations or options that may be available.
To add products to your Shopify store, follow these steps:
- Log in to your Shopify dashboard and click on the “Products” tab.
- Click on the “Add product” button.
- In the provided fields, enter the details of your product, such as the product name, description, price, and any variations or options.
- If you have multiple images of your product, click on the “Add media” button to upload and select the images.
- Choose the collection or collections where you want to include your product.
- Set up the shipping details, such as weight, dimensions, and shipping origin. You can also set up shipping rates and add different shipping options.
- Configure the payment gateways. Shopify includes built-in payment gateways like Shopify Payments, which allows you to accept credit card payments. You can also set up other payment gateways like PayPal.
- Set up your tax settings based on your business needs.
- Review all the details and make sure everything is accurate.
- Click on the “Save product” button to publish your product on your Shopify store.
By following these steps, you can add as many products as you need to your Shopify store. Adding products is an important step in building your online business as it allows your customers to browse and purchase the items or services you offer.
Furthermore, Shopify provides many features for customizing your product listings to make them more appealing to your customers. You can use themes and design options to customize the look and feel of your product pages, as well as add additional functionality through apps and integrations.
With Shopify, you can get your online store up and running in no time. Whether you’re a beginner or an experienced business owner, Shopify makes it easy to set up and manage your online business. It includes everything you need, from domain registration to payment gateways and shipping options.
So, follow this step-by-step guide on how to create a Shopify website, and you’ll be ready to start adding products to your online store!
Step 5 – Set Payment Gateways
Once you have everything set up like your logo, custom domain, and shipping details, it’s time to add payment gateways for your Shopify website. In order to do this, follow these steps:
- Sign up for a Shopify account. If you don’t already have one, you can sign up for a free trial on the Shopify website.
- Go to your Shopify admin panel and click on “Settings” in the lower-left corner of the screen.
- Click on “Payment providers” in the “Settings” menu.
- Here, you’ll see different payment options that Shopify offers, like Shopify Payments, PayPal, and many more. You can choose the ones that you want to offer to your customers.
- Click on “Edit” next to the payment option that you want to set up. This will open a settings page where you can customize the payment gateway to fit your business needs.
- Follow the steps provided by the payment gateway to connect it to your Shopify store. This may include providing your account details, setting up a merchant account, or integrating with a third-party payment processor.
- Once you’ve set up the payment gateway, click on “Save” and it will be ready to use on your Shopify store.
Setting up payment gateways is a crucial step in creating your Shopify website. It allows you to accept payments from your customers and ensures a seamless shopping experience. You can choose from a variety of popular payment gateways that Shopify offers, or even add custom ones if needed.
In addition to payment gateways, Shopify also offers various other features for building and customizing your online store. You can explore different themes and built-in design settings to make your store look exactly how you want it. Shopify also includes tools for managing inventory, orders, and shipment tracking.
By following these steps, you’ll be well on your way to creating and publishing a professional e-commerce website on Shopify. Whether you’re starting a new business or already have an established one, Shopify provides all the tools and services you need to get started and succeed in the world of online stores.
Step 6 – Taxes and Shipment

Once you have set up your Shopify website and customized it to your liking, it’s time to take care of the important details like taxes and shipment. These are crucial aspects of any online store, as they determine how much you charge your customers and how you handle the shipping process.
Shopify offers built-in tax settings to help you easily configure taxes based on your business location and the locations you ship to. You can set tax rates for different regions and even enable automatic tax calculations for your customers. This ensures that you are compliant with the tax regulations of the countries you operate in.
When it comes to shipment, Shopify integrates with various shipping carriers and gateways to make the process seamless. You can choose from popular shipping services like USPS, FedEx, and DHL, and even set up custom shipping rates based on factors like weight or price. This allows you to offer accurate shipping costs to your customers and provide a better shopping experience.
Furthermore, Shopify provides options for adding order tracking and delivery notifications, so your customers can stay informed about the status of their shipments. This helps build trust and ensures customer satisfaction.
To customize your taxes and shipment settings on Shopify, follow these steps:
| Step 1 | Open the Shopify admin and go to the “Settings” section. |
| Step 2 | Click on “Taxes” to access the tax settings. |
| Step 3 | Add the tax details for each region you operate in. |
| Step 4 | Enable automatic tax calculations if needed. |
| Step 5 | Go back to the “Settings” section and click on “Shipping and delivery”. |
| Step 6 | Add the shipping details for each region you ship to. |
| Step 7 | Set up shipping rates based on weight, price, or other factors. |
By following these steps, you can ensure that your Shopify store is ready to handle taxes and shipment for your business. It’s important to get these details right, as they can have a significant impact on your customers’ satisfaction and your overall success.
In conclusion, creating a Shopify website for your business is a great way to start using e-commerce. Shopify provides all the necessary tools and services to build an online store, customize it to your liking, and handle essential aspects like taxes and shipment. By following the steps outlined in this article, you can create a professional and successful online store that meets the needs of your clients and makes wonders for your business.
Step 7 – Add Domain
Once you have created your Shopify store and customized it to your liking, the next step is to add a domain to your website. Adding a domain is essential as it gives your online store a professional and trustworthy appearance.
To add a domain to your Shopify website, follow these steps:
| 1- | Signup for a Shopify account |
| 2- | Go to the “Settings” section of your Shopify dashboard |
| 3- | Click on “Domains” in the left-hand menu |
| 4- | Click on “Add domain” |
| 5- | Enter the domain name you want to use for your website |
| 6- | Click on “Add domain” |
Remember that you can add multiple domains to your Shopify website, which can be useful if you have different websites for different products or services.
Furthermore, adding a domain to your Shopify store allows you to customize your domain settings, such as setting up a custom email address or redirecting your domain to a different site.
Keep in mind that adding a domain may come with a cost depending on the domain provider you choose. Shopify offers its own domain registration service, but you can also use external domain providers if you already have a domain registered.
By adding a domain to your Shopify website, you are making it ready to go live and start receiving orders from customers. A domain adds credibility and a sense of professionalism to your online store, which can make a world of difference for your business.
Follow these steps and you’ll be well on your way to building a successful e-commerce business with Shopify!
How Much Does it Cost to Build a Shopify Website
When it comes to building an online business, one of the first things you’ll need to do is create a website. Shopify is a popular platform that allows you to easily build and customize your own online store. But how much does it cost to actually build a Shopify website?
The cost of building a Shopify website can vary depending on a few factors. One of the main factors is whether you choose to build the website yourself using Shopify’s easy-to-use interface, or if you decide to hire an agency to design and build the website for you.
If you’re building the website yourself, you can get started with Shopify by signing up for an account and following the step-by-step setup process. This includes choosing a domain name, selecting a theme, adding products, setting up payment gateways, and configuring shipping and taxes. Shopify offers a variety of themes and customization options, so you can create a website that suits your business needs.
If you decide to hire an agency to build your Shopify website, the cost will be higher. Agencies usually charge an hourly rate for their services, and the final cost will depend on the complexity of your website and the specific features you want to include. Additionally, agencies may offer additional services such as logo design, prototype development, and mockup creation, which can add to the overall cost.
In terms of ongoing costs, Shopify offers different pricing plans that include various features. The basic plan starts at $29 per month, and the advanced plan goes up to $299 per month. The higher-tier plans include additional features such as advanced reporting and third-party calculated shipping rates. Furthermore, if you want to customize your store further, you can add apps and extensions from the Shopify app store, which may have additional costs.
It’s worth noting that the cost of building a Shopify website doesn’t include other expenses such as marketing and advertising. These are separate costs that you’ll need to consider in order to promote your website and attract customers.
In conclusion, the cost of building a Shopify website can range from a few hundred dollars if you build it yourself using the basic features, to several thousand dollars if you hire an agency and want custom design and additional services. It’s important to consider your budget and business needs when deciding how much you’re willing to invest in your online store.
Building your services business
If you’re planning to create an e-commerce website for your services business, Shopify is a great platform to consider. With its user-friendly interface and customizable options, you can easily build a website that showcases your services and meets your business needs.
The first thing you need to do is create a Shopify account and set up your store. This includes choosing a domain name for your website and configuring your store settings. Once you’ve done that, you can start customizing your website with themes and adding your logo to make it unique to your brand.
In order to offer your services through your website, you’ll need to set up the payment gateways and shipping methods. Shopify offers a wide range of payment gateways to choose from, so you can pick the ones that work best for your business. Additionally, you can set up shipping options and calculate the shipping cost based on your preferences.
To make it easier for your customers to find and order your services, you can create a dedicated section for your services on your website. This section should include details about each service, including a brief description, pricing, and any additional information you want to provide. You can also use this section to showcase any reviews or testimonials from satisfied customers.
Furthermore, Shopify allows you to add various features and functionalities to your website through its app store. There are apps available for every aspect of your services business, whether it’s appointment scheduling, inventory management, or customer support. Using these apps can help streamline your operations and provide a better experience for your customers.
In addition to the features offered by Shopify, you can also integrate other tools and services to further enhance your website. For example, using a prototyping tool like Mockitt by Wondershare can help you create interactive mockups of your services, giving your customers a better idea of what to expect. You can also use source control and versioning tools to manage your website’s development and ensure a smooth workflow.
Once you’ve built and customized your website, you’ll be ready to publish it and start promoting your services. Shopify provides built-in SEO features, so you can optimize your website for search engines and attract more organic traffic. Additionally, you can use social media and other marketing channels to reach a wider audience and generate more leads for your business.
Building your services business on Shopify is a step-by-step process that requires careful planning and attention to detail. By customizing your website, adding the necessary features, and implementing efficient tools and services, you can create a professional and user-friendly online presence that will attract customers and drive your business forward.


