

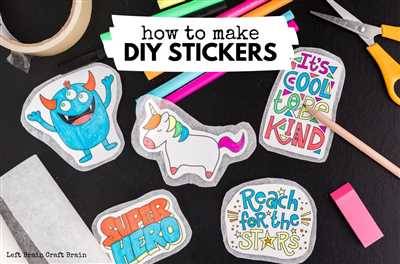
If you’re passionate about homemade crafts or looking to add a personal touch to your belongings, making your own stickers is an easy and fun way to do so. In this article, we’ll teach you step-by-step how to create your own custom-designed stickers right at home.
Co-authored by Nicole, a DIY enthusiast, this article will guide you through a method that requires only a few materials and is suitable for beginners. Even if you haven’t tried making stickers before, with this simple technique, you’ll be able to create professional-looking stickers in no time.
To get started, you’ll need some supplies: paper, scissors, a printer (optional), double-sided adhesive sheets, and a Cricut machine (optional, but it can make the process even easier). This method involves using sticky layers to stack the images, so you won’t need any glue or messy adhesive.
The first step is to design your stickers. You can either draw your own images or use images you find online. If you’re using a printer, print out the images onto the paper. Then, cut out the images. Simple shapes with minimal details work best for this method.
Next, peel off the backing from the double-sided adhesive sheets and stick your cut-out images onto the sticky side. Press them down firmly to ensure they’re securely attached. Layer as many images as you want, creating fun and unique combinations.
Once you have all your images stacked, cut around them, leaving a small border to ensure the adhesive doesn’t seep out. And that’s it! Your homemade stickers are ready to be used. You can stick them on your belongings, decorate your notebooks, or add a touch of creativity to your interior.
This method offers tons of possibilities for creating your own unique stickers. You can experiment with different designs, colors, and shapes. And the best part is, it requires less time and effort than other sticker-making techniques.
So why not give it a try? Get creative with homemade stickers and start adding a personal touch to everything around you!
- How to make stickers with Cricut
- What you’ll need
- Step 1: Create your sticker design
- Step 2: Load the sticker paper into your Cricut machine
- Step 3: Cut out your stickers
- Step 4: Peel and stick
- Step 2: Cut Out the Sticker You Designed
- Gather Your Materials:
- Start Cutting:
- How to Make Stickers Using Sticker Paper The Easy Way
- Make your own stickers…
- The materials you’ll need
- The step-by-step process
- About This Article
- Video:
- HOW TO MAKE STICKER SHEETS | NO CUTTING MACHINE & NO DRAWING SKILLS?!
How to make stickers with Cricut
If you’re looking for a fun and easy way to make homemade stickers, then Cricut is the perfect tool for you. Cricut is a cutting machine that can be used to create all sorts of crafts and DIY projects, including stickers.
Co-authored by Nicole, a crafting enthusiast, this article will guide you through the step-by-step process of making your own stickers using a Cricut machine.
What you’ll need
To get started, here’s what you’ll need:
- Cricut machine: Cricut machines are designed to cut various materials and can be used to create stickers effortlessly.
- Design software: You’ll need design software to create your sticker design. Cricut Design Space is a free software that works seamlessly with Cricut machines.
- Sticker paper: Look for double-sided adhesive sticker paper that is compatible with your Cricut machine.
- Images or designs: Choose the images or designs that you want to turn into stickers.
Step 1: Create your sticker design
Start by opening the design software and creating your sticker design. You can either use pre-designed images or create your own from scratch. Let your creativity flow!
Step 2: Load the sticker paper into your Cricut machine
Once your design is ready, load the double-sided adhesive sticker paper into your Cricut machine. Make sure it is properly aligned and secured.
Step 3: Cut out your stickers
Using the Cricut machine, cut out your stickers based on the design you created. The machine will precisely cut the sticker paper, giving you perfect stickers.
Step 4: Peel and stick
After the cut is complete, carefully peel the stickers off the sticker paper backing. The adhesive layer on the back of the stickers will make them sticky, ready to be used wherever you like.
With this method, you can make tons of stickers easily and effortlessly. The Cricut machine simplifies the process and ensures precise cuts every time.
Now that you know how to make stickers with Cricut, you can personalize your belongings, decorate your interior, or even sell your homemade stickers. The possibilities are endless!
So, give it a try and enjoy the fun and creative world of sticker making with Cricut!
Step 2: Cut Out the Sticker You Designed
Once you have your sticker design printed on the sticky paper, it’s time to cut it out. This step is essential to create your own homemade stickers. Follow the method below to cut out your sticker:
Gather Your Materials:
To cut out your stickers, you’ll need the following:
- A pair of sharp scissors or a cutting machine like Cricut
- Double-sided sticky paper
- Your printed sticker design
Start Cutting:
First, peel off the backing of the sticky paper to reveal the adhesive side. Then, place your printed design facing down onto the sticky side of the paper. Make sure there are no air bubbles or wrinkles, as these can affect the appearance of your stickers.
Next, using your scissors or cutting machine, carefully cut out the sticker design. Take your time and be precise to achieve clean edges. If you’re using a Cricut or similar cutting machine, follow the instructions provided with the device for the best results.
Depending on the complexity of your design, you may need to make several cuts and layers to bring out the details. For example, if you have different colors in your design, you can cut out each color separately and layer them together.
Once you have finished cutting out your stickers, peel the backing of each individual sticker to reveal the adhesive side. This will allow you to stick the stickers onto various surfaces.
This cutting method makes it easy to create homemade stickers using your own designs. Plus, it’s a fun way to express your creativity and add a personal touch to your belongings. With this step done, you’re one step closer to making tons of stickers!
How to Make Stickers Using Sticker Paper The Easy Way
If you’re a fan of DIY crafts and love to personalize your own items, making homemade stickers is a fun and creative project that you can do right at home. One easy and efficient method for making stickers is by using sticker paper. In this guide, we’ll show you how to create your own stickers using sticker paper in a simple and hassle-free way.
What You’ll Need:
- Sticker paper
- A printer
- Scissors or a cutting machine (like a Cricut)
- Images or designs that you want to turn into stickers
Step 1: Design Your Stickers
The first step is to design your stickers. You can use any design software or even online resources to create the images or designs that you want to turn into stickers. Get creative and let your imagination run wild!
Note: If you’re not confident in your design skills, you can also find pre-designed sticker sheets online that you can print and use.
Step 2: Print Your Stickers
Once you have your stickers designed, you’ll need to print them onto the sticker paper. Make sure to follow the instructions provided by the manufacturer of the sticker paper to ensure the best printing results. When printing, use the highest quality setting for the best-looking stickers.
Step 3: Cut Out Your Stickers
After your stickers are printed, it’s time to cut them out. You can use scissors to cut the stickers by hand or use a cutting machine like a Cricut for more precise and professional-looking results. Take your time and carefully cut around the edges of each sticker.
Step 4: Peel and Stick
Now that your stickers are cut out, it’s time to peel them off the backing paper and stick them wherever you want! The sticker paper is typically double-sided, with a sticky layer on one side and a backing layer on the other. Simply peel off the backing layer and stick the stickers onto your desired surface.
Note: Some sticker papers may require you to apply glue to the back of the stickers if they are not sticky enough. Make sure to read the instructions provided with your sticker paper.
That’s it! You’ve successfully made homemade stickers using sticker paper in an easy and efficient way. Now you can decorate your belongings, personalize gifts, or create your own sticker collection with tons of unique designs.
Whether you’re making stickers for yourself or for others, this method allows you to unleash your creativity and design stickers that are truly one-of-a-kind. Have fun and enjoy the process!
Make your own stickers…
If you’re interested in making your own stickers, this article is for you. Designing and creating homemade stickers can be a fun and creative way to personalize your belongings or decorate your home’s interior. In this article, co-authored by Nicole, you’ll learn about an easy method for making your own stickers using just paper and glue.
The materials you’ll need
To make homemade stickers, you’ll only need a few materials:
- Paper – any type of paper can work, but it’s best to use something thicker like cardstock or sticker paper.
- Glue – opt for a glue that dries clear.
- Scissors – for cutting out your sticker designs.
The step-by-step process
Follow these steps to create your own homemade stickers:
- Design your stickers – use any graphic design software or even hand-draw your sticker designs.
- Print your designs – print your designs onto the paper you’ve chosen. If you’re using sticker paper, skip to step 4.
- Apply glue – coat the back of your printed paper with glue using a brush or your finger.
- Stick the glue-coated paper – peel off the backing from a sheet of double-sided adhesive and stick the glue-coated side of your printed paper onto it.
- Layer and cut – if you want to make a more durable sticker, you can repeat steps 3 and 4 to add another layer. Once done, cut out your sticker designs.
- Peel and stick – peel off the backing from the adhesive layer and stick your homemade stickers onto any surface you like.
That’s it! With this simple method, you’ll be able to make your own homemade stickers in no time. Whether you’re using them for personalizing items or adding a touch of creativity to your living space, homemade stickers can be a fun and cost-effective way to decorate. Get creative and enjoy making unique stickers with this easy process!
About This Article
This article explores a simple and easy method for making your own homemade stickers. Designed for anyone interested in creating their own custom stickers, this article provides step-by-step instructions on how to make your own unique stickers in just a few easy steps.
Whether you’re a seasoned crafter or new to DIY projects, this article has all the information you need to get started. Nicole, a DIY enthusiast and experienced sticker maker, co-authored this article to share her knowledge and expertise.
In this article, you’ll learn how to make homemade stickers using basic materials that you probably already have at home. There’s no need for expensive equipment like a Cricut machine – you can create beautiful stickers with just scissors, paper, and glue.
The process is simple: you’ll start by designing your stickers, either by hand or using digital software. Then, you’ll print out your designs on sticker paper and cut them out. Next, you’ll remove the backing and stick the stickers to any surface you like. With this method, you can create custom stickers for personal use, gift-giving, or even selling.
One of the advantages of making homemade stickers is the ability to design exactly what you want. Unlike store-bought stickers, you have complete control over the size, shape, and images you use. You can even create double-sided stickers or use transparent sticker paper for a unique look.
In addition to being a fun and creative activity, making homemade stickers can also be a sticky way to personalize your belongings. Whether you want to decorate your laptop, phone, water bottle, or even your car’s interior, homemade stickers provide an easy and affordable option.
So, if you’re ready to start making your own homemade stickers, keep reading. In just a few easy steps, you’ll be able to create tons of unique and personalized stickers that you can proudly display and share with others.


