

If you are ready to start blogging, the first step is to create a blog account. Luckily, there are several platforms that offer free blog creation services. One popular option is Blogger, also known as Blogspot.com. In this article, we will guide you through the simple steps of creating a blog account on Blogger.com.
To create a blog account on Blogger, you will need to open the Blogger website and click on the “Create Your Blog” button. This will take you to the account creation wizard, where you can choose a name for your blog and a custom domain address. If you don’t have a domain yet, you can choose a simple address that includes your blog name, such as “yourblogname.blogspot.com”.
After choosing your blog name and address, you will need to provide some details, such as your email address. Blogger will use this email address to connect your blog to your account, so make sure to provide a valid and active email address.
Once you have provided all the necessary details, you can customize your blog. Blogger offers a variety of themes and templates that you can choose from. You can also later customize the theme to give your blog a unique look that reflects your personal style or brand.
With your blog account created, you are now ready to start blogging. The Blogger dashboard is where you will write and edit your blog posts. You can access the dashboard by clicking on the “⚙️” icon next to your blog name. From there, you can create new posts, edit existing ones, and manage all aspects of your blog.
Now that you know how to create a blog account on Blogger.com, you can start sharing your thoughts, ideas, and expertise with the world. Happy blogging!
- How To Create An Account On Blogger
- Step 2: Choose a domain name and template
- How to start a blog with Blogger
- Step 2 Install the free WordPress software ⚙️
- Step 1: Open the WordPress installation wizard
- Step 2: Connect your domain
- Step 3: Install WordPress
- Step 4: Customize and start blogging
- Video:
- How to Make a Free Blog Website on Blogger.com
How To Create An Account On Blogger
If you have a passion for writing and want to share your thoughts with the world, creating a blog is a great way to start! Blogger is a free platform that allows you to create and customize your own blog. Here’s a step-by-step guide on how to create an account on Blogger and become a part of the blogging community.
Step 1: Open your browser and go to blogger.com.
Step 2: Click on the “Create Your Blog” button. If you already have a Google account, you can use that to sign in. Otherwise, you will need to create a Google account first by clicking on the “Create Account” button.
Step 3: Once you’re signed in, you’ll be taken to the Blogger dashboard. Here, click on the “Create New Blog” button.
Step 4: A pop-up window will appear where you can enter the details for your blog. Choose a name for your blog and a domain address. You can either choose a domain that ends with “.blogspot.com” or connect a custom domain that you already have. Click on the “Next” button.
Step 5: Now, select a template for your blog. Blogger offers a variety of pre-made templates that you can choose from. You can always change and customize the template later on. Once you’ve chosen a template, click on the “Create Blog” button.
Step 6: Congratulations! You have successfully created your blog on Blogger. You can now start writing and publishing your posts. The Blogger dashboard provides a simple editor that allows you to write and edit your blog posts. Just click on the “New Post” button to start writing.
Step 7: If you want to customize the look and feel of your blog, you can do so by going to the “Theme” section in the Blogger dashboard. Here, you can change the colors, layout, and other design elements of your blog.
Step 8: As you gain more experience with blogging, you may want to explore advanced features such as installing third-party software or adding widgets to your blog. You can find these options in the “Layout” section.
That’s it! You now have an account on Blogger and are ready to start your blogging journey. Remember to write engaging content and interact with your readers. Happy blogging!
Step 2: Choose a domain name and template
Once you have created a blog account with Blogger, the next step is to choose a domain name and template for your blog. The domain name is the web address that people will use to access your blog.
You can choose a domain name directly from Blogger or use your own custom domain if you have one. If you choose to use a domain from Blogger, it will have the format “yourblogname.blogspot.com”. This is a free option provided by Blogger.
To choose a domain name, click on the “⚙️” icon, which represents the settings button, located on the top right corner of your Blogger dashboard. From there, click on the “Settings” option to open the settings wizard.
In the settings wizard, you will find the “Basic” section where you can find the “Publishing” sub-section. This is where you can customize your domain name. Simply click on the “Edit” button next to the address you want to change and type in your desired domain name.
If you have your own custom domain, you can connect it to your Blogger account by following the instructions provided. This allows you to have a more personalized web address for your blog.
After choosing the domain name, the next step is to select a template for your blog. A template is a pre-designed layout and theme that easily gives your blog a professional look. Blogger provides a variety of free templates for you to choose from.
To choose a template, go back to your settings wizard, then click on the “Theme” option under the “Basic” section. From there, you will see a list of available templates. You can preview each template to see how it will look on your blog.
Once you have found a template that you like, click on the “Apply to Blog” button to install it. You can also customize the template further by clicking on the “Customize” button. This allows you to change colors, fonts, and other design elements to match your style.
Don’t worry if you are not satisfied with the template you initially choose. You can always change it later by following the same steps.
Now that you have completed step 2, you have chosen a domain name and template for your blog. The next step is to start writing and publishing your blog posts!
How to start a blog with Blogger
Blogger is a free blogging platform provided by Google. It allows you to create a blog and start sharing your thoughts and ideas with the world. In this guide, we will walk you through the step-by-step process of creating a blog using Blogger.
Step 1: Create a Blogger Account
To start a blog with Blogger, you will need a Google account. If you don’t have one, you can easily create it by going to accounts.google.com/signup. Once you have a Google account, go to www.blogger.com and click on the “Create Your Blog” button.
Step 2: Choose a Blog Name and Address
On the Blogger dashboard, click on the “Create a New Blog” button. A pop-up window will open where you need to choose a name for your blog and a domain address. The domain address will be something like “yourblogaddress.blogspot.com”. Choose a name and address that best represents your blog topic or niche.
Step 3: Customize your Blog
After choosing the name and address, you will be directed to the blog customization wizard. Here, you can select a theme for your blog. Blogger provides a variety of templates and themes to choose from. Click on the “Customize” button to edit the theme and customize it according to your preferences.
Step 4: Connect a Custom Domain (optional)
If you have a custom domain that you want to use for your blog instead of the default “yourblogaddress.blogspot.com”, you can connect it to your Blogger account. Blogger allows you to connect custom domains through the settings. Click on the “⚙️” icon on the left sidebar, then click on “Settings”, and navigate to the “Basic” tab. There, you will find the option to add a custom domain.
Step 5: Write and Publish your First Blog Post
Now that your blog is set up, it’s time to start writing your first blog post. On the Blogger dashboard, click on the “New Post” button. A simple editor will open where you can write your blog post. You can add images, format the text, and include links to make your blog post more engaging. Once you are done writing, click on the “Publish” button to make your blog post live.
Starting a blog with Blogger is a simple and free way to enter the world of blogging. You don’t need any technical skills or software installation, as Blogger provides everything you need to create and manage a blog. Give it a try and start sharing your thoughts with the world!
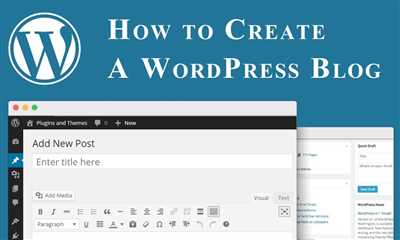
Step 2 Install the free WordPress software ⚙️
Now that you have created your blog account on Blogger.com, the next step is to install the free WordPress software. WordPress is a popular blogging platform that allows you to customize and create a blog with ease.
To install WordPress, you need to have your own domain name. If you don’t have one yet, don’t worry – WordPress allows you to choose a free domain name during the installation process.
Step 1: Open the WordPress installation wizard
To install WordPress, go to the WordPress website and click on the “Get Started” button. This will open the installation wizard.
Step 2: Connect your domain
If you already have a domain name, you will need to connect it to your WordPress account. Follow the instructions on the wizard to connect your domain.
If you don’t have a domain name, WordPress will provide you with a free domain ending in “.wordpress.com”. You can choose this option or skip it and connect a custom domain later.
Step 3: Install WordPress
On the wizard, you will find the option to install WordPress. Click on the “Install WordPress” button to start the installation process. WordPress will guide you through the steps, asking for details such as your blog name, login details, and the theme you want to use.
WordPress offers a wide range of free and premium themes, allowing you to give your blog a customized look and feel.
Step 4: Customize and start blogging
Once you have installed WordPress, you can customize your blog to your liking. WordPress provides a simple and user-friendly interface that allows you to easily edit and write blog posts, change the layout, add widgets, and more.
With WordPress software installed, you now have the tools and freedom to start blogging. So go ahead, open your new WordPress blog, and begin sharing your thoughts and ideas with the world!


