

If you love stickers and want to make your own, laminated stickers are a great option. Many times, stickers that you buy from the store may not hold up as well as you’d like. The corners may peel or the image may get scratched off. Laminating your own stickers fixes these issues and makes them much more durable and waterproof.
To make laminated stickers, you will need a few materials. First, you will need printable vinyl sheets. These sheets usually come in a large size, so you can fit multiple stickers on one sheet. You will also need a laminating machine and laminating sheets. If you don’t have a laminating machine, you can also use clear packing tape, although it may not be as smooth of a finish.
The first step is to select or create the design that you want for your stickers. You can use a program like Inkscape or any other design program you are comfortable with. If you are not confident in your design skills, you can also search for images online and download them to use for your stickers. Just make sure that they are not copyrighted.
Next, print your design onto the printable vinyl sheets. Be careful with the sizing, as the stickers will come out the same size as what you see on the screen. If you want bigger stickers, adjust the size before printing. Once you have printed the sheets, let them dry for a few minutes to prevent any smudging.
After the ink is dry, cut out your stickers using scissors or a cutting machine like a Cricut. If you are using a cutting machine, make sure to select the right settings for the vinyl material. Be careful when cutting, as you want to cut through the vinyl but not the backing sheet. This will make it easier to remove the stickers later.
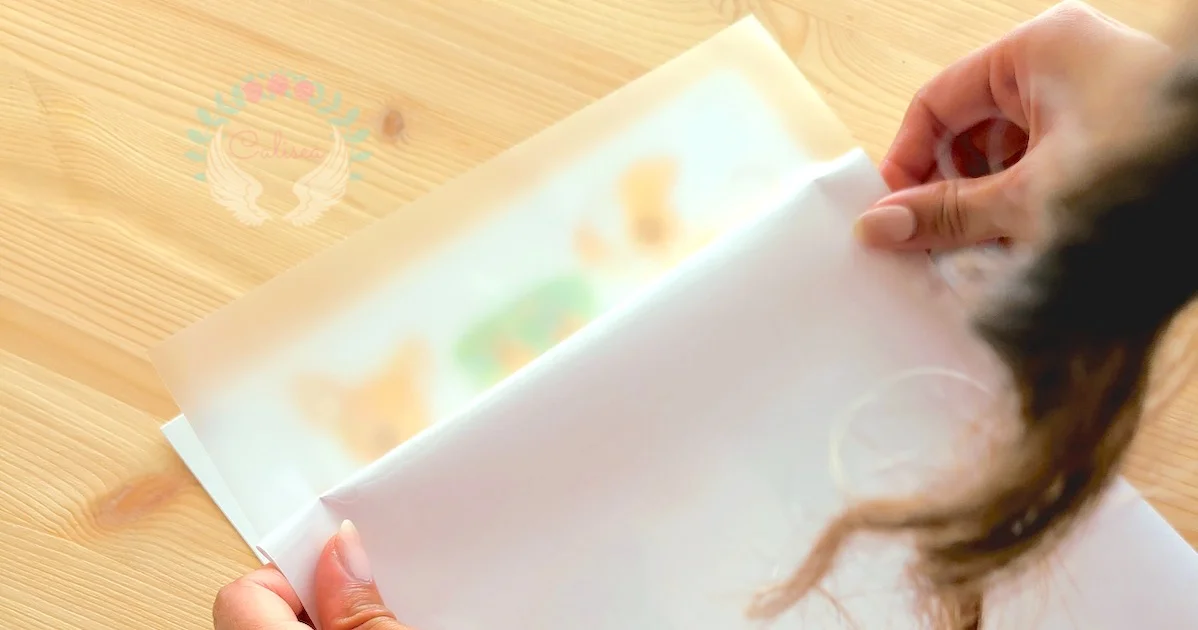
Once your stickers are cut out, place them on a smooth, flat surface. Peel off the backing sheet from the laminating sheet and carefully place it over the stickers. Make sure to smooth out any wrinkles or bubbles. If you are using clear packing tape instead, simply apply the tape over the stickers, making sure to cover the entire design.
Finally, cut out your laminated stickers from the laminating sheet or the clear tape. You can now use your homemade laminated stickers on anything you want: notebooks, laptops, phone cases, or even walls! The stickers should hold up well and withstand wear and tear.
In conclusion, making laminated stickers is a fun and DIY project that allows you to create your own unique designs. With a few simple materials and some creativity, you can make stickers that are not only durable and waterproof but also personalized to your taste. So why not give it a try and explore the world of laminated stickers?
The 3¢ Sticker – Make a Vinyl DIY Sticker
If you love stickers, you’re not alone! Stickers have always been a popular way to express yourself and add personality to your belongings. But before you rush to the nearest store to buy some stickers, why not try making your own using a few simple materials and a bit of creativity?
One option for making your own stickers is to use vinyl. Vinyl stickers are durable, weather-resistant, and easy to work with. Plus, they have a professional look and feel that can’t be beat.
To start, you’ll need a few supplies. You’ll want to have a printer and some standard printer paper on hand, as well as vinyl sheets. You can find vinyl sheets at most craft stores or online. Choose a size that works best for your stickers.
Next, prepare your images. Using a program like Photoshop or even Microsoft Word, select the images you want to use for your stickers. You can either download images from online sources or create your own using the program’s tools. Make sure to choose high-quality images to ensure your stickers look their best.
Once your images are ready, print out multiple copies on your printer. You may also want to make a few test prints to ensure the colors and sizing are just right.
After printing, it’s time to laminate your stickers. Laminating your stickers is an important step because it adds an extra layer of protection to keep them looking great for a long time. You can use a laminating machine for this, or you can use clear tape to cover the front and back of each sticker.
After laminating, carefully cut out each sticker. If you have a die-cut machine like a Silhouette or Cricut, you can use that to cut out your stickers for a professional look. If not, a pair of scissors will do just fine.
Now it’s time to stick your stickers! Peel off the backing from each sticker and place it on a clean, smooth surface. Make sure to press down firmly to ensure they hold.
And there you have it – your very own DIY stickers! With just a few materials and a bit of time, you can create custom stickers to add a personal touch to your belongings. Whether you want to make stickers for yourself, as gifts for others, or even to sell, the possibilities are endless. So go ahead, explore your creativity and start making your own vinyl stickers today!
How to Apply Laminate to Waterproof Stickers
If you love to make your own stickers, one issue you may have run into is finding a way to make them waterproof. Luckily, laminating your stickers can provide a solution. In this guide, we will show you the step-by-step instructions on how to apply laminate to waterproof stickers.
Materials You’ll Need
To prepare for laminating your stickers, you’ll need the following materials:
-
Laminating machine or laminating sheets
-
Waterproof stickers
-
Printer and ink
-
Scissors or a cutting machine (e.g., Cricut or Silhouette)
-
Clear vinyl laminate
-
Placemat or other flat surface
Step-by-Step Instructions
Step 1: Print and Cut Your Stickers
First, you’ll need to design and print your stickers on a standard printer. If you’re having trouble with curling papers, we recommend using a heavier paper material or cardstock. Once printed, use scissors or a cutting machine to cut the stickers into the desired shape.
Step 2: Prepare the Laminate
Next, select the size of your laminate sheet that is slightly larger than your stickers. Peel off the protective layer from the laminate and place it on a flat surface, sticky side up. Remove any dust or dirt from the laminate before proceeding.
Step 3: Apply the Stickers to the Laminate
Gently place your printed stickers onto the sticky side of the laminate. Make sure they are positioned correctly and press firmly to ensure they adhere well to the laminate. If you need to reposition the stickers, be careful not to damage the laminate.
Step 4: Trim the Excess Laminate
Using scissors or a cutting machine, trim the excess laminate around your stickers. Make sure to leave a small border around the edges of the stickers to prevent any lifting or peeling.
Step 5: Laminating with a Machine
If you have a laminating machine, follow the manufacturer’s instructions to laminate your stickers. Place your stickers with the laminate into the machine and feed them through. The machine will apply heat and pressure to seal the laminate around your stickers, making them waterproof.
Step 6: Laminating without a Machine
If you don’t have a laminating machine, you can use self-adhesive laminate sheets. Carefully place the laminate sheet on top of your stickers, aligning the edges. Press down firmly to ensure a secure bond between the laminate and stickers.
Troubleshooting Tips
If you encounter any issues with the lamination process, here are some tips:
-
Make sure your stickers are fully adhered to the laminate before trimming the excess.
-
If the laminate curls or bubbles after lamination, apply pressure or use a tool to flatten it.
-
To avoid glare or reflections on your laminated stickers, choose a matte laminate instead of a glossy one.
-
If you’re planning to use your laminated stickers outdoors or in wet areas, make sure to use a waterproof laminate material.
Final Thoughts
Laminating your stickers can not only protect them from water and other elements but also enhance their durability and lifespan. Whether you’re making DIY stickers for personal use or for selling, adding laminate can be a rewarding step in the sticker-making process. Now that you know how to apply laminate to waterproof stickers, you can explore different materials and designs without worrying about their resistance to water!
Tools and Materials
Making your own laminated stickers requires a few key tools and materials. Here’s what you’ll need:
| Tools | Materials |
| Printer | Sticker paper |
| Laminating machine | Laminating sheets |
| Cutting mat | Scissors or craft knife |
| Plastic sleeve or placemat | Waterproof ink for printer |
| Silhouette or Cricut cutting machine | Vinyl for die-cut stickers |
| Paper towels | Glue or adhesive |
| Clear tape | Inkscape or design program |
While these tools and materials are necessary for making laminated stickers, you may also find some additional tools helpful for the process. For example, a bone folder can help smooth out any curling or creases in the sticker paper, and tweezers can be useful for precise placement of the stickers.
It’s also important to note that not all sticker paper is created equal. When selecting sticker paper, look for ones specifically labeled as printable or compatible with your printer type. Matte sticker paper usually works better than glossy paper, as it reduces glare and results in a smoother appearance.
If you’re using a cutting machine like the Silhouette or Cricut, download the necessary software or design program recommended by the manufacturer. Inkscape is a popular program for creating designs that can be used with cutting machines.
Overall, having the right tools and materials is crucial for creating high-quality laminated stickers. With the proper supplies in hand, you can explore your creativity and make stickers that will stick and hold up to water, wear, and tear.
Instructions
Before making laminated stickers, it is important to select the right tools and materials. You will need a printer, printable vinyl or sticker paper, a laminating machine, and laminating sheets. Depending on the size and quantity of stickers you want to make, you may also need a die-cut machine.
Here are the step-by-step instructions on how to make laminated stickers:
1. Prepare your design or image using a software or an online tool. Make sure it is the correct size and resolution for printing.
2. Print the design or image using your printer. If you are using a printable vinyl, make sure to select the correct printer settings for the material.
3. Let the printed stickers dry for a few minutes before laminating them to avoid any smudging or smearing.
4. Cut out the stickers from the printed sheet using scissors or a paper trimmer. Be careful to cut along the edges of the design.
5. Peel off the backing from the laminating sheet and place the stickers on the adhesive side, leaving some space between each sticker.
6. Carefully press the stickers down to ensure they stick onto the laminating sheet smoothly without any air bubbles or wrinkles.
7. Trim the excess laminating sheet around the stickers using scissors or a paper trimmer. Make sure to leave a small border around each sticker for better durability.
8. Run the laminating sheet through a laminating machine according to the manufacturer’s instructions. This will seal and protect the stickers.
9. Once the stickers are laminated, trim around each sticker again, if needed, to remove any excess laminating sheet.
10. Your laminated stickers are now ready to use! Peel them off the laminating sheet and apply them to any smooth surface you desire.
Remember to be careful when handling the laminated stickers to avoid tearing or curling. If you have trouble using a laminating machine or a die-cut machine, refer to the manufacturer’s instructions or seek assistance from an affiliate.
Now that you know how to make laminated stickers, you can explore various design options and create personalized stickers for your own use or for giving as gifts. Have fun and enjoy the rewards of your DIY sticker-making journey!
Common Cricut Sticker Issues and Fixes
If you are having trouble with your Cricut machine when making stickers, you are not alone. Many crafters experience common issues while creating stickers, but don’t worry, there are simple fixes for these problems.
- Issue: Copies not shown correctly on the cut preview
- Issue: Trouble removing stickers from the backing sheet
- Issue: Stickers curling after printing
- Issue: Glare on laminated stickers
- Issue: Stickers not sticking well
- Issue: Inkscape not working with the Cricut machine
- Issue: Printed stickers coming out with jagged edges
- Issue: Stuck stickers on the cutting mat
The Fix: Make sure you have selected the right size and number of copies in the print dialog before cutting. Double-check that you have chosen the correct machine in the Cricut Design Space.
The Fix: Use a sharp tool like a Silhouette spatula or a Cricut scraper to gently lift the stickers from the sheet. Be careful not to tear them.
The Fix: Place the printed sticker sheets between heavy books or use a heavy object to keep them flat for a few hours. This will help them flatten out and reduce curling.
The Fix: If you’re experiencing glare on your laminated stickers, try using a matte laminating sheet instead of a clear one. This will reduce the reflection and give your stickers a more professional look.
The Fix: Before applying the stickers, make sure the surface is clean and free from any dust or oils. You can also try using a stronger adhesive or double-sided tape to ensure better adhesion.
The Fix: Inkscape is not compatible with the Cricut system. Instead, use Cricut Design Space or other recommended design software to create your stickers.
The Fix: Double-check that your machine is set to the best print quality option. Also, make sure your image or design has high resolution and is not pixelated. You can always do a trial print on regular paper before using special sticker papers.
The Fix: If your stickers are stuck to the mat after cutting, use a spatula or other Cricut tools to gently remove them. Be careful not to tear or stretch the stickers.
Remember that troubleshooting sticker issues may require some trial and error, so don’t get discouraged if things don’t work perfectly the first time. Explore different materials, tools, and settings to find what works best for you. With a little practice, you’ll be making beautiful DIY stickers in no time!
Still having trouble making Cricut stickers
If you are still having trouble making Cricut stickers, don’t worry, you are not alone. It is a common issue that many people experience. Here are some tips and fixes that might help you:
- Check your printer settings: Make sure you have selected the right printer and paper size before printing your stickers. You can explore the toolbar options in your printer settings to find the best settings for your stickers.
- Use the right materials: Make sure you are using the right materials for your stickers. Vinyl sheets are the best option for Cricut stickers as they are waterproof and durable. Laminating sheets can also be used for added protection.
- Prepare the surfaces: Before applying the stickers, make sure the surfaces are clean, dry, and smooth. This will ensure that the stickers adhere properly and stay in place.
- Try different adhesive: If the stickers don’t stick well, you can try using a different adhesive. Double-sided tape or glue can be used to hold the stickers in place.
- Explore laminating: Laminating your stickers can help protect them from wear and tear. You can use a laminating machine or even self-adhesive laminating sheets to laminate your stickers.
- Remove glare: If your stickers have a glare, you can try using a matte or clear finish on top to remove the glare and make them look better.
- Check your designs: If you are having trouble with the print quality of your stickers, check your designs. Make sure the images are high-resolution and suitable for printing. You can also try adjusting the printer settings for a better result.
- Peel and stick: When it’s time to apply the stickers, make sure you peel them carefully and place them on the desired surface. Press down firmly to ensure they stick properly.
Hopefully, these tips and fixes will help you resolve any issues you are having with making Cricut stickers. Remember to experiment and try different things to find the best system that works for you. Don’t get discouraged if it doesn’t work perfectly the first time – with a little practice, you’ll be creating beautiful Cricut stickers in no time!
Laminated Sticker AFTER
Once you have laminated your stickers, you will see the difference it makes in terms of durability and long-lasting quality. The laminating process helps to protect your stickers from wear and tear, making them more resistant to scratches and fading.
After laminating, the next step is to carefully peel the sticker from the backing paper. It is important to be gentle during this process to avoid any damage to the sticker or its adhesive.
Once the sticker is peeled, you can then place it on any smooth and clean surface. The laminated sticker will adhere easily due to the added strength of the laminate material.
One advantage of laminated stickers is that they are usually die-cut, meaning that there is no excess material around the image. This provides a clean and professional look, making your stickers more visually appealing.
If you are making laminated stickers for a school or any large quantity, it is recommended to use a laminating machine. This will ensure that all your stickers have a uniform finish and are free from any bubbles or wrinkles.
After laminating, you can also choose to add more design elements or text to your sticker. This can be done using a program like Silhouette or by hand using different materials such as vinyl. It gives you the flexibility to create custom stickers that suit your preferences.
In conclusion, laminated stickers are a great option if you want to make durable and long-lasting stickers. The laminating process adds a layer of protection that helps your stickers withstand everyday wear and tear. Whether you are using them for personal or business purposes, laminated stickers are sure to make a lasting impression.
Search Silhouette School
If you’re looking for more information on how to make laminated stickers, we highly recommend searching for tutorials on Silhouette School. Silhouette School is a popular website that provides a wealth of tips, tricks, and tutorials for using cutting machines like the Silhouette Cameo to create various DIY projects including stickers.
One resource you can find on Silhouette School is a step-by-step guide on how to make laminated stickers using a Silhouette machine. The tutorial will walk you through the entire process, from preparing your design to printing and laminating the stickers. It will show you what materials and tools you’ll need and provide detailed instructions on each step.
One important thing to note is that laminating your stickers can help protect them from water damage and make them more durable. You can choose to use a clear, glossy laminate sheet or a matte laminate sheet depending on the finish you prefer. Laminating your stickers can also help reduce glare and make them look more professional.
Before you start making your laminated stickers, it’s crucial to be careful with the design and preparation. Make sure your design is the right size and format for the sticker. You can use Silhouette Studio, a program provided by Silhouette, to create and edit your design. Silhouette School recommends having a test print and trial run to ensure everything is in order before making the final copies.
To make the stickers, you’ll need a printable vinyl sheet and laminating materials. You can find these at craft stores, online retailers, or even in some office supply stores. Follow the instructions on the packaging of the vinyl and laminating materials for the best results.
One helpful tip Silhouette School offers is to use a placemat or similar material to help hold down the vinyl and laminating materials while you work. This can prevent them from curling or moving around during the process.
Once you have all your materials ready, you can start making your laminated stickers following the step-by-step instructions from Silhouette School. They will guide you through the process of printing your design, applying the laminating materials, and fixing any issues that may arise along the way.
If you’re having trouble with any step, you can always search for specific fixes or troubleshooting tips on Silhouette School or other sources. There are many resources available online that can help you overcome any challenges you may encounter.
In summary, if you’re looking to make laminated stickers, searching for tutorials on Silhouette School is highly recommended. They offer comprehensive instructions, tips, and tricks to help you create professional-looking laminated stickers with ease. Explore their website for more information and downloads of helpful resources.
Sources
When it comes to making laminated stickers, it’s important to choose the best materials to achieve the desired results. Here are some sources you can consider:
1. Peel and Stick Laminate Sheets: These are the standard laminated sheets that you can still find in most schools and offices. They are usually water-resistant and have a flat, printable surface, making them perfect for creating laminated stickers of any size.
2. Laminating Machines: If you’re looking for a better option and want to make your laminated stickers at home, investing in a laminating machine is recommended. This machine helps you to laminate your stickers and ensures they stay waterproof and durable even after continuous use.
3. Inkscape: Inkscape is a free graphics program that you can use to design your stickers. It’s a great tool for creating vector images, which can be easily printed and laminated.
4. Self-Adhesive Laminating Sheets: These sheets have a sticky surface on one side, which makes them perfect for sticking onto flat surfaces like notebooks, placemats, or even walls. They provide a glossy finish and are easy to apply.
5. Shipping Tape: If you’re having trouble finding the right laminating materials, shipping tape can be a great alternative. While it may not provide the same level of durability, it can still protect your stickers from water and everyday wear and tear.
Before you start making your laminated stickers, note that having the right tools and materials is crucial. Make sure to follow the instructions carefully and be careful when using the laminating machine or any sharp objects.
By exploring these sources, you can find the ideal materials to create your own laminated stickers for school, work, or just for fun. Enjoy the rewards of your hard work and let your creativity shine through!
Please note that some of the links in this article are affiliate links. This means that I may earn a small commission if you make a purchase through these links, at no additional cost to you.


