

If you’re wondering how to insert a Google Form into your website or email, you’re in the right place. Google Forms is a powerful tool that allows you to create surveys, questionnaires, and more. By adding a Form to your website or email, you can collect information from your audience with ease.
Here are the steps to add a Google Form:
- Select the Form you want to insert: First, you’ll need to create a Google Form or choose one from your existing Forms. Setup the right questions, summary field, and other settings.
- Get the embed code: Once you’ve finished creating your Form, click on the “Send” button. In the pop-up menu, select the “Embed” tab. You’ll see the HTML code for your Form.
- Add the code to your website: If you’re using a free website platform like WordPress, simply go to the page where you want to add the Form. Click on the “+” or “Add new” button and select the “Custom HTML” block. Paste the code you copied from Google Forms and click on “Save” or “Publish”.
- Insert the code into your email: If you want to send the Form via email, you’ll need to copy the HTML code and insert it into the body of your email. The process may vary depending on the email provider you’re using, so make sure to check their instructions on how to insert HTML code.
Note: If you want to have all the responses and submissions in one place, Google Forms have a spreadsheet format that can be linked to your Form. Simply select the “Responses” tab and click on the “Create Spreadsheet” icon. This way, all the data will be organized in a Google Sheets document.
With the help of Google Forms and a little bit of HTML code, you can easily embed a Form on your website or send it via email. Make sure to look into other sources like Zapier for more advanced features and templates that can enhance your Google Forms experience. So start using Google Forms today and collect valuable information from your audience!
How to embed a Google Form in an email
If you want to insert a Google Form into an email, there are a few steps you need to follow. Here’s a summary of how to do it:
- Create a new Google Form by clicking on the “New” button in Google Forms.
- Setup your form with the questions and fields that you need. You can choose from a variety of templates or create your own.
- When you’re finished with your form, click on the “Send” button.
- Select the “Email” tab, enter the email address(es) you want to send the form to, and add a subject and a message.
- Under the “Send via” dropdown, select the option “Email with Google Forms”.
- Choose whether you want to include a summary of responses in the email.
- Click on the “Send” button to send the email with the embedded Google Form.
Now, let’s look at the step-by-step instructions on how to embed a Google Form in an email:
| Step 1: | Go to Google Forms and create a new form. You can do this by going to Google Sheets, clicking on “Create” and selecting “Form”. |
| Step 2: | Select the questions and fields that you want to include in your form. You can choose from a variety of options, such as multiple choice, checkboxes, and text fields. |
| Step 3: | Once you have finished creating your form, click on the “Send” button in the top right corner of the page. |
| Step 4: | In the “Send form” dialog box, enter the email address(es) of the recipients you want to send the form to. |
| Step 5: | Add a subject and a message to the email if desired. |
| Step 6: | Select the option “Include form in email” under the “Send via” dropdown. |
| Step 7: | Choose whether you want to include a summary of responses in the email or not. |
| Step 8: | Click on the “Send” button to send the email with the embedded Google Form. |
That’s it! Now you know how to embed a Google Form in an email and send it to your recipients. It’s a great way to collect feedback, conduct surveys, or gather information from others.
Please note that you can only embed a Google Form in an email if you have a Google account. Additionally, the steps for embedding a form may vary slightly depending on the email service provider you are using.
How to create a form with Google Forms

Google Forms is a free survey tool that allows you to easily create custom forms for a variety of purposes. Whether you need to gather feedback, conduct a survey, or collect information, Google Forms makes it easy to create and share forms with others.
To start creating a form with Google Forms, follow these steps:
Step 1: Access Google Forms
First, open Google Forms in your web browser. You can do this by searching for “Google Forms” in your preferred search engine, or by navigating directly to the Google Forms website.
Step 2: Sign in to your Google account
If you’re not already signed in to your Google account, you’ll need to do so in order to create a form. You can sign in by clicking the “Sign In” button in the top-right corner of the Google Forms homepage.
Step 3: Create a new form
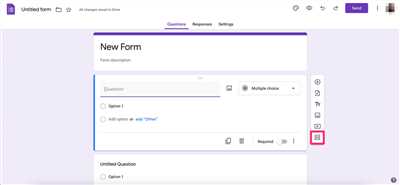
Once you’re signed in, click the “Blank” button to create a new form from scratch. You’ll be taken to a new form template with a single, empty field in a column on the left.
Step 4: Add fields to your form
To add more fields to your form, click the “+” button on the right side of the form template. This will create a new row with a blank field. You can customize the field by clicking on it and selecting the type of question or information you want to collect.
Step 5: Customize your form
Once you’ve added all the fields you want, you can customize your form further by clicking on the field and selecting the right options. You can add descriptions, multiple choice answers, and even require certain fields to be filled in.
Step 6: Preview and test your form
Before you send out your form, it’s a good idea to preview and test it. You can do this by clicking the “Preview” button in the top-right corner of the form editor. This will let you see how your form will look to respondents, and allow you to test it out by filling in responses.
Step 7: Share your form
Once you’re finished with your form, you can share it with others by clicking the “Send” button in the top-right corner of the form editor. This will give you options for how you want to share your form, including a link that you can copy and send in an email, embed a form on a website, or share it on social media.
Step 8: Collect responses
As respondents fill out your form, Google Forms will automatically collect their responses and store them in a new worksheet in Google Sheets. You can access these responses by clicking the “Responses” tab at the top of the form editor, or by opening the spreadsheet directly.
Step 9: Analyze and work with your responses
In Google Sheets, you can analyze and work with the responses you’ve collected. You can use formulas and functions to summarize and manipulate the data, create charts and graphs to visualize the results, and even use tools like Zapier to automate actions based on the form responses.
Step 10: Finish and format your form
Once you have collected all the responses you need, you can finish and format your form. To do this, click the “Send” button again and select the “Summary” option. This will provide you with a summary of the responses you have collected, which you can format and present as needed.
And there you have it! You now know how to create a form with Google Forms. Start collecting responses and gather the information you need!
Zapier setup
If you want to send your Google Forms responses to a Google Sheets spreadsheet, you can use Zapier to automate the process. Zapier is a free tool that allows you to connect different apps and automate tasks between them.
Here are the steps to set up Zapier:
- Create a new Zapier account, or log in if you already have one.
- On the Zapier dashboard, click on the “Make a Zap” button.
- In the “Choose a Trigger App” search field, type “Google Forms” and select it from the list of options.
- Select “New Response in Spreadsheet” as the trigger event.
- Click on the “Sign in to Google Forms” button and authorize Zapier to access your Google account.
- Under “Choose Account”, select the Google account associated with your Google Forms.
- Under “Spreadsheet”, select the Google Sheets spreadsheet where you want to store the form responses.
- Click on the “Test trigger” button to make sure Zapier can connect to your Google Forms and spreadsheet correctly.
- If the test is successful, click on the “Continue” button.
- In the “Choose an Action App” search field, type “Google Sheets” and select it from the list of options.
- Select “Create Spreadsheet Row” as the action event.
- Click on the “Sign in to Google Sheets” button and authorize Zapier to access your Google account.
- Under “Choose Account”, select the same Google account you used for your Google Forms.
- Under “Spreadsheet”, select the same Google Sheets spreadsheet where you want to store the form responses.
- Under “Worksheet”, select the worksheet or tab where you want to insert the new row.
- For each column, click on the “Insert a Field” button and select the corresponding form field to map it to the spreadsheet column.
- Click on the “Continue” button when finished mapping the form fields to the spreadsheet columns.
- Click on the “Test & Review” button to make sure Zapier can create a new row in your Google Sheets spreadsheet with the form responses.
- If the test is successful, click on the “Turn on Zap” button to start automating the process.
Note: Zapier will only send the form responses to the Google Sheets spreadsheet once the Zap is turned on. If you want to send existing form responses to the spreadsheet, you can use Zapier’s “Catch Hook” feature or manually copy and paste the responses.
That’s it! With the Zapier setup, your Google Forms responses will be automatically sent to your Google Sheets spreadsheet.
Step 1 – New Spreadsheet Row in Google Sheets
To add a Google Form to your website, you’ll need to set up a connection between your form and a Google Sheets spreadsheet. This connection will allow you to collect and store the responses from your form in a spreadsheet. Here’s how to do it:
- Start by creating a new Google Form. If you’re not familiar with Google Forms, you can find templates and examples to help you get started. Once you have your form set up, click on the “Responses” tab at the top of the form.
- In the Responses tab, you’ll see a summary of all the responses you’ve received so far. Right under the summary, you’ll find a small green icon that looks like a spreadsheet. Click on that icon.
- A pop-up window will appear with the option to create a new spreadsheet or select an existing one. If you want to create a new spreadsheet, click on the “Create” button. If you already have a spreadsheet that you want to use, select it from the list of available options.
- Once the spreadsheet is created or selected, you’ll see a note at the top of the pop-up window with the spreadsheet’s name and a link to open it. Make a note of the spreadsheet’s name and close the pop-up window.
- Now, go to your Google Sheets account and find the spreadsheet that you just created or selected. In the spreadsheet, you’ll see a new worksheet with the same name as your form. This worksheet will be where your form responses will be stored.
- Under the worksheet’s name, you’ll see columns labeled “Timestamp” and “Email.” These columns will be automatically added to capture the date and time of each response and the email address of the respondent. If you want to add more columns to capture additional information, you can do so by inserting new columns to the right of these columns.
- Now that your Google Form responses are linked to your Google Sheets spreadsheet, you can embed the form on your website or share the form’s link. When respondents submit their answers, a new row will be added to the spreadsheet with all the form data.
By following these steps, you can easily set up a connection between your Google Form and Google Sheets spreadsheet to collect and store responses in an organized format.
Step 2 – Create Note in Close
To start, select the “Create Note” action in your Zapier setup. This step will allow you to send an email with a summary of the survey responses to your team.
Under the “Close” column, click the “Which sheet do you want to insert into your Google Sheets?” button and select the worksheet that you have set up for your Google Form responses.
Next, you will need to select the “Note” field in Close. This is where the summary of the survey responses will be inserted. Click the “Add a Field” button and look for the “Note” field in the dropdown menu.
Once you have selected the “Note” field, you can format the email in any way you want using HTML code. For example, you can use tags to make certain words or phrases bold, or tags to emphasize important points.
When you have finished formatting the email, click the “Done editing” button to save your changes.
Now, your Close note will be populated with the summary of the survey responses whenever a new form submission is received. This will allow your team to have all the relevant information in one place and easily refer back to it later.
Summary
To add a Google Form to your website or blog, you can follow these steps:
- Create a new form in Google Sheets or use one of the templates provided.
- Select the form you want to add and click the “Send” button.
- Choose the “Embed” option and copy the code provided.
- In your WordPress dashboard, go to the page or post where you want to add the form and switch to the text editor.
- Paste the code in the right place and save the changes.
- Your Google Form is now embedded on your website, and visitors can fill it out without leaving your site.
Note that you can also use Zapier to connect your form to other apps or sources, such as email, Google Sheets, or a CRM system. This way, you can automate tasks related to form submissions and keep your data organized.
Before you start using Google Forms, it’s important to note that it’s a free tool that allows you to create surveys and collect data in a simple format. However, if you want more advanced features or a more polished look, you may need to explore other options.
With the steps mentioned above, you can easily add a Google Form to your website or blog and start collecting responses right away. Just follow the setup process and customize the form to suit your needs.
Once you’re finished and have collected responses, you can go back to the Google Sheets or click on the form’s “Summary” tab to see a summary of the data in a convenient column and row format. You can also download the data as CSV or PDF files for further analysis.
Don’t forget to close the loop with your respondents by sending a thank you email or a follow-up message. This helps to keep them engaged and increases the chances of receiving valuable feedback.
Matteo Duò

If you want to add a Google Form to your website, there are a few steps you need to follow. First, go to Google Forms and create a new form. You can select from a variety of templates or start from scratch.
Once you have your form setup, click on the “Send” button in the top-right corner. You will see a popup with different options to send the form. Choose the option to embed the form.
A code will be generated for you to insert into your website. You can copy this code and paste it into the HTML of your webpage. If you are using WordPress, you can use the “Custom HTML” block to insert the code.
Now you need to create a worksheet in Google Sheets to store the responses to your form. In the form editor, click on the “Responses” tab and then click on the Google Sheets icon. This will create a new Google Sheets document with a link to your form.
When someone submits a response to your form, it will be added as a new row in the Google Sheets document. You can later use this data for analysis or further processing.
To close the loop, you can use third-party tools like Zapier to automatically send an email notification whenever a new response is received. This way, you will always be notified when someone fills out your form.
That’s it! Now you have successfully added a Google Form to your website. Don’t forget to customize the form to match the look and feel of your website, and note that you can only embed the form on websites that allow you to insert HTML code.
Matteo Duò is a free consultant and provides various resources and tutorials to help people improve their online presence. If you have any questions or need further assistance, feel free to reach out.
Sources
There are several ways to add a Google Form to your website or blog. Here are a few sources you can use:
| Source | Description |
|---|---|
| 1. Google Forms | Go to forms.google.com and create a new form. Customize the fields and questions as needed. |
| 2. WordPress Plugin | If you’re using WordPress, you can install a plugin like “Google Forms” to easily insert a form into your posts or pages. |
| 3. Zapier | With Zapier, you can connect Google Forms to other apps and automate tasks based on form responses. This requires a Zapier account. |
| 4. Embedding Code | After creating your Google Form, click the “Send” button and select the “Embed” option. Copy the provided code and insert it into your website’s HTML. |
| 5. Google Sheets | If you want to have a summary of responses in a spreadsheet, create a new Google Sheets document and select “Form” in the toolbar to start setting up your form. |
| 6. Email Notifications | In Google Forms, go to the “Responses” tab, click the “More” button (three vertical dots) and select “Get email notifications“. This will send you an email every time someone fills out your form. |
These are just a few sources you can use to add a Google Form to your website. Depending on your needs, you may find other methods or tools that work best for you.


