

If you’ve ever wanted to add a personal touch to your car, making your own car decals is a great way to do it. With the right tools and a little creativity, you can create custom designs that reflect your own style and personality. In this tutorial, we’ll show you how to make car decals using printable vinyl sheets and an inkjet printer.
To get started, you’ll need a few things. First, you’ll need a computer with a desktop publishing software like Adobe Illustrator or CorelDRAW. You’ll also need an inkjet printer and printable vinyl sheets. These can be found at your local craft store or online. Make sure to choose vinyl sheets that are compatible with your printer.
Next, you’ll need to design your decal. If you’re not a graphic designer, don’t worry! There are plenty of resources available online where you can find clipart, fonts, and other design elements to use in your decal. Just make sure to use royalty-free or properly licensed images if you plan to sell your decals.
Once you have your design ready, it’s time to print. Open your design in the desktop publishing software and adjust the size and layout to fit your printable vinyl sheets. If you want multiple decals on one sheet, you can group them together and print them all at once. Just make sure to leave enough space between each decal for cutting.
Before you print, it’s advisable to do a test print on a regular sheet of paper to make sure the colors and layout are correct. Once you’re satisfied with the result, load the printable vinyl sheets into your printer and hit print. Remember to set your printer to the highest quality settings to ensure sharp and vibrant colors.
Once your decals are printed, it’s time to cut them out. Use a pair of sharp scissors or a craft knife to carefully cut along the outlines of your decals. If you have a Cricut or a similar cutting machine, you can use that too. Just make sure to follow the manufacturer’s instructions for cutting vinyl.
Now that your decals are cut, it’s time to apply them to your car. Clean the surface where you want to apply the decal thoroughly and make sure it’s dry. Peel off the backing of the decal and carefully stick it onto the car. Use a tool like a credit card to smooth out any air bubbles and ensure a smooth application.
That’s it! You’ve successfully made your own car decals. Now you can show off your personal style and make your car stand out from the crowd. Whether you’re a car enthusiast, a small business owner, or just a car-loving individual, making your own decals is a fun and creative way to customize your ride.
In conclusion, making your own car decals is an easy and enjoyable process that allows you to add a personal touch to your vehicle. With the right tools and a little creativity, you can create unique and eye-catching designs that will make your car truly one-of-a-kind. So go ahead and give it a try – you’ll be amazed at the results!
Vinyl Car Decal
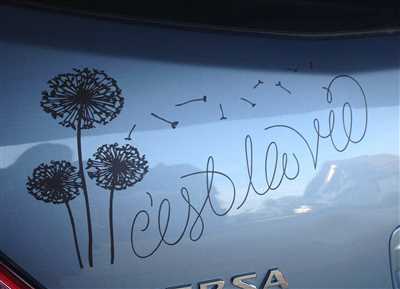
When it comes to making car decals, using vinyl is a popular choice among designers and DIY enthusiasts. Vinyl decals can be easily applied to cars and are an effective way to add a personal touch or promote a group or business.
If you’re considering making your own car decal, here are a few things you’d want to know:
- Design: Using a graphic design software or a clipart, create the design you want for your car decal. It’s advisable to use a software like Cricut Design Space that offers a range of tools and features to make the design process easier.
- Material: Choose the right type of vinyl for your car decal. Matte vinyl is a popular choice as it gives a professional look. Make sure to use an adhesive vinyl that is compatible with your printer if you’re planning to print the design.
- Size and curves: Consider the size and curves of your car surface when designing the decal. If you want a smaller decal, a standard size would work well. However, if you’re looking to cover a larger area, you might need a larger decal or multiple decals that can be easily aligned.
- Printing: If you’re loving the design and ready to print, make sure you have a printer with quality inkjet capabilities. It’s also important to use printable vinyl sheets that are specifically designed for inkjet printers. This will ensure that the colors are vibrant and the print is sharp.
- Peel and stick: Once printed, peel off the backing of the printed vinyl and carefully stick it onto your car surface. Use a tool like a squeegee to remove any air bubbles and make sure the decal is securely attached.
In conclusion, making your own vinyl car decals can be a fun and creative DIY project. By following these steps, you can design, print, and apply your own personalized car decals. Whether you want to sell your decals or simply add a personal touch to your own vehicle, vinyl car decals are a great way to showcase your creativity.
Print Your Own Car Decals
If you’re a car enthusiast or just want to add a personal touch to your vehicle, printing your own car decals is a fun and creative way to do it. With the right tools and materials, you can create custom designs and have them ready to apply in no time.
One of the key components of car decals is the adhesive vinyl. This vinyl is specially designed to stick to the surface of your car and withstand outdoor conditions. You can find adhesive vinyl in a variety of colors and finishes, such as matte or glossy. Depending on your preference, you can choose the type that best suits your needs.
When it comes to designing your car decals, you have a few options. If you’re a designer, you can use professional graphic design software like Adobe Illustrator or CorelDRAW to create your own designs. However, if you don’t have access to these tools, there are free online design platforms that you can use. These platforms offer pre-made templates and tools to help you create your own custom designs.
If you’re not a designer and just want to print existing designs, there are plenty of websites that offer printable car decals. These sites often have a wide selection of designs to choose from, allowing you to find something you love. Simply purchase the printable decal files and print them using your inkjet printer.
Speaking of printers, you’ll need an inkjet printer to print your car decals. Make sure your printer is compatible with adhesive vinyl, as not all printers are. It’s best to use a printer that has a rear feed tray, as this will allow the vinyl sheets to pass through smoothly. Additionally, using a printer with a high resolution will ensure sharp and vibrant prints.
Before you start printing, make sure you have the right size vinyl sheets. Standard car decal size is usually around 8×11 inches, but you can adjust the size according to your preferences. Once you have the sheets, load them into your printer and adjust the settings to ensure the best quality prints.
Once your decals are printed, you’ll want to let them dry for a few minutes to ensure the ink has fully set. After that, it’s time to peel off the adhesive backing and apply the decal to your car. Make sure the surface is clean and dry before applying for the best results. If you’re not confident in your skills, there are plenty of online tutorials and videos that can guide you through the application process.
In conclusion, printing your own car decals is a fun and unique way to add a personal touch to your vehicle. Whether you’re a designer or just want to print existing designs, there are plenty of options available. With the right tools and materials, you can easily create custom decals that will make your car stand out on the road.
Make Car Decals With Cricut to Sell – Conclusion
If you’ve been contemplating making car decals to sell, then using a Cricut machine is the way to go. With this powerful tool, you can create professional-looking and customizable car decals that will surely catch the attention of potential buyers.
One of the great things about making car decals with Cricut is that you have complete control over the design. You can choose the font, clipart, and size of the decals to perfectly match the preferences of your target audience. Whether they prefer a standard sticker or a more unique and personalized design, you can provide it all.
Another advantage of using Cricut for car decals is that the machine can cut through vinyl material with ease. This means that you can easily add curves and intricate details to your designs. Unlike traditional desktop printers, Cricut ensures sharp and clean cuts every time.
When it comes to the printing process, Cricut is a breeze to use. Simply open the Cricut Design Space software, upload your design, and let the machine do its magic. You can print on vinyl sheets with adhesive backing, ensuring that your car decals will easily stick to any surface.
One thing to keep in mind is that if you decide to sell car decals made with Cricut, it is advisable to use a high-quality inkjet printer. This will give your designs a clear and vibrant appearance, making them more appealing to your potential customers.
Once your decals are printed, the next step is to give them a professional finish. Peel off the backing and apply the decal to a clean and dry surface. Press it firmly to ensure that it sticks well. If you want to remove it later, simply peel it off without leaving any residue.
In conclusion, making car decals with Cricut can be a profitable venture. With this versatile and user-friendly tool, you can create customized decals that people will love. Just make sure to invest in a good quality inkjet printer and use adhesive vinyl sheets for the best results. Happy decal making and selling!
Related Posts
If you’re interested in making your own car decals, here are some related posts that you might find helpful:
|
| – A Step-by-Step Tutorial on Car Decal Making: If you want a detailed guide on how to make car decals, this tutorial is for you. It covers everything from choosing the right design to printing and applying the decals. |
|
| – Printing Tips for Car Decals: If you’re using an inkjet printer to print your car decals, this post will give you advice on using the right printer settings and choosing the right printable adhesive sheets. |
|
| – Design Tips for Car Decals: If you’re not a designer but still want to create your own car decal designs, this post will give you tips on finding and using clipart and fonts that will make your decals look professional. |
|
| – Using a Cricut Machine for Car Decals: If you own a Cricut machine, this post will show you how to use it to make car decals. It covers the necessary tools, materials, and steps to take for a successful project. |
|
| – Vinyl Options for Car Decals: If you’re not sure which type of vinyl to use for your car decals, this post will help you decide. It discusses the differences between matte and glossy vinyl and explains which one is more advisable for car decals. |
|
| – How to Make Stickers with Car Decal Materials: If you love making stickers and want to create your own using car decal materials, this post will guide you through the process. It includes tips on printing, cutting, and adhesive application. |


By exploring these related posts, you’ll find valuable content that will make your car decal making journey even more enjoyable. Happy crafting!
Add Content
When it comes to making your own car decals, the most important thing is the content you choose. You can get creative and design your decal using graphic design software or find printable clipart online. Make sure the content you choose is related to the message or theme you want to convey.
If you’re loving a specific font or want to include numbers in your decal, you can use a professional design tool like Adobe Illustrator or Photoshop. There are also online design tools like Cricut Design Space that can help you create and customize your decal.
Once you have the content ready, it’s time to decide how you want to print your decal. Inkjet printers are generally recommended for this purpose as they give good results on clear vinyl sheets. Make sure to select the appropriate printer settings like the size and background color. For example, if you’re printing on a clear vinyl sheet, choose the “clear” or “transparent” setting so that only the content is printed and not the background color.
If you’re using matte vinyl sheets, it’s advisable to use a printer with pigment-based inks as they will give better results and won’t smudge easily. Always follow the instructions provided by your printer manufacturer for the best print quality.
Once you have printed your decal, you can use a desktop cutting tool like a Cricut machine to cut out the design. This will give you sharp and precise edges. If you don’t have a cutting machine, you can also use a pair of scissors or a hobby knife to carefully cut along the curves and lines of your design.
When it comes to applying the decal, peel off the backing and stick it onto your car or desired surface. Make sure to press down firmly to ensure good adhesion. If you want to reposition the decal, be careful as the adhesive may lose its stickiness after being applied once. It’s always a good idea to follow a tutorial or instructions provided by the decal manufacturer for the best results.
In conclusion, making your own car decals can be a fun and creative project. Just remember to choose the right content, use the right printer and tools, and follow the proper application techniques. With a little time and effort, you can create personalized decals that will make your car stand out.
About the Author
The author is a car enthusiast who has a passion for creating custom car decals. With an open mind and a pair of creative hands, they have mastered the art of making unique and eye-catching decals. Whether it’s a standard decal or a custom design, they invest their time and love into each project to give the best end product.
In their tutorial posts, the author shares their knowledge and expertise on making car decals. They discuss everything from choosing the right font and clipart to deciding on the size and background of the decal. They also give step-by-step instructions on using design software, printable sticker sheets, and a desktop printer to print the decals.
The author is an experienced designer who knows the ins and outs of creating decals that will stick to your car and won’t peel off easily. They understand the importance of using clear, matte adhesive vinyl sheets for printing, as it provides a clean and professional look to the decals. They also advise against using inkjet printers, as the white ink won’t show up on the vinyl, making it advisable to use a desktop printer for this purpose.
With their attention to detail and love for making car decals, the author is sure to provide valuable content related to this topic. They add a personal touch to each tutorial, making it easier for readers to follow along. Their tutorials are a great resource for both beginners and experienced car decal makers.
So, if you’re interested in making your own car decals, look no further than the posts by this dedicated author. They will guide you through the process and give you the confidence to create stunning decals for your vehicle. Get ready to unleash your creativity and make your car stand out from the rest!


