

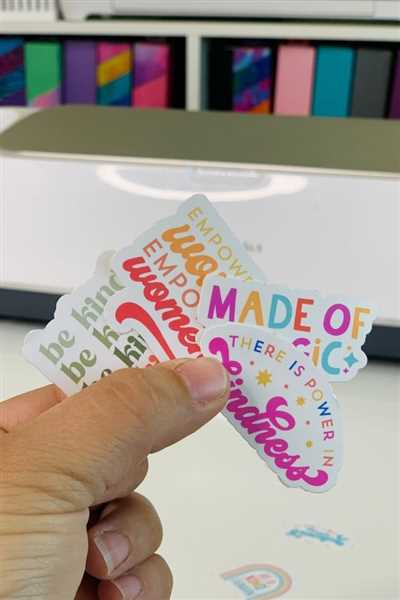
If you’re a cricket enthusiast, you may want to show your love for the sport by creating your own cricket stickers. Whether you want to customize your gear or hide any wear and tear, making cricket stickers is a highly recommended way to add a personal touch.
Today, there are various methods to make cricket stickers, but we’ll focus on using printable online sticker sheets. One brand that comes highly recommended is the Cricut, a pro-level cutting machine that allows you to create impressive designs with ease. Jasmine Scott-Owens, a cricket gear pro, created a neato step-by-step guide on how to make cricket stickers using the Cricut machine.
Here’s how it works: First, you will need a Cricut machine and printable sticker sheets. You can find these materials online or at your local craft store. Once you have the gear ready, use the Cricut Design Space software to import your cricket sticker designs. The software allows you to select and print multiple layers, so you can achieve a professional look.
When designing your stickers, keep in mind that the Cricut machine cuts your designs with precision, so be sure to follow the registration marks and flatten your images to prevent any offset in the cutting process. The next step is to print your designs on the sticker sheets. The Cricut machine will automatically select and print each design, making the process super easy and efficient.
Once the stickers are printed, you can cut them according to your desired shape and size. The Cricut machine allows you to make custom cuts, so you have the freedom to create cricket stickers in various shapes, such as circles, squares, or even smaller rectangles. If you prefer larger stickers, you can also go for larger designs.
One important thing to note is the type of paper you use for printing. It’s recommended to use waterproof paper for cricket stickers, as it will ensure durability and longevity. Additionally, using black and white or colored ink will give your stickers a professional look.
Overall, making cricket stickers using a Cricut machine is a fun and creative way to personalize your cricket gear. Whether you want to showcase your favorite player, team logo, or simply add some unique designs, creating your own cricket stickers is a fantastic option. So, gather your materials, follow the steps above, and get ready to impress your fellow cricket enthusiasts with your custom-made stickers!
- HOW TO MAKE STICKERS WITH A CRICUT USING PRINT THEN CUT AND THE OFFSET TOOL
- Cricket Bat Stickers
- LATEST WORK
- Scott Cricket Bat Sticker Designs
- WCW Cricket Bat Sticker Designs
- SIXES Cricket Bat Sticker Designs
- Owens Cricket Bat Sticker Designs
- Printing stickers with a Cricut
- Congrats You are a Pro at Making Cricut Stickers
- Video:
- How to make cricket🏏 bat stickers and handle grip at home
HOW TO MAKE STICKERS WITH A CRICUT USING PRINT THEN CUT AND THE OFFSET TOOL
If you’re looking to make your own cricket stickers, then the Cricut machine is a great tool to use. With the Print Then Cut feature and the Offset tool, you can easily create custom stickers that are waterproof and long-lasting.
To get started, you’ll need a Cricut machine, printable vinyl, a printer, and your own design or image that you want to turn into a sticker. Once you have everything you need, follow these steps to create your own stickers:
- Print your design: Use your printer to print the design or image onto a sheet of printable vinyl. Make sure to set the paper size to match the size of your printable vinyl.
- Load the printed vinyl into the Cricut machine: Place the printed vinyl onto a cutting mat and load it into the Cricut machine.
- Select your design in Design Space: Open Cricut Design Space and select the Print Then Cut option. Click “Upload” and select your design from the files on your computer.
- Define the cut lines: Use the Offset tool in Design Space to create a small border around your design. This will ensure that the Cricut machine cuts around your design accurately.
- Print the design with cut lines: In the Print then Cut dialog, select the “Print on White” or “Print on Black” option, depending on the color of your vinyl. This will print your design with the cut lines on top of it.
- Load the printed design into the Cricut machine: Place the printed design onto a cutting mat and load it into the Cricut machine.
- Cut out the stickers: Follow the Cricut machine’s prompts to cut out the stickers. Once the cutting process is complete, you’ll have your custom stickers ready to use!
With the Cricut machine, you can create professional-looking stickers that have crisp edges and precise cuts. Plus, the printable vinyl is waterproof, so your stickers will last even when exposed to water. Whether you want to make stickers for your cricket bat or brand your cricket gear, the Cricut machine is a great tool for making custom stickers.
And if you’re ever in need of some inspiration or ideas for your cricket stickers, there are always online communities and resources, like the Cricut Community and the latest cricket sticker ideas from designers like Scott Lucey and WCW Pro, to keep you in touch with the latest trends and gear.
So why wait? Get your Cricut machine and start making your own custom cricket stickers today!
Cricket Bat Stickers
When it comes to cricket bat stickers, there are many options available today. Whether you prefer a custom design or one of the many pre-made sticker sets, there is a sticker that will fit your needs.
One of the most popular methods for making cricket bat stickers is using a vinyl printer cutter. This tool allows you to print your sticker designs onto vinyl sheets, which can then be cut into the desired shape. The printer cutter is a great option because it allows for precise cuts and the ability to create intricate designs.
If you don’t have access to a vinyl printer cutter, another option is to print your stickers using a regular printer and then cut them out manually. This method is a little more time-consuming, but it can still produce high-quality results.
Once you have your sticker designs printed, you can apply them to your cricket bat. It’s important to make sure the surface of the bat is clean and free from any dirt or debris. You can use a little bit of rubbing alcohol to clean the surface if needed.
To apply the stickers, start by peeling off the backing and aligning the sticker with the desired placement. Gently slide the sticker onto the bat, making sure to smooth out any bubbles or wrinkles as you go. If you need to make any adjustments, gently peel the sticker back and reposition it.
When applying the stickers, it’s a good idea to start from one corner and work your way to the opposite corner. This will help ensure that the sticker is applied evenly and prevents any bubbles from forming.
If you want to add a little extra touch to your cricket bat stickers, you can also consider adding an outline or a border around the edges. This can be done using a black marker or by printing out an additional sticker in a different color and cutting it into a slightly larger square or rectangular shape.
Another option is to use a sticker that has a rounded or angular shape, which can add a unique look to your cricket bat. This can be found in various sticker sets and can be a fun way to personalize your bat.
In addition to using pre-made sticker sets, you can also get creative and come up with your own designs. There are many online resources and software programs available that can help you create custom stickers for your cricket bat.
It’s always recommended to test your sticker designs on a small area of the bat before applying them fully. This will allow you to see how they look and make any necessary adjustments before committing to the final placement.
When it comes to making cuts in the vinyl, it’s important to follow the instructions provided by your printer and cutter system. Each system may have different settings and requirements in terms of registration marks, layers, and offsets, so it’s important to double-check the instructions for your individual system.
Regardless of the method or design you choose, cricket bat stickers are a great way to personalize your bat and show off your personality on the field. Whether you prefer a super simple design or a more intricate pattern, there are endless possibilities for creating unique cricket bat stickers.
LATEST WORK
If you’re looking for high-quality cricket stickers, look no further! Our latest work is a pro paper cricket sticker that is designed to impress. We have collaborated with top printers to create printable stickers that are above and beyond your expectations.
Our team has been working tirelessly to bring you rounded corner options that give your stickers a sleek and modern look. Scott Owens, our expert printer, has been instrumental in ensuring that our prints are of the highest quality. Today, we are highly impressed with the designs we’ve created and can’t wait to show them off.
By clicking on the “HOW TO MAKE” tab at the top menu, you’ll find step-by-step instructions on how you can make your own stickers. We believe in empowering our customers and providing them with the tools they need to create something unique.
If you want to keep things simple, we offer a wide range of pre-printed sticker designs. With just a few clicks, you can select the designs you love and place your order online. Our printing system will automatically print your selected stickers onto square or rectangular vinyl sheets.
If you’re feeling more creative, our WCW (Work Cricket Workshop) tool allows you to design your own stickers from scratch. You can change the colors, add text, and even upload your own images. The possibilities are endless!
Once you have created your sticker design, you have the option to print it using our cutting-edge printing system. Our printers are top-of-the-line, and we guarantee that your prints will be of the highest quality.
If you prefer an offset printing technique, we recommend choosing the “FLATTEN” option in the print dialog box. This will ensure that your stickers are printed with precision and without any offset marks.
Congrats! You’ve created your cricket stickers. Now comes the fun part – cutting them out! We provide you with the necessary tools to cut your stickers into any shape you desire. Whether it’s a traditional bat shape or a super-angular gear, it’s up to you!
When cutting, make sure to follow the outline of your sticker and keep the white border if you desire. Our cutting tool is easy to use and will give you professional-looking results every time.
If you want to give your stickers an extra touch, you can add layers of vinyl or even screen print on top of them. This adds depth and dimension to your stickers and makes them truly standout.
So, no matter what your sticker needs are, we have you covered. Our latest work is a testament to our commitment to quality and service. Get started today and show off your love for cricket with amazing custom stickers!
Scott Cricket Bat Sticker Designs
When it comes to making cricket stickers, one popular option is the Scott Cricket Bat Sticker Designs. These stickers are known for their high-quality and unique designs that can make your cricket bat stand out from the rest.
Printing your Scott Cricket Bat Sticker Designs is easy. Above the menu options, you will find the “Print” option. Clicking on it will open a dialog box where you can select your desired settings for printing. If you have a printer, you can use it to print your stickers. However, if you don’t have a printer or prefer a professional service, you can always use an online printing service to get your stickers printed.
Before printing, make sure to change the settings to match the type of cricket bat sticker you are making. Scott Cricket Bat Sticker Designs are usually printed on white vinyl, so select the “Vinyl” option. You can also choose to print in black and white or full-color, depending on your preference. Also, make sure that the size of the sticker matches the size of your cricket bat.
When it comes to making the actual sticker, it’s important to have the right tools. The Cricut machine is a popular choice for making cricket bat stickers. It is a small, rectangular cutting tool that can cut through vinyl sheets with precision. The Cricut machine comes with a set of tools, including a set of angular registration marks that can be placed on the corners of each sticker design. These registration marks allow the machine to automatically align and cut the stickers accurately.
Before making your stickers, you’ll need to create your Scott Cricket Bat Sticker Designs. You can either design them yourself or choose from various pre-made designs available online. One popular option is the WCW Cricket Bat Sticker Design created by Jasmine Owens. These designs are always up to date with the latest cricket trends and can be customized to fit your preferences.
Once you have your design ready, you can use the Cricut machine to cut out each sticker. Place the vinyl sheet with the sticker design on the cutting mat, and load it into the machine. Select the “Cut” option and watch as the Cricut machine cuts out your Scott Cricket Bat Sticker Designs with precision.
After cutting, carefully remove each sticker from the vinyl sheet using a small tool. Make sure not to touch the sticky side of the sticker, as it may leave marks or smudges. Place each sticker on the desired location of your cricket bat, and press firmly to ensure it sticks properly.
And there you have it – your very own Scott Cricket Bat Sticker Designs! These unique and eye-catching stickers will make your cricket bat stand out on the field.
WCW Cricket Bat Sticker Designs
When it comes to designing cricket bat stickers, WCW offers a wide range of options to choose from. Whether you want a classic design or something more modern, WCW has you covered.
WCW uses an offset printing system, where each color is printed separately. This allows for great color accuracy and ensures that the design looks amazing once it’s on the bat.
One of the great features of WCW’s sticker system is that it doesn’t change the weight or balance of the bat. The stickers are applied above the bat surface, and they don’t affect the bat’s performance in any way.
If you’re looking to add some extra flair to your bat, WCW offers the option to customize the sticker layers. You can choose to have a larger custom design printed on top of the base layer, or you can add additional layers to create a more textured look.
WCW’s sticker printing service is top-notch. They use high-quality vinyl material that is durable and long-lasting. The stickers are easy to apply and will stay in place during intense gameplay.
To make the WCW sticker, the design is first printed on a transfer paper. Then, the sticker is placed on a screen printing machine. The screen is placed on top of the bat, and the sticker is slid onto the bat surface. This ensures that the sticker is properly aligned and placed in the desired position.
If you prefer a clean look, WCW can also print the stickers in white. This is a great option if you want a subtle design that blends in with the bat’s color. Additionally, WCW offers rounded corner stickers, which add a neat and professional touch to the overall design.
When it comes to the printing process, WCW has all the necessary equipment to deliver high-quality results. They use state-of-the-art printers that can handle large volumes of printing, ensuring that each sticker comes out perfectly.
If you’re new to sticker making, WCW has a user-friendly system that makes it easy to create your own designs. By simply clicking on the WCW menu, you’ll be able to attach and print your design. The system will automatically flatten the design onto a printable rectangle, ready for printing.
When it comes to registration marks, WCW has you covered. The system will generate registration marks for you, ensuring that the design is properly aligned when printed. This is important, especially if you have multiple stickers that need to be layered on top of each other.
Congrats! You’re now ready to make your own WCW cricket bat stickers. With a wide range of customization options and a user-friendly printing system, you can create unique and eye-catching designs that will impress everyone on the field.
So, what are you waiting for? Get started with WCW and make your cricket bat stand out with your own personalized sticker!
SIXES Cricket Bat Sticker Designs
If you’re a cricket enthusiast and want to give your cricket bat a unique look, we highly recommend trying out our SIXES Cricket Bat Sticker Designs. These stickers are perfect to personalize your cricket gear and make it stand out on the field.
When it comes to sticker designs, we have a wide range of options for you to choose from. Whether you like angular, rounded, or even more abstract designs, we’ve got you covered. Each design has been carefully created by our team of talented designers, so you can be sure that you’re getting a high-quality sticker that will make your cricket bat look great.
Using our online tool, you can easily select the design you prefer and customize it to your liking. You can change the colors, add text, and even upload your own images. Once you’re satisfied with the design, you can simply click the “print” button, and our service will automatically flatten the design and print it on a sticker sheet.
If you’re not sure how to apply the sticker to your cricket bat, don’t worry! We have a step-by-step guide on our website that will walk you through the process. It’s super easy, and you’ll have your bat looking like a pro in no time.
With our SIXES Cricket Bat Sticker Designs, you can also hide any marks or scratches on your bat and give it a brand new look. The stickers are made from high-quality vinyl, so they will be durable and long-lasting. Whether you prefer a simple and clean design or something more intricate and colorful, we have options for everyone.
So why wait? Get in touch with us today and start designing your custom cricket bat stickers. Don’t settle for the same old bat design – make it unique with SIXES Cricket Bat Sticker Designs!
Owens Cricket Bat Sticker Designs
When it comes to cricket bat sticker designs, Owens offers a wide range of options to choose from. Whether you’re looking for a simple design or something more intricate, Owens has got you covered.
One of the great features of Owens’ sticker system is that they have created a brand new printing system to ensure that the designs are highly impressive. The stickers are printed on multiple layers of printable white sticker paper, which helps to achieve a waterproof and durable finish. Each design is carefully flattened and cut into smaller sheets for easier application.
Owens offers a range of sticker designs, including their latest WCW series. These designs are perfect for those who want to show off their love for cricket and stay up to date with the latest trends. From the classic black and white stickers to the more vibrant and colorful options, Owens has something for everyone.
The process of applying Owens cricket bat stickers is simple. Start by cleaning the bat surface and removing any dirt or residue. Then, peel off the backing paper from the sticker and place it on the desired area of the bat. Gently flatten the sticker from the center to the edges, making sure there are no air bubbles trapped underneath.
Owens uses a square registration system to ensure that the stickers are aligned perfectly. The stickers have rounded corners to avoid any accidental peeling. If needed, you can trim the stickers to fit the specific dimensions of your cricket bat.
To achieve a super professional look, Owens recommends using their online printing service. By clicking the “Print Now” button on their website, you can easily upload your own designs or choose from a wide range of pre-made options. The online printing service will automatically adjust the size and print the stickers with high quality images.
If you prefer a more personalized touch, Owens also offers a custom sticker making tool. This tool allows you to design your own sticker using a wide range of cricket-related graphics, fonts, and colors. Once your design is ready, you can simply print it out using a compatible printer or use a cutting tool like Cricut to create your own unique sticker.
When it comes to cricket bat sticker designs, Owens is the go-to brand. Their high-quality prints, easy application process, and wide range of options make them a highly recommended choice. So whether you’re a cricket enthusiast or just looking to add some style to your gear, Owens has the perfect sticker option for you.
Printing stickers with a Cricut

If you’re into crafting and want to create your own custom cricket stickers, using a Cricut machine can make the process much easier. The Cricut is a popular brand of cutting machine that allows you to create precise cuts and designs on various materials, including vinyl.
When it comes to printing stickers with a Cricut, there are a few steps to follow. First, you’ll need to select the images or designs you want to use for your stickers. You can either create your own designs or use pre-made ones. Once you have your designs ready, you can upload them to the Cricut Design Space software.
In the Design Space, you can adjust the size, orientation, and layout of your designs. You can also add multiple layers if needed. If you prefer rounded corners on your stickers, you can use the “Edit” menu to apply a rounded corner effect to your designs.
After you’ve set up your designs, you can select the appropriate settings for printing with a Cricut. The software will automatically detect the Cricut machine connected to your system and display the available printing options. You can choose the material you’ll be using for your stickers, such as vinyl or waterproof paper.
Once everything is set up, you can click on “Print” and the Cricut machine will start cutting your designs. This process can take some time, so you can leave the machine to do its job while you attend to other things.
Once the prints and cuts are done, you can remove the stickers from the cutting mat. If you’re printing white stickers, you may need to use a little more care as white vinyl can sometimes be a bit trickier to work with.
If you’re impressed with the results and would like to make more stickers, you can repeat the same process using different designs or ideas. The Cricut Design Space software allows you to save your projects, making it easy to revisit them later.
A Cricut machine is a great tool for creating custom stickers with a professional look. Whether you’re making stickers of cricket gear or congratulatory messages, the Cricut can handle it all. It’s a versatile and user-friendly system that gives you the flexibility to create unique and high-quality stickers.
If you’re unsure about the best printers or materials to use for your stickers, it’s always a good idea to do a little research. There are many online resources and communities where you can find recommendations and insights from experienced crafters.
Remember, practice makes perfect, so don’t be discouraged if your first few attempts don’t turn out exactly as you hoped. With time and experience, you’ll get better at creating stunning cricket stickers that are sure to impress.
So, if you’re ready to take your sticker-making game to the next level, invest in a Cricut machine and start printing stickers with ease!
Congrats You are a Pro at Making Cricut Stickers
Congratulations! You have mastered the art of making Cricut stickers. With the help of the Cricut cutting machine and a few simple steps, you can create customized stickers for any occasion.
To start, you’ll need some materials. Here’s what you’ll need:
- A Cricut cutting machine
- Cricut printable sticker sheets
- A computer with Cricut Design Space software
- Cricut sticker paper or any other printable sticker paper brand you prefer
- A printer
Once you have all the materials ready, follow these steps:
- Open Cricut Design Space on your computer and create a new project.
- In the design menu, select the option to print your design. Make sure you have selected the correct printer.
- If you want to print multiple stickers on one sheet, select the option to add a shape to your project. You can choose a rectangle shape to create a sticker with a defined border.
- Once you have the shape selected, resize it to the desired size for your sticker.
- Next, add the images or text you want to include on your sticker. You can either upload your own images or choose from the library of free images available in Cricut Design Space.
- Arrange the images within the shape, making sure they fit properly. You can rotate, resize, and move the images as needed.
- Once you are satisfied with the design, click on the “Make It” button in the top-right corner of the screen.
- Follow the on-screen instructions to connect your cutting machine and prepare the sticker paper for printing.
- When everything is set up, click on the “Continue” button to start cutting your stickers.
- The Cricut machine will automatically cut around the outline of your stickers. Once the cutting is complete, carefully remove the stickers from the cutting mat.
- If you prefer rounded corners for your stickers, you can use a corner rounder tool to achieve the desired shape.
- Congrats, your Cricut stickers are ready to use! You can attach them to your notebooks, water bottles, laptops, and more.
One option to make your stickers waterproof is by using a clear sticker laminate. Simply apply the laminate over your printed stickers to protect them from water and wear.
Remember, the possibilities for customizing your Cricut stickers are endless. Let your creativity shine and experiment with different designs and ideas. Whether you’re making stickers for yourself or as gifts, the Cricut machine can help you create truly unique and personalized creations.
Enjoy your new sticker-making skills and have fun crafting with your Cricut!


