

Running your own channel on a platform like YouTube or Twitch can be an exciting and rewarding venture. Not only does it give you the opportunity to share your knowledge and skills with others, but it also allows you to connect with a like-minded community. However, creating a channel from scratch can be a daunting task if you’re unsure where to begin. That’s why we’ve put together a step-by-step guide to help you get started on the right foot.
1. Register: The first thing you should do is register for an account on the platform of your choice. Whether it’s YouTube, Twitch, or any other popular streaming or video-sharing website, you’ll need to create an account before you can start uploading your videos.
2. Choose a Name: One of the most important decisions you’ll need to make is choosing a catchy and unique name for your channel. Think about your content, your personality, and what you want your channel to represent. A great name can help you stand out in the sea of other channels and attract more viewers.
3. Customize Your Channel: Once you’ve registered and created your channel, it’s time to customize the layout and design. Consider having a welcoming banner or artwork that reflects your content and personality. You can also choose a layout that suits your style and showcases your videos in the most appealing way.
4. Upload Your Videos: Now that you have your channel set up, it’s time to start uploading your videos. Before you start uploading, think about the type of content you want to create and what your target audience might be interested in. This will help you come up with ideas for your videos and ensure that you’re providing valuable and engaging content.
5. Optimize Your Videos: One mistake that many new content creators make is neglecting to optimize their videos. By choosing the right tags, descriptions, and thumbnails, you can make it easier for viewers to find your videos when searching for specific topics. This will help increase your chances of getting more views and subscribers.
6. Sound and Music: Another important aspect to consider when creating your videos is the sound and music. Make sure to choose background music that fits your content and sets the right mood. Also, ensure that your audio levels are balanced and clear, so that viewers can easily understand what you’re saying.
By following these instructions, you’ll be well on your way to creating a successful channel. Just remember to stay consistent, engage with your audience, and always strive to improve your content. With time and effort, you can build a thriving community around your channel and turn your passion into a rewarding career.
- How to Create a YouTube Channel Step-by-Step
- How to Make a YouTube Channel
- Step 1: Create a YouTube account
- Step 2: Set up your channel
- Step 3: Customize your channel
- Step 4: Add channel sections
- Step 5: Create a channel trailer
- Step 6: Optimize your channel
- Step 7: Keep creating content
- 1 Create a YouTube Channel Account
- 2 Add a Channel Description
- 3 Choose a Channel Icon
- 4 Customize YouTube Channel Art
- 5 Add a Channel Trailer and a Featured Video
- 6 Create a Custom Channel URL
- 7 Add Sections to Your Channel Homepage
- 8 Upload Your First Video
- How Do You Create a Successful YouTube Channel
- Put your knowledge of how to create a YouTube channel to the test
- Videos:
- How To Create A YouTube Channel – 2023 Beginner’s Guide
How to Create a YouTube Channel Step-by-Step
Creating a YouTube channel is a great way to share your music, show off your skills, or connect with others who have similar interests. In just a few simple steps, you can create your own channel and start building your online presence. Here’s a step-by-step guide to help you get started:
| Step 1: Register for a YouTube account |
| Before creating a channel, you’ll need to have a YouTube account. If you don’t already have one, you can register for free on the YouTube website. Just click on the “Sign Up” button and follow the instructions to create your account. |
| Step 2: Choose a catchy channel name |
| When choosing a name for your channel, think about what kind of content you’ll be creating and who your target audience is. Your channel name should be easy to remember and reflect the theme or focus of your videos. Make sure it’s not already taken by searching through existing YouTube profiles. |
| Step 3: Create a high-quality channel banner |
| Your channel banner is the first thing visitors will see when they land on your channel’s homepage, so it’s important to make a good impression. You can use a tool like Canva to create a custom banner that accurately reflects your channel’s style and personality. Make sure the banner is eye-catching and visually appealing. |
| Step 4: Upload a profile picture and channel description |
| Choose a profile picture that represents your channel. It could be a photo of yourself, your logo, or something related to your content. In the channel description, give a brief overview of what your channel is about and what viewers can expect to see. Be clear and concise. |
| Step 5: Start uploading high-quality videos |
| Now that your channel is created, it’s time to start uploading videos. Make sure your videos are of high quality and provide value to your viewers. Test different video ideas and see what works best for your audience. Don’t forget to also work on optimizing your video titles, descriptions, and tags for better search results. |
| Step 6: Engage with your audience |
| Building a successful YouTube channel is not just about uploading videos. It’s also about engaging with your audience and building a loyal subscriber base. Reply to comments, ask for feedback, and encourage viewers to subscribe to your channel. Make sure to have a call-to-action button for viewers to easily subscribe. |
| Step 7: Promote your channel through social media |
| To get more exposure for your channel, promote it through your social media profiles. Share your videos on Facebook, Twitter, Instagram, and other platforms where your target audience hangs out. This will help increase your channel’s visibility and attract more subscribers. |
| Step 8: Give it time and keep improving |
| Building a successful YouTube channel takes time and effort. Don’t get discouraged if you don’t see immediate results. Keep creating high-quality content, analyzing your performance, and improving your approach. Learn from successful channels and implement best practices into your own strategy. |
By following these steps, you’ll be on your way to creating a successful YouTube channel that showcases your passion and attracts a loyal audience. Remember, it’s important to be consistent and constantly work on making your channel better. Good luck!
How to Make a YouTube Channel
If you want to create a Youtube channel, there are several steps you need to follow. In this section, we will go over how to make a YouTube channel.
Step 1: Create a YouTube account
To start, you need to create a YouTube account. If you already have a Google or Gmail account, you can use that to sign in to YouTube. If not, you can easily create a new account by going to the YouTube homepage and clicking on the “Sign In” button at the top right of the screen. From there, follow the prompts to create your account.
Step 2: Set up your channel
Once you have created your YouTube account, you can start setting up your channel. To do this, click on your profile icon in the top right corner and then click on the “Create a channel” button. You will then be prompted to choose a name for your channel. It is recommended to choose a name that is unique and reflects the content you will be uploading.
Step 3: Customize your channel
After you have created your channel, you can customize it to make it more visually appealing and unique. You can add a channel icon and channel art, which will be displayed at the top of your channel page. It is important to choose high-quality images that represent your channel well.
Step 4: Add channel sections
Channel sections are a great way to organize your content and make it easier for viewers to navigate your channel. You can add sections like “Popular uploads,” “Playlists,” or “Latest videos” to showcase your best content. To add a section, go to your channel homepage and click on the “Customize channel” button. From there, click on the “Add section” button and choose the type of section you want to add.
Step 5: Create a channel trailer
A channel trailer is a short video that introduces your channel to new viewers. It is recommended to keep it under 2 minutes long and make it engaging and informative. You can use a video editing software like Adobe Premiere Pro or iMovie to create your channel trailer. Once you have created your channel trailer, you can upload it to your channel by clicking on the “Customize channel” button and then clicking on the “Edit trailer” button.
Step 6: Optimize your channel
To increase the visibility of your channel and attract more viewers, it is important to optimize your channel. You can do this by using relevant keywords in your channel description and video titles, using tags that are associated with your content, and creating compelling thumbnails for your videos. Additionally, you can promote your channel through social media and other online platforms to drive traffic to your channel.
Step 7: Keep creating content
Once your channel is up and running, it is important to keep creating content on a regular basis. The more content you have, the more likely you are to be discovered by viewers. It is recommended to upload at least 1-2 videos per week to keep your channel active.
By following these steps, you can create your own YouTube channel and start sharing your unique content with the world. Remember to stay consistent, engage with your audience, and always strive to improve your videos and grow your channel.
1 Create a YouTube Channel Account
Creating a YouTube channel is the first step to sharing your videos with the world. Whether you want to upload content for fun or use YouTube as a platform to grow your brand or business, setting up a channel account is essential.
To create a YouTube channel, you’ll need a Google account. If you already have one, simply sign in to YouTube with your Google account credentials. If not, you can easily create a new Google account by following these instructions:
- Go to the YouTube homepage or website.
- Click on the “Sign In” button located in the top-right corner of the screen.
- Select the “Create Account” option.
- Follow the instructions to create a new Google account. You will need to provide your name, email address, and password.
Once you have your Google account, you can proceed to create a YouTube channel by following these steps:
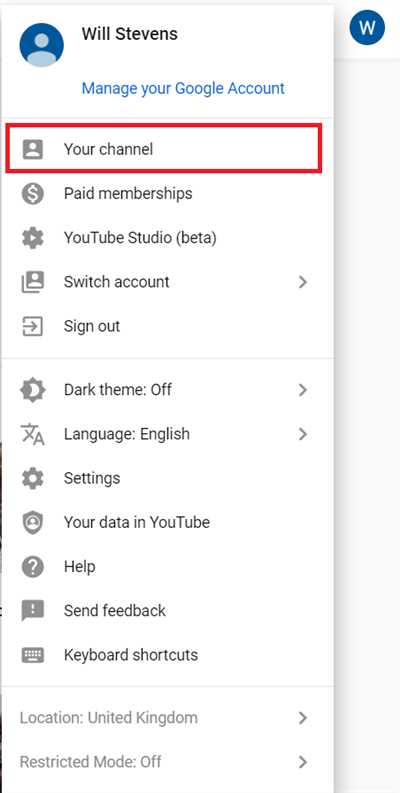
- Click on your profile icon or avatar in the top-right corner of the screen.
- From the drop-down menu, select the “Create a channel” option.
- Choose a name for your channel. This name will be publicly shown on your YouTube channel, so make sure it represents your content or brand.
- Select a category that best describes the type of videos you will upload.
- Click on the “Create” button to finalize the creation of your YouTube channel.
When creating your YouTube channel, it’s important to consider branding. You can customize your channel with a unique banner and icon to make it visually appealing and recognizable. The size of the banner is 2048 x 1152 pixels, with a maximum file size of 6MB. Additionally, you can add sections to your channel to organize your videos and give viewers an easier way to navigate through your content.
Once your YouTube channel account is open, you can start uploading videos and sharing them with the world. It’s a good idea to test different types of videos and see what resonates best with your audience. You can also consider collaborating with other YouTubers or reaching out to influencers in your niche for a better chance at growth. Keep in mind that YouTube is highly competitive, so it’s important to have a unique approach and offer something of value to your viewers.
When uploading videos to your channel, make sure to optimize them for search. Use relevant keywords in the title, description, and tags to increase the chances of your videos being found when people are searching for related content.
Lastly, don’t forget to encourage people to follow your channel and engage with your content. Welcoming comments, likes, and shares can help increase your visibility and attract more traffic to your channel.
Creating a successful YouTube channel takes time and effort, but with the right strategies and consistent upload schedule, you can expect growth. Look around YouTube for inspiration, analyze other successful channels in your niche, and learn from their strategies. Ultimately, stay true to yourself and create content that you enjoy making, as this passion will shine through and attract an audience that shares your interests.
2 Add a Channel Description
When creating your YouTube channel, it’s important to add a description that effectively represents your show or content. This description will be shown on your channel banner, so make sure it’s catchy and engaging enough to attract viewers.
Think of your channel description as the first section people see when they click on your channel. It needs to be concise, yet informative enough to give them a clear idea of what your channel is all about.
A good approach is to keep the description simple and to the point. You can include a brief introduction about yourself or your brand, mention the type of content you will be uploading, and include any other relevant information that you think your viewers should know.
Don’t forget to include a call-to-action at the end of your description, such as a link to subscribe to your channel or to watch your latest video. This will make it easy for viewers to engage with your content and stay updated with your channel.
Once you have created your channel description, it’s recommended to test it out by selecting the “Publicly” option. This way, people who are not subscribed to your channel can also view your description and get a glimpse of what they can expect from your content.
When writing your channel description, keep in mind the layout of your channel page. The description will be shown below your channel banner, so make sure it looks nice and welcoming in the overall design of your channel.
Having a high-quality channel description can also improve your channel’s visibility on YouTube. It is likely to be included in the search results when people are looking for content similar to yours, so make sure to include relevant keywords.
To add a description to your channel, follow these steps:
| Step 1 | Login to your YouTube account. |
| Step 2 | Click on your profile picture in the top-right corner of the screen. |
| Step 3 | Select “YouTube Studio” from the dropdown menu. |
| Step 4 | On the left sidebar, click on “Customization”. |
| Step 5 | Select “Basic Info”. |
| Step 6 | Scroll down to the “Description” section. |
| Step 7 | Enter your channel description in the text box. |
| Step 8 | Click “Save” to update your channel description. |
By following these steps, you can easily add a unique and appealing channel description to your YouTube channel.
3 Choose a Channel Icon
Once you’ve created your channel and set up your studio, it’s time to give it a unique identity by choosing a channel icon. This icon will be shown on your channel homepage, in search results, on your channel banner, and next to your channel name when you make comments and engage with other channels.
The channel icon is an important part of your channel’s branding and can have a big impact on its visibility and growth. You want to make sure it represents your channel and catches the eyes of potential viewers. A nice and catchy icon can help you stand out from the rest and attract more traffic to your channel.
When selecting a channel icon, keep in mind the following instructions:
- Choose a simple and memorable icon that represents your channel’s theme or niche. For example, if your channel is about art, you can choose an icon related to painting or drawing.
- Don’t forget to add a clear and concise channel name in text format. This name will appear under your channel icon on the homepage.
- If you have created a channel trailer, you can select a frame from it to use as your channel icon.
- Customize your channel icon using photo editing tools like Canva to make it more unique and visually appealing.
- Avoid using generic icons or icons that are too similar to other popular channels to avoid confusion.
Having a visually appealing and recognizable channel icon will not only attract more viewers to your channel but also make it easier for them to identify your content. It sets the tone and expectations for what viewers can expect from your channel.
Keep in mind that the channel icon is just one part of a larger branding strategy. It should be consistent with the overall look and feel of your channel, including your channel banner, thumbnails, and video descriptions. This consistency will help build your channel’s brand and make it more memorable.
Remember, building a successful channel takes time and effort. Don’t expect immediate results, but with the right channel icon and consistent branding, you can increase your chances of attracting subscribers and growing your channel.
4 Customize YouTube Channel Art
Once you have registered and customized your YouTube channel name and homepage, the next step is to create eye-catching channel art. Channel art is the large banner that appears at the top of your channel page, and it is an important part of making your channel look unique and welcoming to new subscribers.
The recommended size for YouTube channel art is 2560 x 1440 pixels, with a maximum file size of 6MB. It’s important to keep in mind that the channel art may look different on various devices, so it’s a good idea to test how it looks on different screens and keep the important elements centered.
There are several things you can include in your channel art to make it stand out. You can have a catchy slogan or tagline, your channel name, and a link to subscribe. You can also consider having a trailer video or a preview of your latest videos. Some channels even have high-quality images or illustrations related to the content they create.
When choosing channel art, it’s important to consider the purpose it serves. Although it’s recommended to have a visually appealing banner, it should also give viewers an idea of what they can expect from your channel. For example, if you have a music channel, you may want to include images of music instruments or concert crowds.
Another option you have is to create a list of your most popular or recommended videos and display them on your channel art. This can help drive traffic to specific videos that you want to highlight. You can also include a call-to-action in your channel art, such as “Watch Now” or “Subscribe.”
Some channels choose to regularly update their channel art to reflect the current theme or series they are featuring. This can give your channel a fresh look and show your subscribers that you’re active and always coming up with new ideas.
When uploading your channel art, YouTube gives you the option to select the best file from your computer or use an image from your social media account. It’s recommended to use high-quality images or create custom graphics that reflect your channel’s brand or style.
In conclusion, having customized and visually appealing channel art is essential for building a successful YouTube channel. It helps set the expectations for viewers and catches their attention. By optimizing your channel art and including catchy elements, you can create a unique place for your content and attract more subscribers.
5 Add a Channel Trailer and a Featured Video
Once you have set up your channel and filled in all the necessary information, it’s time to add a channel trailer and a featured video. These two elements are crucial for the success of your channel as they give potential viewers a glimpse into what they can expect from your content.
Here are some important tips to consider when making your channel trailer:
1. Keep it short and engaging: Your trailer should be around 30 seconds to 1 minute long. Make sure to grab the viewer’s attention right from the start and keep them engaged throughout the video.
2. Showcase your best content: Use this opportunity to show off your most high-quality and representative videos. Choose videos that are not too long and have a clear message or purpose.
3. Have a clear call-to-action: At the end of your trailer, tell viewers what you want them to do next. It could be subscribing to your channel, watching a specific video, or visiting your website.
4. Think about branding: Your trailer should reflect your channel’s branding and style. Use consistent visuals, fonts, and colors to create a cohesive look.
5. Test and optimize: Don’t be afraid to test different variations of your trailer to see what works best. Keep track of your analytics and make adjustments accordingly.
Once you have your trailer ready, it’s time to set it as the featured video on your channel homepage. Here are the steps to do that:
1. Open YouTube Studio: Click on the YouTube Studio button at the top right corner of the screen.
2. Select the Videos tab: On the left side of the screen, scroll down and click on “Videos” under the “Content” section.
3. Find the video you want to feature: Scroll through your videos and find the one you want to set as the featured video.
4. Click on the three-dot menu: Hover over the video and click on the three-dot menu icon that appears.
5. Click on “Set as featured video”: From the drop-down menu, select “Set as featured video”.
Having a channel trailer and a featured video is a great way to increase the visibility of your channel and attract more viewers. So take the time to create a compelling trailer that represents your channel and follow these step-by-step guidelines to add it to your channel homepage.+
6 Create a Custom Channel URL
When you create a channel on YouTube, the URL assigned by default is a combination of random characters and numbers, which is not very memorable or attractive. If you want to make your channel more successful and easily recognizable, you should consider creating a custom channel URL.
A custom channel URL is a unique and personalized web address that represents your channel. It is easier to remember and can be shared with others more effectively. Creating a custom URL for your YouTube channel allows you to brand your channel and make it stand out from the rest.
Before you can create a custom URL, there are a few requirements that you need to meet:
- Your channel needs to be at least 30 days old.
- Your channel needs to have at least 100 subscribers.
- Your channel needs to have uploaded a profile picture and cover photo.
If your channel meets these requirements, you can follow these step-by-step guidelines to create a custom channel URL:
- Sign in to your YouTube account.
- Click on the profile icon in the top right corner of the screen.
- Select “Settings” from the dropdown menu.
- In the left sidebar, click on “Advanced settings”.
- Scroll down to the “Channel settings” section and click on the “Create custom URL” button.
- A box will pop up showing you the custom URL options that are available for your channel. Keep in mind that you can only select from the options provided, and you cannot create your own custom URL.
- Select the custom URL that you want to use for your channel. Make sure to choose something catchy and easy to remember.
- Click on the “Confirm choice” button to save your custom URL.
Once you have created a custom URL for your channel, it will be visible in several sections of your YouTube channel, including the header section, the “About” section, and the featured channels section. Having a custom URL shows that your channel is more established and gives it a professional look.
Don’t forget to optimize your custom URL for search engine visibility by including relevant keywords. This will make it easier for people to find your channel when searching on YouTube or other search engines. You can also put your custom URL in your website or social media profiles to encourage people to subscribe to your channel.
Creating a custom channel URL is a great way to enhance your branding and make your channel more memorable. It shows that you are serious about your YouTube presence and can help you attract more viewers and subscribers.
7 Add Sections to Your Channel Homepage
When creating your YouTube channel, it’s important to consider how you can organize your content to make it easy for viewers to navigate and find the videos they are looking for. One way to do this is by adding sections to your channel homepage. These sections allow you to showcase different types of content or highlight specific playlists, making it easier for viewers to explore your channel.
Here are 7 tips on how to add sections to your channel homepage:
| 1. | First, go to your YouTube channel and navigate to the “Customize Channel” tab. |
| 2. | Select the “Add Section” button. |
| 3. | Choose the type of content you want to showcase in the section, such as “Uploads,” “Popular uploads,” or “Playlists.” |
| 4. | Customize the section by selecting the layout, which can be either a horizontal row or a vertical list. |
| 5. | Consider adding a section title to give viewers a better idea of what they can expect to find in that section. |
| 6. | If you have specific playlists or videos you want to include in the section, search for them using the search bar in the instructions and add them to the section. |
| 7. | Once you have created the section, drag and drop it to the desired position on your channel homepage. You can also easily move sections around by selecting the three-bar handle that appears when you hover over the section’s title. |
By adding sections to your channel homepage, you can give viewers a more personalized and organized viewing experience. They will be able to easily find the type of content they are interested in without having to scroll through your entire video library. This can also help you to grow your subscribers as viewers are more likely to subscribe if they can quickly find and view your best content.
Keep in mind that when selecting the content for your sections, it’s important to consider your current audience and their preferences. Think about what types of videos are the most popular and include those in your sections. Additionally, don’t forget to regularly update your sections with new content to keep viewers engaged and coming back for more.
Building a channel with sections not only looks great, but it also helps to show viewers that you have a variety of content to offer. It can also be a great way to showcase any collaborations or partnerships you have done with other YouTubers or brands.
So, when creating your channel, don’t forget to add sections to your homepage. It’s an important step in customizing your channel and giving viewers the best possible viewing experience.
8 Upload Your First Video
Now that you have created your channel, it’s time to upload your first video! This step is crucial as it will be the first impression for your audience. Here are some important steps to consider when uploading your video:
1. Give it a long and descriptive title: How you choose to title your video is important for searchability and visibility. Make sure to accurately describe the content of your video in the title.
2. Optimize the video description: The description is a great opportunity to provide more information about your video. Include relevant keywords, tags, and links to your social media accounts or website.
3. Choose an eye-catching thumbnail: The thumbnail is the first thing viewers see when searching for videos. It’s important to select a high-quality image that accurately represents your video and entices people to click.
4. Add a nice banner to your channel homepage: A well-designed banner can make your channel look more professional and appealing. Don’t forget to include important information such as your channel name and social media handles.
5. Include a call-to-action in your video: It’s always a good idea to encourage viewers to like, comment, and subscribe to your channel. This helps with audience engagement and growth.
6. Test the sound quality: No one likes watching a video with poor audio. Make sure the sound is clear and pleasant to listen to.
7. Make your videos shorter: Research has shown that videos that are 3 minutes or less are more likely to be watched in their entirety. Consider making shorter videos to keep your audience engaged.
8. Rest and learn from your first video: Don’t expect your first video to go viral or get thousands of views. It’s a learning experience, and with time and knowledge, you’ll be able to create better content and drive more traffic to your channel.
Remember, creating your channel is only the first step. The success of your channel will depend on how well you optimize your content, engage your audience, and keep improving over time. Good luck!
How Do You Create a Successful YouTube Channel
Creating a successful YouTube channel takes time, effort, and dedication. If you want to create your own channel and achieve great results, here are some step-by-step tips for success:
- Register Your Channel: The first step is to create a Google account if you don’t have one. Once you have a Google account, you can go to the YouTube website and click on the “Sign In” button located in the top-right corner of the homepage. If you already have a Google account, you can simply log in.
- Customize Your Channel: After registering, you should customize your channel to make it unique and welcoming. You can select a catchy name for your channel and upload a banner and profile picture. Customize the layout and art on your channel’s homepage to make it visually appealing.
- Create High-Quality Videos: The quality of your videos plays a significant role in the success of your channel. Invest in good equipment and learn how to edit effectively. Make sure your videos are engaging and informative to keep your viewers hooked.
- Upload Video Content: Once you have your videos ready, you can start uploading them to your channel. Make sure to add relevant tags, descriptions, and thumbnails to optimize your videos for search results. You can also create a trailer video to give people a clue about what they can expect from your channel.
- Promote Your Channel: Having high-quality videos alone is not enough. You need to promote your channel to attract more viewers. Share your videos on social media, collaborate with other YouTubers, and engage with your audience through comments and messages.
- Engage with Your Audience: Building a successful YouTube channel is not just about uploading videos. You should also engage with your audience by responding to their comments, likes, and shares. Show appreciation for their support and make them feel valued.
- Set Clear Goals and Expectations: To grow your channel, you need to set clear goals and expectations. Define what you want to achieve with your channel and make a plan to reach those goals. Monitor your progress regularly and make adjustments as needed.
- Be Consistent: Consistency is key when it comes to running a successful YouTube channel. Upload videos regularly and stick to a schedule. By being consistent, you will build a loyal audience that looks forward to your content.
- Utilize Call-to-Action: At the end of your videos, include a call-to-action to encourage viewers to take the desired action, such as subscribing to your channel, liking the video, or leaving a comment. This will help increase engagement and drive more traffic to your channel.
Creating a successful YouTube channel requires dedication and hard work. By following these tips and continuously improving your content, you can increase your chances of creating a thriving channel that viewers will love.
Put your knowledge of how to create a YouTube channel to the test
The first step is to create a YouTube account if you don’t already have one. Once you’re signed in, click on your profile icon in the top right corner and then click on the “Create a channel” option. This will open up a new page where you can name your channel and choose a branding option for your channel art. Think carefully about the name you want to call your channel, as it will be the first thing people see when searching for your content.
Next, you will need to upload a channel icon and a banner. Your channel icon is the image that will appear next to your channel name, and the banner is the larger image that appears at the top of your channel homepage. Make sure to use high-quality images that represent your brand and grab people’s attention.
Once you have your channel set up, it’s time to start adding videos. The most important part of a video is the title and description. Your title should be catchy and descriptive, while your description should provide enough information about the video and include relevant keywords that people might be searching for. A good description can make or break the success of a video.
In addition to the title and description, you can also add tags, which are keywords that help people find your video when searching on YouTube. It’s recommended to include several tags that are relevant to your video content, as well as any other tags that might be related. This will increase the chances of your video being viewed by the right audience.
Another important aspect of your video is the thumbnail. The thumbnail is the image that will be displayed as a preview of your video when people are browsing through search results. Make sure to choose a thumbnail that is eye-catching and represents the content of your video accurately.
While creating videos is an important part of building a successful YouTube channel, it’s not the only thing you need to focus on. You should also think about how to promote your channel and attract more viewers. One way to do this is by including a call-to-action at the end of your videos, encouraging viewers to subscribe to your channel or visit your website.
Social media can also be a valuable tool for promoting your channel. Share your videos on platforms like Twitter, Facebook, and Instagram to reach a wider audience. Engage with your viewers by responding to comments and messages, and ask for feedback and ideas for future videos. Building a community around your channel is essential for long-term growth and success.
When it comes to uploading videos, there are a few things to keep in mind. YouTube recommends that videos be at least 2 minutes long, although shorter videos can still be effective if they provide value to the viewer. Make sure the sound quality of your videos is good, as people are more likely to watch a video with clear audio. If you plan on including music in your videos, make sure you have the necessary rights or use royalty-free music.
One of the most important aspects of building a successful YouTube channel is to be consistent. Upload videos on a regular schedule, whether it’s once a week or once a month. This will help you build an audience and keep viewers coming back for more.
Finally, don’t forget to analyze your results. YouTube provides analytics that can give you insights into how your videos are performing. Pay attention to metrics like views, watch time, and engagement to get an idea of what is working and what can be improved. Use this information to fine-tune your content strategy and make your channel even better.
Creating a YouTube channel is an exciting journey that requires time, effort, and dedication. But with the right knowledge and approach, you can easily make your channel stand out and attract an audience. So put your knowledge to the test, create your channel, and watch it grow!


